Author: Mathew Kennedy

  • Print Shop Pricing That Actually Works (Minimums, Setup Charges, and Markup)

    The quote you regret is usually the quote you win.

    You know the one. The customer says yes fast. You feel good for about ten minutes. Then the job lands on the schedule and suddenly everyone’s asking questions you didn’t price for: file fixes, extra proofs, a weird folding request, “can you pack these in sets,” and a rush pickup.
    That’s not bad luck. That’s print shop pricing with missing parts.

    This article gives you a simple way to price jobs so you stop guessing. Not perfect pricing. Just pricing that pays you back.

    Start with true costs (materials, clicks, and consumables)

    Before we talk markup, you need to know what the job eats.

    At minimum, capture these:

    • Stock/substrate cost (paper, vinyl, board, apparel blanks)
    • Ink/toner/click charge (especially on digital)
    • Lamination/film/tape/adhesive
    • Packaging (boxes, shrink wrap, labels)
    • Waste/spoilage (your “extra sheets” that magically vanish)

    A quick rule that helps: build spoilage into the quote on purpose, not as a surprise later.

    • Easy digital jobs might be 5–10% extra
    • Finishing-heavy or color-sensitive jobs might be 10–20%
    • New substrate + new profile + tight brand color? Add more until you have history

    You’re not “charging for mistakes.” You’re pricing reality.

    Turn labor + overhead into a shop rate

    Most shops underprice labor because they treat it like wages.

    But the customer isn’t buying wages. They’re buying a functioning shop: equipment payments, rent, software, utilities, maintenance, admin time, insurance, and the fact that you can remake a job when life happens.

    You need a shop rate (sometimes called an hourly burden rate). It’s the “one number” that helps you stop underquoting.

    Here’s a simple way to create it:

    1. Add up your monthly overhead (rent, utilities, admin payroll, software, insurance, etc.)
    2. Estimate billable production hours per month
    3. Divide overhead by billable hours = overhead per hour
    4. Add direct labor + a profit target to get your shop rate

    Example (easy math, adjust to your reality):

    • Monthly overhead: $18,000
    • Billable production hours: 240 hours
      • (That’s roughly 2–3 people producing, minus breaks, meetings, downtime.)

    Overhead per hour = 18,000 ÷ 240

    • 240 goes into 18,000 75 times
      Overhead per hour = $75/hour

    Now add labor and profit on top (or bake it all into one “loaded shop rate”). Many shops keep it simple and use a single number like $95/hr or $120/hr depending on equipment, staffing, and goals.

    The exact number matters less than having a number you trust.

    Markup vs margin (this trips people up)

    This is where shops accidentally price too low.

    • Markup is what you add to cost
    • Margin is the percentage of the final price that is profit

    Example:

    • If something costs $50
    • And you sell it for $100
    • Profit is $50

    Markup = 50 profit ÷ 50 cost = 100% markup
    Margin = 50 profit ÷ 100 price = 50% margin

    When someone says “we aim for 30%,” ask: markup or margin?

    If you want a rough target for many print jobs, think in terms of healthy gross margin (what’s left after direct materials and direct labor). Your target will vary by niche, but the big idea is this: you need enough margin to cover overhead and still leave money at the end.

    Build a minimum charge that protects small orders

    Small orders often destroy margin because setup and admin time don’t shrink.

    Minimums feel scary until you realize you already have one. It’s just invisible. You “pay” it with stress.

    A good minimum charge covers:

    • order intake + emails + questions
    • file check
    • proof (even if it’s informal)
    • setup/make-ready
    • packing + handoff

    A practical way to set your minimum:

    1. Time your average small job intake + setup + pack
    2. Multiply by your shop rate
    3. Add a basic material allowance

    Example:

    • Intake + file check: 10 minutes
    • Setup/make-ready: 15 minutes
    • Pack + label: 10 minutes
    • Total: 35 minutes

    35 minutes is 35 ÷ 60 = 0.5833 hours

    If your shop rate is $95/hr:
    0.5833 × 95 = $55.41 (rounded)

    So your minimum might be $59, $65, or $75 depending on your market and how much chaos you want to remove from your life.

    You can present it as:

    • “Minimum job charge: $75”
    • or “Minimum order: $75”
    • or “Setup minimum: $75”

    Simple. Clean. No long explanation.

    A real pricing example (small run, priced on purpose)

    Let’s price 100 double-sided flyers on a digital press. This is a made-up example. Use your own numbers.

    Specs

    • 100 flyers, 8.5×11, double-sided
    • 100lb text
    • Cut to size
    • Pickup

    Costs

    • Paper per sheet: $0.08
    • Click charge per side: $0.04
    • Double-sided click per sheet: $0.04 + $0.04 = $0.08
    • Spoilage: 10% → print 110 sheets

    Material cost:

    • Paper: 110 × 0.08 = $8.80
    • Clicks: 110 × 0.08 = $8.80
      Materials total = 8.80 + 8.80 = $17.60

    Labor time (example):

    • Setup + file check: 15 min
    • Run time: 15 min
    • Cutting: 15 min
      Total time = 45 min = 45 ÷ 60 = 0.75 hours

    Shop rate (example): $95/hr
    Labor/production charge: 0.75 × 95 = $71.25

    True cost (materials + production):

    • 17.60 + 71.25 = $88.85

    Now you decide pricing:

    • If you sell for $119, gross profit = 119 − 88.85 = $30.15
    • Gross margin = 30.15 ÷ 119
      • 30.15/119 ≈ 0.25325.3% gross margin

    If that margin feels tight, that’s your signal:

    • raise the minimum
    • reduce time with standard workflow
    • or change the way you price small runs

    The point: you’re not guessing. You’re choosing.

    Quote like a pro (a checklist that prevents “forgotten” charges)

    Most underquoting happens because steps go missing.

    Here’s a quoting checklist you can copy into your estimating form:

    Prepress

    • File check included? If not, line item it.
    • Number of proofs included?
    • Design/layout changes included? If not, hourly.

    Production

    • Setup/make-ready time included?
    • Spoilage/waste included?
    • Special color matching or test prints?

    Finishing

    • Cutting time (and tricky cuts)
    • Folding/binding/laminating
    • Kitting/labeling/banding
    • Packaging requirements (boxes, sets, shrink)

    Delivery

    • Pickup, local delivery, shipping
    • Freight/palletizing
    • Inside delivery or liftgate (if applicable)

    Schedule

    • Standard turnaround vs rush
    • Rush fee or rush multiplier applied?

    If you’d like one rule that fixes a lot: anything that changes the workflow gets a line item.

    What to do next

    If you want to tighten pricing fast, do this:

    1. Pick your top 3 products (the ones you quote every week)
    2. Define a minimum and setup standard for each
    3. Add “forgotten charges” as optional line items (rush, file fixes, packing, kitting)
    4. Review the last 10 jobs you hated and ask, “what did we miss in the quote?”

    That’s the start of pricing that feels calm.

  • Getting Started in Cube in MTG

    Getting Started in Cube in MTG

    If you’ve ever watched someone draft a cube and thought, “Wait… you can just make your own set?” yep. That’s the whole appeal. getting started in cube in mtg is basically learning how to build a replayable draft environment that matches how your group actually likes to play. More interaction? Less “oops I opened the mythic”? More weird pet cards? All on the table.

    And the nice part: your first cube doesn’t need to be perfect. It just needs to get drafted.

    What “Cube” Means in MTG (and Why People Love It)

    An MTG cube is a hand-picked pool of cards that you shuffle up and draft like a normal booster draft, except you’re making the packs yourself. Instead of cracking three store boosters each, players draft three 15-card packs built from the cube, then build 40-card decks with basic lands added after.

    People love cube because it hits a sweet spot:

    • It feels like Limited (drafting, deckbuilding, reading signals)
    • But it plays like Constructed sometimes (coherent decks, strong synergies, real archetypes)
    • And you can tune it over time so the draft gets better instead of rotating out

    If your group has ever said, “I wish this set had more removal,” cube is your chance to be the person who fixes that.

    Getting started in cube in mtg: Pick a Goal First (Not a Card List)

    Before you start throwing cards in a pile, decide what you want the table to feel like. This saves you from building a cube that’s half “fair midrange slugfest” and half “turn two combo kill” unless that’s your thing.

    A few common “first cube” goals:

    Classic goodstuff cube
    A mix of strong creatures, efficient removal, planeswalkers, value engines, and some synergy. Draft any color pair and you’ll get a deck.

    Set cube
    You build a cube from one set (or one block). Great if your group loves a specific vibe and wants that draft feel any time.

    Budget, peasant, or pauper-style
    Lower rarity constraints tend to create tighter games and fewer blowouts. Also easier to build without chasing expensive singles.

    Powered vs unpowered
    “Powered” usually means the most broken fast mana and iconic nonsense. “Unpowered” means you keep the power level high, but not that high.

    My honest recommendation: pick “classic goodstuff” unless you already know you want a theme. It’s the easiest to balance, and it teaches you what your group actually enjoys.

    Choose a Cube Size That Matches Your Player Count

    Cube size matters because it changes consistency. Smaller cubes are more “everything shows up” and bigger cubes are more “every draft is a little different.”

    Here’s a practical way to think about it:

    Cube SizeTypical UseWhat It Feels Like
    1802 players (tight drafts)Fast setup, super consistent, great for testing
    3608 players (full draft)Every card gets drafted, very “designed” feeling
    5408 players (variety draft)About 1/3 stays in the box each draft, more variety
    720Two 8-player draftsHuge variety, harder to balance, more “big environment”

    If you’re brand new, 360 is the clean starting point. It’s the smallest “full pod” cube size, and it’s way easier to tune than a 720-card beast.

    The Fastest Way to Build Your First Cube (Without Spiraling)

    There are three sane approaches. Pick one.

    1) Start from an existing cube list

    This is the easiest path. You grab a proven list, draft it, then change things as your group gives feedback. It also teaches you what “enough fixing” and “enough removal” looks like in practice.

    2) Build from your collection

    This is fun and fast, but it needs one rule: keep the power level even. If your green deck is full of medium creatures and your blue deck is full of busted free counters, you’re going to create a “don’t draft green” problem. That gets old fast.

    3) Build a “skeleton,” then fill it in

    This is how a lot of cube designers work long-term. You decide how many cards each section gets (colors, multicolor, artifacts, lands), then you fill the slots with cards that support your archetypes.

    If you’re doing getting started in cube in mtg the first time, I’d do either #1 or #3. #2 works, but it’s more likely to produce a lopsided first draft.

    Your Cube’s Skeleton: Colors, Curve, Removal, Archetypes

    A cube plays well when decks come together reliably. That means you need more than “cool cards.” You need support for curve, interaction, and mana.

    Here’s a simple checklist that prevents most beginner cube problems:

    • One-drops and two-drops exist in every color, especially for aggro
    • Removal is real, not just “seven-mana sorcery speed”
    • There’s mana fixing, so two-color decks aren’t punished
    • Archetypes have overlap, so players aren’t forced into one narrow lane

    And don’t ignore the mana curve. Limited games are still won by casting spells on time. If your cube has too many 4–6 drops and not enough early plays, you’ll get slow drafts where everyone durdles until one bomb sticks. Sometimes that’s fine. Usually it’s not.

    A “minimum viable cube” card mix (simple version)

    This is not a strict rulebook. It’s just a sanity check.

    • Threats at every mana value (especially 1–3)
    • Interaction (removal, counters, combat tricks if you like them)
    • Card advantage (draw spells, value creatures, engines)
    • Finishers (big threats that actually end the game)
    • Mana fixing (lands and a little ramp if needed)

    If you draft and every deck looks like “23 playables and vibes,” you probably need more redundancy in the key roles above.

    Lands and Mana Fixing: The Part Everyone Underestimates

    If cube has one universal truth, it’s this: bad mana creates non-games.

    You want most decks to be two colors, sometimes three. That means your cube needs fixing that shows up often enough for people to draft it, and strong enough that they want to.

    A few practical tips that help immediately:

    • Include fixing across all color pairs, not just your favorites
    • Don’t make fixing “too precious”. If the lands section is tiny, only one person gets to have good mana each draft, and everyone else stumbles
    • Support the kind of decks you want. Aggro wants untapped lands. Control can live with more taplands. If you only run taplands, aggro gets worse by default

    If you want your cube to feel smooth, lands are not optional content. They are gameplay.

    How to Run Your First Cube Draft Night

    Once the cube exists, the actual night is simple. The big thing is having a plan so you’re not sorting piles for 40 minutes while everyone watches you like you’re defusing a bomb.

    Here’s the clean “classic” setup:

    1. Shuffle the cube well
    2. Make 15-card packs (3 per player)
    3. Draft like a normal booster draft (pick one, pass)
    4. Build 40-card decks (basics provided)
    5. Play matches (best-of-one or best-of-three, your call)

    If you don’t have 6–8 players, cube is still great. You can use alternative draft formats like Winston draft or other small-pod methods. The point is the same: draft a deck from a shared pool, play some games, learn what’s fun, then tweak.

    Drafting Basics: Don’t Draft “Good Cards,” Draft a Deck

    This is the most common cube faceplant: players take the strongest card every pick and end up with a pile that doesn’t function.

    Cube has more powerful cards per pack than normal Limited, so it’s easy to get distracted. Try drafting with these thoughts in mind:

    • What is my deck trying to do?
    • Do I have enough cheap plays?
    • Do I have interaction?
    • Can I cast my spells?

    A deck with a plan beats a deck with random hits. Almost every time.

    Playtest, Adjust, Repeat (This Is the Fun Part)

    Your first list is a draftable prototype. After that, cube becomes a hobby of tiny improvements.

    After each draft, ask your group two questions:

    • What felt unbeatable or miserable?
    • What never showed up, or showed up and did nothing?

    Then make small changes. Swap a card or two per color. Add a land cycle if mana felt rough. Cut the “cute” build-around that never gets there. Over time your cube becomes more “yours,” and your drafts stop feeling like chaos.

    And yes, you will misjudge cards. Everyone does. That’s normal.

    Common Beginner Mistakes (So You Can Skip Them)

    Too many multicolor cards
    Gold cards are tempting, but they rot in sideboards if fixing is thin or drafters aren’t in that lane.

    Not enough early plays
    If you want aggro to exist, you need one-drops and two-drops, plus enough pressure to punish slow decks.

    Not enough removal
    If threats stick forever, games become board stalls and “who drew their bomb.”

    Fixing that’s too weak
    If everyone is missing colors, your cube will feel clunky even if the cards are great.

    Trying to support 12 archetypes in 360 cards
    Start with a few, make them overlap, then expand once you know what your group likes.

    Wrap-Up

    You don’t need a perfect list to start. You need a cube that can be drafted, played, and adjusted.

    If you remember one thing: getting started in cube in mtg is easier when you start small, prioritize mana and curve, and let playtesting tell you what to fix. Draft it once, you’ll instantly see what’s missing. Draft it five times, and you’ll wonder how you ever played without it.

  • Job Costing for Print Shops (Track Real Margins Without a Full MIS)

    If you’ve ever argued about a job like this…

    • “That job was fine.”
    • “No, it killed us.”
    • “It only took an hour.”
    • “It took half a day.”

    …you don’t have a people problem. You have a data problem.

    Job costing for print shops is just a way to replace shop folklore with facts. It doesn’t have to be complicated. You can start with a spreadsheet and one new habit.

    What to track on every job (keep it boring)

    Start small. Track only what changes pricing decisions.

    1) Materials used

    • sheets/feet/sq ft actually consumed
    • ink/toner clicks (if you can pull it)
    • laminates, grommets, hems, tape, etc.

    2) Time by step
    You don’t need second-by-second. Use 5–15 minute chunks.

    • prepress/file check
    • setup/make-ready
    • production/run time
    • finishing
    • packing/shipping

    3) Spoilage and rework
    This is the gold. Track it without blame.

    • “rerun due to file issue”
    • “rerun due to color match”
    • “rerun due to equipment”
    • “customer change after approval”

    Your goal is patterns, not punishment.

    The simplest job costing workflow (before / during / after)

    Here’s a system that works even in a busy shop.

    Before the job starts: lock the estimate assumptions

    On the job ticket, write down:

    • quantity
    • stock/substrate
    • finishing steps
    • planned spoilage
    • estimated time by step (even rough)

    During the job: capture reality with one touch

    Pick one method:

    • time notes on the job traveler
    • a shared timer (per job, per step)
    • a simple “start/stop” sheet at the workstation

    Important: make it easy. If it’s annoying, nobody will do it.

    After the job ships: do a 3-minute closeout

    Whoever closes the job records:

    • actual time totals
    • actual material usage (or best available)
    • any rework reason codes
    • notes like “folding took longer due to scoring issue”

    That’s it.

    How to calculate actual gross margin (simple version)

    You want to know: did this job fund the business or drain it?

    A clean, practical calculation:

    Revenue (what you charged)
    minus Direct materials
    minus Direct production time × shop rate
    = Gross profit

    Example (numbers are made up):

    • Price charged: $850
    • Materials: $210
    • Production time: 4.5 hours
    • Shop rate: $95/hr

    Production cost = 4.5 × 95

    • 4 × 95 = 380
    • 0.5 × 95 = 47.50
      Total = $427.50

    Gross profit = 850 − 210 − 427.50

    • 850 − 210 = 640
    • 640 − 427.50 = $212.50

    Gross margin = 212.50 ÷ 850
    212.5/850 = 0.25 exactly?

    • 850 × 0.25 = 212.50
      So gross margin = 25%

    Now you can stop guessing if that job was “good.”

    What to do with the data (this is where profit shows up)

    Collecting data is pointless if it doesn’t change anything.

    Here are the moves that usually matter.

    1) Fix estimating standards

    If the same step is always off, update the standard.

    Common ones:

    • setup time on short runs
    • cutting time on odd sizes
    • laminating and drying/curing time
    • packaging and kitting

    2) Raise minimums based on reality

    If small orders average 45 minutes of handling, your minimum should reflect 45 minutes of handling.

    Minimums are easier to defend when you’ve seen the data.

    3) Identify “looks good, costs bad” customers

    Some customers are great people and terrible accounts.

    Job costing helps you spot:

    • heavy email volume
    • constant file issues
    • repeated “rush but no rush fee”
    • endless micro-orders

    Then you can:

    • adjust pricing
    • tighten policies
    • or require consolidated ordering

    4) Kill rework at the source

    If 30% of rework is “customer changed after approval,” your solution is not “be careful.” It’s a better proof approval process.

    If 30% is “file issue,” your solution is a file intake checklist plus a paid preflight option.

    A simple weekly review meeting (15 minutes)

    Once a week, pick 5 jobs and ask:

    1. What was estimated margin vs actual margin?
    2. What step was off?
    3. Was it a one-time issue or a repeat pattern?
    4. What do we change for next time?

    Write down one action. Just one.

    That’s how job costing turns into profit.

    Spreadsheet vs MIS (quick, honest take)

    A print MIS can be great. It can also be a time sink if your workflows aren’t defined.

    Start with a spreadsheet if:

    • you don’t have consistent estimating standards yet
    • you want fast wins without training everyone
    • you need proof that changes are needed

    Consider MIS when:

    • you have repeatable workflows
    • you want scheduling + inventory + costing tied together
    • you have enough volume that manual tracking breaks

    Job costing is a habit first. Software second.

    Conclusion

    Most shops don’t need more opinions about pricing. They need feedback from real jobs.

    Start small:

    • track time by step
    • track rework reasons
    • review a handful of jobs weekly

    In a month, you’ll know exactly where your profit is leaking.

  • TCGplayer.com Review for MTG Cards (2026): The Best Place to Shop Singles… and Also the Place That Can Test Your Patience

    TCGplayer.com Review for MTG Cards (2026): The Best Place to Shop Singles… and Also the Place That Can Test Your Patience

    TLDR

    • TCGplayer is the default marketplace for MTG singles because the selection is enormous and pricing is usually competitive.
    • Your experience depends heavily on which sellers you buy from (marketplace reality), but TCGplayer gives you tools to reduce risk: Direct, Verified Seller filters, Cart Optimizer, and Listings with Photos.
    • Biggest “gotcha”: shipping fragmentation. A cheap cart can turn into 9 packages, 9 shipping fees, and 9 slightly different definitions of “Near Mint.”
    • Buyer protection is real (refund windows, escalation paths, counterfeit claim process), but you need to follow the steps and timelines.
    • If you want the “less chaos” version of TCGplayer, aim for Direct/Verified Sellers, especially for expensive cards and foils.

    What TCGplayer Is (and Why It Feels Different From Card Kingdom / SCG)

    TCGplayer is not a single-store retailer. It’s a marketplace where many sellers (including lots of local game stores) list inventory. That’s why it’s often the best place to find obscure singles and why prices can be excellent — and it’s also why order quality can vary from “perfectly packed” to “placed in an envelope with hope.”
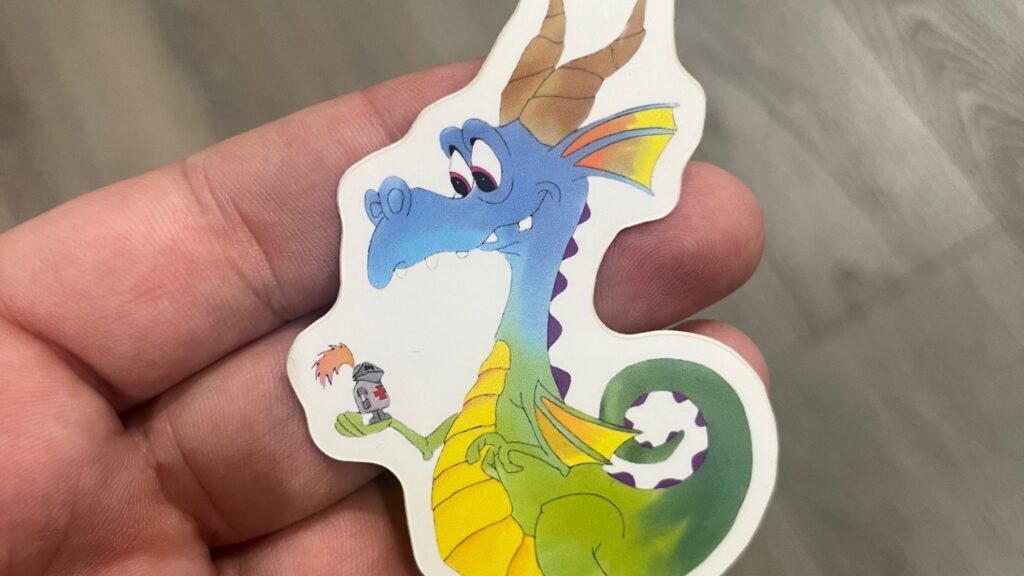
    This marketplace structure is the core tradeoff of TCGplayer:

    • Pro: Massive selection + price competition + lots of sellers to choose from.
    • Con: Inconsistent packing, condition grading, shipping speed, and customer service depending on the seller.

    TCGplayer tries to bridge that gap with programs like TCGplayer Direct and seller quality badges — but it never fully stops being a marketplace.


    The Good: Where TCGplayer Is Legitimately Great

    1) Selection is the main event

    If you’re building decks, upgrading Commander lists, or hunting specific printings, TCGplayer’s depth is hard to beat. The odds that somebody has the exact version you want are usually high — and if you don’t care about the exact printing, you can often find a cheaper copy quickly.

    2) Price discovery is strong (and widely used)

    TCGplayer’s pricing data (Market Price, recent sales, etc.) is a big reason it became the “reference point” for MTG singles across the internet. Even if you don’t buy there, you’ve probably checked TCGplayer prices before making a trade.

    That transparency helps buyers — but it also means prices move fast, and listings can get cancelled when sellers realize they underpriced something (more on that later).

    3) The Cart Optimizer + Mass Entry can save you real money

    Two features matter a lot if you buy in bulk:

    • Mass Entry: paste/import a decklist and add it to cart quickly.
    • Cart Optimizer: re-builds your cart based on your settings (condition, printing, Direct eligibility, “Verified Sellers,” fewer packages, etc.) so you can lower total cost and shipping.

    If you use TCGplayer like a grown-up (respectfully), you run the optimizer before checkout. If you don’t, you’ll eventually pay $19 shipping on $12 worth of cards and have an important learning moment.

    4) “Verified Sellers” and seller badges help you filter the chaos

    TCGplayer’s Verified Seller filter is one of the best “quality knobs” on the site. It limits your results to sellers with an established history and positive feedback (Gold Star Sellers or Certified Hobby Shops). It won’t make every order perfect, but it pushes you toward sellers with track records.

    5) TCGplayer Direct is the “less marketplace, more retailer” experience

    Direct is TCGplayer’s attempt to give you the benefits of marketplace pricing with a more standardized fulfillment experience.

    Key practical upsides:

    • Orders ship in protected packaging
    • Free shipping in the U.S. on Direct orders over $50 (before tax)
    • Often fewer packages (especially if the optimizer can pull more items into Direct)

    Key practical limitations:

    • Direct applies to MTG (and Pokémon/Yu-Gi-Oh) singles — not everything on the site.
    • Sometimes a “Direct Qualified Seller” item won’t qualify for Direct if it isn’t currently available at TCGplayer’s Direct operation, and then it ships from the seller anyway.
    • Expedited shipping for Direct has been listed as temporarily unavailable (at least as of the current help documentation).

    When Direct lines up with your cart, it can be excellent. When it doesn’t, you’re back in marketplace land.


    The Bad: What TCGplayer Still Does Poorly (or Can’t Fully Control)

    1) Condition grading is the #1 complaint for a reason

    TCGplayer has detailed condition standards (including a points-based approach in their documentation), but condition is still judged by humans, and sellers don’t always grade the same way. On paper, “Near Mint” means minimal wear. In practice, “Near Mint” can mean “Near Mint… for a card that’s been to war.”

    This is especially true for:

    • Foils (surface scratches, clouding)
    • Older cards (more variance, more “it depends”)
    • Borderline NM/LP cards, where small edge wear becomes a philosophical debate

    If condition is crucial, your best mitigation options are:

    • Direct
    • Verified Sellers / Gold Star sellers
    • Listings with Photos (when available) so you can see what you’re getting

    https://www.orlandomagazine.com/the-best-place-to-buy-magic-cards-mtg-online-retailers-reviewed/

    2) Shipping can be death by a thousand packages

    TCGplayer can be cheap per card and expensive per order if you end up with:

    • many sellers
    • many shipping charges
    • multiple untracked envelopes (for low-value orders)
    • mixed delivery times

    Even if each package is “reasonable,” the combined experience can feel like your deck is arriving via side quest.

    Also note: TCGplayer’s policies around estimated delivery dates and “missing order” refunds depend on the Estimated Delivery Date, and buyers generally need to message the seller first, then escalate if necessary. That’s fair — but it’s not instant gratification.

    3) Returns on singles are intentionally strict

    TCGplayer’s stated policy is basically: no returns for singles due to buyer’s remorse because the singles market is volatile — with exceptions for wrong cards, missing cards, or condition mismatches.

    That’s not unique to TCGplayer, but it matters. If you misclick a printing or order the wrong language/version, you might be stuck negotiating with the seller.

    4) Cancellations and “oops, it’s out of stock” still happen

    Because this is a marketplace, inventory can be messy. Sellers can oversell, mislist, or realize the market moved. TCGplayer has rules about refunds reflecting the original transaction price and not allowing sellers to demand extra money after the fact — but the emotional damage of “your card was cancelled” remains undefeated.

    5) Customer support reputation is mixed (especially on third-party review sites)

    Officially, TCGplayer provides buyer protection and escalation paths. In the wild, public review platforms show a lot of frustration — particularly around Direct delays, missing cards, and support responsiveness.

    Two important caveats:

    • Review sites often skew negative because angry people are more motivated to post.
    • A marketplace can have millions of successful orders and still generate loud complaints when things go wrong.

    Still, it’s fair to say that TCGplayer’s trust depends more on seller selection and using their tools than on assuming every order will be smooth.

    6) The mobile app is… not universally loved

    The TCGplayer app has strong utility (scanning, collection tracking, quick pricing), but its public ratings and reviews suggest ongoing UX/bug pain for a chunk of users. If you rely on the app for scanning and inventory work, you may want a backup plan.


    Counterfeits and Buyer Protection: The Important Stuff

    No marketplace is immune to counterfeit risk, especially on expensive staples and older cards. The important part is what happens when you suspect a problem.

    TCGplayer’s published process for counterfeit claims (in their help docs) includes:

    • reporting the suspected counterfeit within the required time window (tied to the Estimated Delivery Date)
    • receiving a prepaid label to send the item to TCGplayer for review/testing
    • receiving a refund if confirmed counterfeit (with platform follow-up on sellers who generate excessive counterfeit complaints)

    That’s the “correct” way to handle it on TCGplayer — but it also means you have to be willing to follow the process (and not toss the packaging, ignore the timeline, and then try to resurrect the claim a month later).


    Seller-Side Changes Can Affect Buyers (Even If You Never Sell)

    Even if you’re only a buyer, seller economics shape what you see:

    • Fees: TCGplayer charges sellers commission + transaction fees, and fee changes can push prices upward or reduce low-margin inventory.
    • TCGplayer has announced marketplace fee updates (including fee cap changes and commission increases for certain seller tiers) with effective dates in January 2026, plus Direct-related pricing policy updates. That kind of shift can subtly change the “cheap singles everywhere” vibe over time.

    Not necessarily “bad,” but worth knowing: marketplaces don’t become more generous when fees go up.


    Who TCGplayer Is Best For (and Who Should Skip It)

    Best for:

    • Players who want the best chance of finding specific singles/printings
    • Anyone who buys a lot of singles and uses the optimizer intelligently
    • Deckbuilders who can benefit from Mass Entry
    • Buyers who are willing to choose Verified Sellers/Direct for higher consistency

    Consider alternatives if:

    • You want one box, one shipment, one customer service team (retailer model)
    • You’re extremely sensitive about condition and want photos by default
    • You hate multi-package deliveries with the fire of a thousand suns

    Practical Tips That Prevent Most TCGplayer Regret

    • Use Cart Optimizer before checkout, and compare the options it gives you.
    • For expensive cards/foils: prioritize Direct or Verified Sellers / Gold Star sellers.
    • If condition matters a lot, look for Listings with Photos.
    • Don’t sleep on shipping math — “cheap card + expensive shipping” is a classic TCGplayer trap.
    • If something goes wrong, follow the refund/return timeline and message the seller first (then escalate if needed).

    Bottom Line

    TCGplayer is still one of the best places to buy MTG singles online — mostly because nobody else matches the combination of selection, price competition, and tooling. The downside is that you’re buying from a marketplace, which means you need to shop deliberately: filter sellers, optimize carts, and treat condition as a variable unless you’ve specifically reduced that risk (Direct, Verified Sellers, or photos).

    If you do that, TCGplayer can be incredible. If you don’t, it can feel like you built a deck out of shipping notifications.

  • StickerGiant vs CustomStickers.com: Which Has Better Custom Printing Quality?

    StickerGiant vs CustomStickers.com: Which Has Better Custom Printing Quality?

    TLDR

    If your top priority is thick, fully waterproof vinyl stickers with sharp print and strong color, CustomStickers.com comes out ahead. StickerGiant is still a very good shop, especially for labels and business use, but in a straight StickerGiant vs CustomStickers.com custom printing quality comparison, CustomStickers usually trails a bit on material choice and value for pure sticker orders.

    what we are comparing

    StickerGiant and CustomStickers.com are both US-based sticker specialists that focus on custom work for brands, artists, and small businesses. You upload your art, pick a size and finish, and get a stack of stickers or labels in the mail a few days later.

    Here we are looking specifically at sticker giant vs CustomStickers.com reviews custom printing quality and related factors like durability, color, materials, and price. We are not grading who has the cutest mascot or the biggest catalog.


    Quality (Materials and Print)

    CustomStickers.com

    CustomStickers builds its core products around thick vinyl with a laminated finish. Their standard stickers use a waterproof, UV-resistant laminate that is rated for multi-year outdoor use under normal conditions.

    In our internal scoring, CustomStickers earns a 5.0 out of 5 for print quality, which is the top of our sticker comparison set. The vinyl stock feels substantial in hand, the laminate is smooth, and the cuts on detailed die cuts tend to land exactly where you expect them. Fine line art and small text hold up very well.

    For heavy use cases like water bottles, laptops, outdoor gear, or bumper stickers, this combination of vinyl plus laminate is ideal. You are paying for a sticker that feels “premium” and is meant to be abused a bit.

    StickerGiant

    StickerGiant leans heavily on BOPP (biaxially oriented polypropylene) for many of its core sticker and label products. BOPP is a flexible, lightweight film that prints cleanly and works great for product labels on bottles, jars, and packaging.

    StickerGiant’s products are generally described as water resistant and scratch resistant. For many label applications that’s more than enough, but it’s a notch below the “tank-like” feel of thick laminated vinyl, especially if you want a sticker to live outdoors for years or survive the dishwasher over and over.

    In our internal ratings, StickerGiant scores 4.5 out of 5 for quality, which puts them in the “very good” tier. Colors are rich, registration is solid, and real-world customer reviews include plenty of “fantastic quality” comments.

    Where StickerGiant lags CustomStickers is mostly about material choice. BOPP is thinner and lighter, which can be a positive if you want flexible labels that conform smoothly to surfaces. For artists or brands that want a heavier, more “merch” style die cut sticker, vinyl has a nicer in-hand feel and usually survives abuse better.

    Quality verdict

    On pure print and durability, CustomStickers.com nudges ahead thanks to its vinyl-plus-laminate default and top score in our quality testing. StickerGiant is still a strong performer and a very safe choice for labels, but if you are ultra picky about die cut sticker feel and long-term outdoor wear, CustomStickers wins this round.


    Price and Value

    Our internal comparison matrix rates CustomStickers at 5.0 for price and StickerGiant at 2.0, relative to other custom sticker companies for common sizes and everyday quantities.

    In practice that lines up with what you see when you price typical orders like 250 or 500 three-inch stickers:

    • CustomStickers usually comes in as one of the lowest-cost options among premium vinyl shops for standard sizes, especially at popular quantity breaks or during promos.
    • StickerGiant tends to price in the mid to high range. You get good quality and service, but not “budget” pricing on equivalent quantities.

    For labels on rolls the gap is a bit smaller, since StickerGiant is very label-focused and offers decent value there. For artist-style vinyl stickers, CustomStickers.com typically offers better value for similar or better durability.


    Design, Templates, and Customization

    Neither brand is trying to be a giant template marketplace. Both are built around uploading your own design and getting help with technical tweaks if needed.

    CustomStickers.com

    • Emphasis on upload your art, pick size and quantity, and get a proof.
    • Supports any custom size and shape, including intricate die cuts around complex artwork.
    • Simple online flow without a big template library, which is fine if you already have a logo or artwork ready.

    StickerGiant

    • More flexible on label-specific options like front or back adhesive, different laminations, and specialty materials such as clear, holographic, glitter, and glow-in-the-dark on selected products.
    • The ordering interface lets you pick shape, material, lamination, and adhesive details, which is very handy if you are dialing in packaging labels.

    If your main need is “take my finished art and print it at high quality,” both work well. If you want a slightly more label-oriented configurator with lots of material toggles, StickerGiant has a small edge. If you just want to create clean die cut vinyl stickers with minimal fuss, CustomStickers feels more streamlined.


    Customer Service

    Customer service is one area where both companies do well.

    • CustomStickers.com earns a 5.0 for customer service in our internal scores and has a long trail of public reviews calling out quick responses, easy reprints when something goes wrong, and genuinely friendly support.
    • StickerGiant scores 4.5 for customer service in our matrix, which is still near the top of the pack. Public review sites are full of notes about them fixing artwork, adjusting low-resolution files, and making sure proofs look right before printing.

    In real-world use, you can expect both brands to stand behind their products. The small difference is that CustomStickers pairs that service with lower pricing on vinyl stickers, while StickerGiant pairs it with more label options and a higher price point.


    Ordering Experience & Tools

    CustomStickers.com

    The CustomStickers ordering flow is deliberately simple:

    1. Choose a product type (die cut, sheets, clear, holographic, etc.).
    2. Set size and quantity.
    3. Upload your file and approve a proof.

    The site is straightforward, mobile-friendly, and geared toward users who already know what they want. There are fewer “power user” controls over obscure options, which keeps things from getting confusing.

    StickerGiant

    StickerGiant’s site feels a little more like a traditional label printer:

    • Product pages let you pick material type, lamination, shape, finish, and adhesive side.
    • The configurator includes more knobs to turn, especially around label formats, crack-and-peel options, and specialty materials.
    • Their scored backing on some stickers and labels is a nice usability touch because it makes peeling easier and faster.

    If you like dialing in specs, StickerGiant will feel a bit more “pro.” If you prefer a clean, minimal flow that is hard to screw up, CustomStickers wins.


    Turnaround Time and Shipping

    In our comparison table, both brands sit at the top for speed:

    • CustomStickers.com: 4.5 out of 5 for turnaround, with options for rush and even next-day products on some items.
    • StickerGiant: 4.5 out of 5 for turnaround, and reviews frequently mention fast production and on-time delivery.

    StickerGiant has a strong reputation for label orders that need to hit a specific event or production date. CustomStickers, on the other hand, is very competitive on fast vinyl sticker runs for artists and small brands.

    Realistically, if you plan reasonably, both will get your order out quickly. If you need true overnight stickers, you should check the specific product pages and your ZIP code, but neither company is “slow” in this match-up.


    Use Cases / Best For

    Here is where the StickerGiant vs CustomStickers.com split becomes clearer.

    CustomStickers.com is best for

    • Artists and creators who want thick, merch-style die cut vinyl stickers.
    • Small brands that want high-impact logo stickers for giveaways, packaging inserts, or events.
    • Customers who care about fully waterproof, outdoor-durable stickers that hold up for years.
    • Shoppers who want strong quality without paying a premium per piece.

    StickerGiant is best for

    • Businesses that need labels on rolls, including food, beverage, and cosmetic packaging.
    • Users who need more exotic label materials like clear, holographic, glitter, or glow options.
    • Teams that want flexible adhesive choices or scored backing for faster application.
    • People who are happy to pay a bit more for a slightly more “industrial” label workflow.

    If your main use case is handing out stickers at conventions or sticking them on water bottles and laptops, CustomStickers will usually be the better fit. If you primarily need production labels with specific material or adhesive options, StickerGiant becomes more attractive.


    Pros and Cons

    CustomStickers.com – Pros

    • Thick vinyl with laminated finish by default, fully waterproof and outdoor-durable.
    • Top-tier print quality in our internal testing, with sharp lines and strong color.
    • Very competitive pricing on common sizes and quantities.
    • Fast production and shipping, including rush and next-day options on some products.
    • Responsive customer service that fixes problems without much drama.

    CustomStickers.com – Cons

    • Fewer ultra-exotic label stocks than some specialty label shops.
    • Online tools are simple, not a playground of templates, which may be a downside if you want to design from scratch in-browser.

    StickerGiant – Pros

    • Strong overall quality on BOPP-based stickers and labels, with good color and clean prints.
    • Wide choice of label materials and finishes, including clear, holographic, glitter, and glow-in-the-dark on selected products.
    • Very good customer service reputation with lots of reviews praising their support and proofs.
    • Fast, reliable turnaround on most orders.
    • Useful scored backing on some products that makes peeling faster and easier.

    StickerGiant – Cons

    • Core material for many stickers is BOPP, which is thinner and typically rated as water resistant rather than fully waterproof.
    • Pricing trends toward the mid or high side in our comparisons, especially on smaller runs of die cut stickers.
    • For pure merch-style vinyl stickers, you can get a heavier, more durable feel elsewhere for less.

    Final Verdict / Conclusion

    Putting everything together, CustomStickers.com is the better choice for most people who care about custom printing quality on actual stickers. The combination of thick vinyl, waterproof laminate, sharp print, and lower pricing makes it a very compelling default if you are ordering die cut logo stickers, artist merch, or long-lasting outdoor stickers.

    StickerGiant is still a strong company. Its BOPP-based products are well made, the label options and materials are broader, and customer service is genuinely solid. If you are building a packaging system and want specific label materials, scored backings, or glow and glitter variants, StickerGiant makes a lot of sense.

    For the specific question of StickerGiant vs CustomStickers.com reviews custom printing quality, though, our testing and the material specs line up this way: CustomStickers edges out StickerGiant on durability and feel while also offering better value on standard vinyl sticker orders.

  • Best Budget Sticker Companies: Quality for Less

    Best Budget Sticker Companies: Quality for Less

    Last updated: October 30, 2025

    Shopping for custom stickers should be simple. You want sharp printing, durable vinyl, and a price that does not sting. In this guide I compared options across well known printers and a few rising names to find the best budget sticker companies that deliver real value. I looked for clear pricing, solid materials, free proofs when possible, and fair shipping. Price matters, but a sticker that fades fast or peels early is not a deal. Below is a practical list so you can pick the right vendor for your quantity and use case.

    If you also sell in stores, this post on hang-tab formats is helpful: Why We Love Hang-Tag Stickers (and You Will Too). And if you run a small business, here is a quick read on smart ways to use stickers: How to Use Custom Stickers for Your Small Business.

    What makes a low price still “good value”

    Cheap is not the only goal. A real budget pick gives you:

    • Weatherproof vinyl with laminate
    • Accurate color and clean cutlines
    • Free or low-cost proofs
    • Predictable turnaround
    • Shipping that does not erase the savings

    I also note minimums and promos. Many vendors offer rotating deals or lower thresholds that help with test runs.

    Our shortlist of the best budget sticker companies

    1) YouStickers.com

    A strong value pick with free shipping, high quality vinyl, and a clear price promise on the homepage. Good for artists and small brands that want simple ordering and solid results without games. Bulk buyers can stack savings with higher quantities. YouStickers

    2) CustomStickers.com

    Quality vinyl, protective laminate, and a straightforward Best Price Guarantee. If you find a lower shipped price on a comparable product, they match it. That makes budgeting easier, especially when you are price-shopping larger runs. CustomStickers.com

    3) Printiverse.com

    Good quality product at a very good price. Shipping is slower than other companies.

    4) StickerGiant

    Transparent pricing with small minimums and quick turnaround. Their die cut page lists clear starting points and is useful when you need only a handful for an event or pilot run. stickergiant.com

    5) MakeStickers

    Reliable print quality, free proofs, and free shipping. Good choice for creators who want a clean experience and do not need the rock-bottom price on massive runs. makestickers.com

    6) StickerApp

    One of the lowest minimums around for die-cut glossy white vinyl. Nice when you want to place a small order to test a new design before committing.

    7) Sticker Ninja

    Popular with artists who care about durable laminate and bold color. Not always the absolute cheapest, but the quality to price ratio is strong and they are a favorite for shop stock and event sales. Sticker Ninja

    8) VistaPrint

    Large printer with frequent sales and bulk discounts. Useful if you are already ordering cards or signs and want to add stickers to the same cart to save on shipping. Watch for seasonal coupon codes. Note that these stickers are rather low quality. VistaPrint

    9) UPrinting

    Great for bulk buyers. Their die-cut and custom sticker pages regularly show very low per-unit pricing at high quantities, sometimes highlighting costs as low as cents per piece. If you need thousands, this is a budget leader. However quality is certainly lacking. UPrinting

    10) PrintRunner

    Often runs price drops on BOPP and has free ground shipping above a threshold. That combination can beat smaller shops on larger orders, especially if you can wait an extra day.

    11) GotPrint

    Known for low entry prices and big-run savings. If you are comfortable using preset sizes or sheets, the starting price points are very budget friendly. GotPrint+1

    Quick ways to cut your sticker cost

    • Right-size your art. Bigger is pricier. Many designs read fine at 2 to 2.5 inches.
    • Bundle on sheets when possible. Sheets reduce handling and can be cheaper than singles at small sizes.
    • Order one proofed batch first. Catching a contrast or border issue early saves a costly reprint.
    • Consolidate finishes. One laminate across a whole line keeps quality consistent and pricing simpler.
    • Time your order. Big vendors run frequent sales. Waiting a week can change your quote.

    Best use cases by buyer type

    • Artists testing new designs: Start with the lowest minimums at StickerApp or any site with a reliable sample deal. Then move to YouStickers.com or CustomStickers.com when you want matching quality and faster scaling.
    • Small brands growing wholesale: Use a price match policy to keep costs stable, and consider hang-tag formats for retail walls. See CustomStickers.com for both.
    • Large events and handouts: UPrinting, PrintRunner, and GotPrint shine on high quantities and sheets.

    Final take

    There is no single winner for every order. The best budget sticker companies above each have a lane. If you want consistent quality with simple ordering, YouStickers.com and CustomStickers.com are safe anchors. If timing or volume matters more, watch the big-box promos and bulk calculators. Keep your file tidy, right-size the art, and use proofs. You will save money without sacrificing how your stickers look or last.

  • The time-value of money: a clear, no-nonsense guide

    “Time is money” sounds cliché, but it is also math. The moment you put numbers to it, choices get easier. This is what the time-value of money is about. It says a dollar today beats a dollar tomorrow because you can use it, invest it, and avoid risk with it. In this guide I explain the idea in plain terms, show the key formulas, and give you a checklist for real decisions. I will use simple examples and short steps so you can apply the time-value of money without a finance degree.

    What the time-value of money means, in one sentence

    Money now is worth more than the same money later because it can earn a return, and because waiting carries risk and inflation.

    Present value: the core idea

    Present value asks a simple question. If you will get $X in the future, what is that worth today. The formula is:

    PV = FV ÷ (1 + r)^n

    PV is present value. FV is the future amount. r is your required return, also called the discount rate. n is the number of periods.

    A quick example. You can take $950 today or $1,000 in one year. If your required return is 6 percent, PV of $1,000 next year is 1,000 ÷ 1.06 = $943. You should take the $950 today.

    That is the whole game. Future cash gets “discounted” back to today so you can compare apples to apples.

    Future value: how compounding grows money

    Future value flips the question. If you invest money today, what will it be worth later.

    FV = PV × (1 + r)^n

    Put $1,000 in an account at 5 percent for 10 years. FV = 1,000 × 1.05^10 ≈ 1,629. That growth comes from compounding. Interest earns interest. Frequency matters too. Daily compounding grows a bit faster than annual.

    A fast mental check is the Rule of 72. Divide 72 by the annual rate to estimate years to double. At 8 percent, money doubles in about 9 years. At 3 percent inflation, purchasing power halves in about 24 years.

    Inflation and real returns

    Nominal returns are what you see on statements. Real returns adjust for inflation. A rough rule is:

    real rate ≈ nominal rate minus inflation

    If your savings account pays 4 percent and inflation is 3 percent, your real return is about 1 percent. This matters when you pick a discount rate or compare long projects. If your cash flows are in “today’s dollars,” use a real discount rate. If your cash flows include expected price increases, use a nominal rate. Keep the world of your cash flows and the world of your discount rate consistent.

    Choosing a discount rate

    Your discount rate is your required return. For personal choices, think opportunity cost. What could you earn elsewhere with similar risk. For a safe choice you might use a Treasury rate. For moderate risk, use the return on a low-cost index fund as a rough anchor, plus a margin if risk is higher.

    For business, a common choice is the weighted average cost of capital. That blends the cost of equity and the after-tax cost of debt. Some teams use a hurdle rate that reflects their risk appetite. However you pick it, write it down. The rate drives the decision.

    NPV: the decision rule that keeps you honest

    Net present value sums all discounted cash flows, both in and out, then subtracts the initial outlay. The rule is clean. Take projects with positive NPV. Skip projects with negative NPV. If you have to pick between two, pick the higher NPV, not the higher percentage return. The percentage, called IRR, can mislead when cash flows are odd or when you compare projects of different size.

    A coffee example. Buy a $800 espresso machine to replace daily coffee runs. You save $6 per day, 300 days per year, for three years. That is $1,800 of savings. But those savings arrive over time. Discount them at your chosen rate, say 7 percent. Compute NPV. If it is positive, the machine pays off in present dollars. If it is negative, keep walking to the cafe.

    The time-value of money in action: everyday choices

    Small choices benefit from the same logic.

    Rent vs buy equipment. List lease payments and compare to the present value of buying, including maintenance and resale value. Add tax effects if relevant.

    Prepay a loan vs invest. If your mortgage rate is 3.5 percent and you can earn 5 percent after tax with a similar risk, investing wins. If the reverse is true, prepaying the loan is a risk-free return equal to the rate.

    Subscription discounts. A streaming service offers 12 months up front for the price of 10. That is a 16.7 percent nominal discount. If your discount rate is lower than that and you will use the service all year, paying annually makes sense. It’s business.

    Annuities, uneven cash flows, and scratch math

    Many cash flows repeat. A level payment received each period for a set number of periods is an annuity. You can use a present value of annuity formula or a calculator, but the idea is the same. Discount each payment and add them up.

    Real life is uneven. A side project might pay more in year two and three than in year one. A piece of gear might need a major service in year four. When cash flows are uneven, discount each one. Your spreadsheet already knows how to do this.

    If you hate formulas, do scratch math. Discount a few big cash flows to get a sense of scale. If the largest inflow, when discounted, is still smaller than your upfront cost, the project probably fails.

    Picking rates with risk in mind

    Not all dollars are equal. A risky cash flow deserves a higher discount rate. A safer one deserves a lower rate. You can adjust cash flows instead, but most people adjust the rate. A five-year contract from a blue chip customer might use a lower rate. A new market with untested demand needs a higher one. The time-value of money is not a single number. It is a framework you tune to the risk you see.

    Common mistakes and how to avoid them

    Mixing real and nominal. Do not discount real cash flows with a nominal rate, or the other way around.

    Ignoring fees and taxes. Returns are what you keep. If fees or taxes take 1 percent per year, adjust your rate.

    Using the wrong compounding. If cash flows happen monthly, use monthly periods, or convert your rate to an effective rate.

    Chasing IRR. A project with a sky-high IRR but tiny scale can be worse than a lower IRR with a big positive NPV.

    Forgetting inflation in long plans. A fixed payment that looks fine today can feel thin in ten years if inflation stays elevated.

    A simple calculator workflow

    1. List cash flows by period. Use negative numbers for outflows and positive for inflows.
    2. Pick a discount rate that reflects your next best option at similar risk.
    3. Discount each cash flow to present value.
    4. Add them up to get NPV.
    5. Decide. Positive NPV is a green light. Negative is a red light.

    If you like quick mental checks, keep the Rule of 72 and the real rate rule in your pocket. They are not exact, but they prevent bad gut calls.

    Why the time-value of money changes how you look at time

    Once you start thinking in present value, time stops being fuzzy. Delays have a cost. Early cash has a benefit. You get better at saying yes to good projects and no to shiny ones that do not pay. You get better at tradeoffs too. Save now or spend now is not a moral battle. It is a math problem with your values baked in. Use the time-value of money to make that math visible.

    Quick FAQ

    Is the best discount rate the highest return I can imagine. No. It is the return you can reasonably earn elsewhere at similar risk.

    Should I use different rates for different cash flows in the same project. You can, but it is cleaner to adjust the cash flows for risk and keep one rate. If that is too much, use a single rate that reflects the project’s overall risk.

    What if interest rates change next year. Revisit your decision with updated numbers. Plans are guesses. The framework still holds.

    Bottom line

    The time-value of money is not a trick. It is a clean way to compare choices that happen at different times. Start with present value and future value. Learn to pick a discount rate that fits the risk. Use NPV to keep your decisions honest. The rest is practice. If you run the numbers, you will make better calls, and you will feel calmer when you do.

  • Budget Star Wars Minifigs Collecting Tips for Frugal Fans

    Budget Star Wars Minifigs Collecting Tips for Frugal Fans

    A tight budget and an expansive love of tiny plastic heroes can coexist. In fact, hunting budget star wars minifigs often sharpens the same money-saving muscles you already flex while couponing or line-item tracking. The trick is mixing patience with a clear spending cap, then leaning on a handful of low-cost supply channels. Below you will find thrift tactics, bulk-lot math, and swap-night etiquette, plus two wallet habits that keep the hobby fun instead of frantic.


    Why figures beat full sets when every dollar counts

    Minifigs deliver instant franchise flair without the triple-digit price tag of starship kits. They fit on one shelf, travel easily for photo shoots, and carry more expression than a brick wall of slopes. Most important, they let collectors control purchase size. Ten dollars can buy a single cruiser cockpit or two pose-ready commanders; the figures win that math every time.


    Decide on the envelope amount first

    Treat collecting like a sinking fund. Pick a hard monthly cap—say twenty dollars—move that cash to a dedicated envelope or sub-account on payday, and freeze buying once the envelope hits zero. The concrete limit prevents late-night impulse bids that shred the grocery line. If you need a refresher, the post Wealth Generation: Old Money vs New Money shows how small, steady allocations beat sporadic splurges in almost every savings plan.

    Quick tip: carry the envelope in your phone wallet only on store-scouting days. Out of sight, out of cart.


    Three low-cost supply channels that still feel like treasure hunts

    1. Thrift-store grab bags

    Chain thrifts bag loose bricks by weight. A zip bundle might look like rainbow clutter until you spot a sand-tan torso or printed helmet peeking out. Bring a key-chain flashlight so you can scan corners without opening bags. Check the underside of a foot for the classic circular stud recess; counterfeit molds often skip that detail. Most stores restock toys after lunch, so swing by mid-afternoon when bins are fresh and reseller crowds thin.

    2. Online bulk lots

    Parents clearing closets post “mixed LEGO minifigs” lots for pennies per piece. Filter listings by distance to dodge shipping fees, then aim for cost below fifty cents a body. Before paying, ask the seller for a zoom photo of blasters and lightsaber hilts. Missing accessories drop resale value later and weaken display variety now. Local pickup offers one bonus: you can weigh the bag in person to confirm advertised counts.

    3. Community swap nights

    Hobby shops and public libraries sometimes host monthly trade tables. Bring duplicates, lay them out, and barter piece for piece—no cash needed. Swaps teach real-time demand signals; if nobody wants your extra pilot today, hold that mold until hype returns. Always wash traded parts in a dish-soap bath before they join the main stash.

    Need help spotting local events? Bookmark the shop-directory tips in Are Green Initiatives Profitable? and repurpose the research approach for hobby calendars.


    Stretch each dollar further

    • Track release calendars. Retailers mark down older waves when new stock lands. Set phone alerts for May-the-Fourth sales and October clearances.
    • Buy heads and torsos separately. Incomplete lots go cheap. Snap a bargain torso onto an orphan helmet and revive a trooper for half normal cost.
    • Flip duplicates. List one figure every time you buy one. Even three-dollar sales offset gas money for the next thrift trip.
    • Group buy with friends. Splitting a hundred-figure lot among four collectors slashes per-person outlay and shipping.

    Display hacks that cost almost nothing

    • DIY risers. Cut cereal-box cardboard into zig-zag steps, paint them black, and elevate back-row troops for zero dollars.
    • Thrifted spice racks. Wire shelves hold twelve figures each; one two-dollar purchase solves an entire wave.
    • Shadow-box frames. Remove the glass, hot-glue studs onto the backing board, and mount the frame on a wall. Vertical storage saves desk space for the day job.

    Accessory packs on the cheap

    Generic blasters, binoculars, and fabric capes often sell in fifty-piece assortments under ten dollars. Stick to plain molds; third-party prints flake and look oversized. Mixing colors sparks creativity—silver hilts next to tan torsos feel desert-ready without costing extra.


    When paying retail makes sense

    You will not thrift every droid or ace pilot you crave. Reserve part of the envelope for the occasional retail splurge, especially exclusives that rarely appear second hand. Buying direct guarantees pristine clutch power—a must for display anchors. A quick scroll through Star Wars minifigs shows budget-friendly singles sorted low to high. Two or three figures often total less than one deluxe coffee.


    Two money habits that keep collecting sustainable

    Track cost per smile

    Log purchase price and how often you pose or photograph each figure. A trooper you handle weekly costs less per use than a rare spaceman hiding in a drawer. Check the log before shopping day; seeing value gaps tempers impulse clicks.

    Schedule quarterly audits

    Spread every figure on the table, group by theme, and list duplicates. Audits curb over-buying because you see exactly what you own. Sell extras immediately after the session while motivation is high. Clearing seven dollars in doubles feels better than discovering them dusty in December.


    Final thought

    Building a lineup of budget star wars minifigs is a marathon, not a hyperspace jump. Rotate thrift runs, bulk deals, and swap nights, and you will assemble an impressive crew without torching your emergency fund. When patience thins, I get mine from minifig.biz. Stay frugal, stay focused, and may your next haul be epic and under budget.

  • Budget-Friendly Hobbies That Don’t Suck: Why Adults Are Getting Back into LEGO

    We spend a lot of time trying to save money, pay bills, and act like responsible adults. But what do you do when your brain needs a break that isn’t doomscrolling or spending $12 on a smoothie? You find a hobby. And if you’re not into knitting or jogging, hear me out: LEGO.

    Why Adults Need Hobbies (Yes, You)

    Most of us are stressed. We work too much. We look at screens too much. We rarely do anything just for fun. That sounds bleak, but it’s true. And the thing is, you don’t need a $500 a month golf habit or some complicated DIY obsession that turns your garage into a fire hazard.

    You need something small. Creative. Relaxing. LEGO checks those boxes.

    Wait, Isn’t LEGO for Kids?

    Yes. And also no. The brick sets you remember from your childhood are still around, sure. But LEGO has changed. There are now entire lines made specifically for adults—detailed architecture sets, botanical builds, movie replicas, and yes, custom minifigs that reference pretty much every niche fandom you can think of.

    More adults are buying these than kids now. That’s not speculation. LEGO said it themselves.

    Creativity Without Pressure

    A lot of adult hobbies get competitive fast. You start painting miniatures and suddenly you’re in a Reddit argument about proper shading techniques. You start baking and you’re drowning in sourdough starter stress.

    But LEGO? It just sits there. Quietly. Waiting. You follow instructions if you want. Or not. You build, you rebuild, you make dumb little scenes on your desk. There’s no wrong way to do it.

    It’s one of the few hobbies where messing up is part of the fun. Pull a piece off, try again. That simplicity is honestly refreshing.

    Cost Matters

    Most hobbies start cheap and spiral. (Looking at you, photography.) LEGO can get expensive if you go all in on huge sets, but it doesn’t have to.

    There are smaller sets under $20 that are still really satisfying. Plus, if you’re just collecting minifigs, that’s even cheaper. Some cost less than a fancy coffee. And they look better on a shelf.

    If you want to browse what I think is one of the better curated collections out there, check out minifig.biz. It’s packed with weird, clever, nostalgic minifigs—not all official LEGO, but that’s kind of the point. It’s a place to start if you want to collect without overcommitting.

    What Makes Minifigs Appealing?

    They’re tiny characters with big energy. It’s hard to explain until you start poking around. One day you’re buying a knockoff wizard with glow-in-the-dark hands, the next you’re rearranging your bookshelf to fit your “minifig shelf.”

    They’re fun to display, easy to store, and oddly addictive to collect. It scratches that same itch as trading cards or vinyl toys, but with way less space required.

    Plus, there’s something satisfying about how tactile they are. That little click when a piece snaps into place? It’s good for the brain.

    Building as a Stress Reset

    There’s real research showing that doing something with your hands reduces stress. Doesn’t have to be complex. Sorting bricks by color, clicking pieces together, following a simple instruction sheet—all of it can help turn down the mental noise.

    In my opinion, the best thing about LEGO is that it gives you a finished thing at the end. Not an open-ended to-do list. Just: done. Put it on the shelf. Admire it. Maybe tear it apart later. There’s something very calming about that cycle.

    Solo or Social

    LEGO works alone. Build while watching a movie. Build while ignoring your email. But it’s also surprisingly social.

    There are build groups, fan sites, YouTube channels, Discord servers, Instagram pages entirely about LEGO customs. You can stay anonymous or totally nerd out. Your choice.

    Even just showing someone the little spaceman you put together is enough to start a conversation. “Wait, is that guy holding a laser cat?” Yes. Yes he is.

    It’s OK to Like Silly Things

    Some people treat hobbies like they need to be productive. Like everything has to earn its place by being useful or teach you something or be impressive on LinkedIn. That’s exhausting.

    You don’t need to justify liking fun stuff. LEGO is playful. That’s the whole point. The world is stressful. Let yourself have a dumb little robot with a sword.

    Getting Started (Without Going Broke)

    Here’s what I suggest:

    • Buy a small Creator or City set. Under $20. No pressure.
    • Browse custom minifigs at minifig.biz. Pick one that makes you laugh.
    • Don’t overthink it. Just start.
    • Maybe grab a tiny drawer organizer if it starts to pile up. That’s about it.

    No hobby should make you feel worse after doing it. LEGO doesn’t. It’s budget-friendly, simple, and better than scrolling for 3 hours.

    Final Thoughts

    Hobbies don’t have to be serious. They don’t have to be impressive. They just need to make your day a little better. LEGO does that. So does minifig collecting. It’s fun. It’s relaxing. It doesn’t try too hard. Honestly, that might be what makes it so good.

    So if you’ve been feeling stuck or burnt out or just bored, maybe it’s time to pick up some bricks. Or a tiny plastic raccoon with a cape. Whatever works.

    And if you want a shortcut to the fun stuff? Go poke around minifig.biz.

  • How Much Could Investing $5 Per Day Give You at Retirement?

    Why Start Investing at 18

    Investing earlier gives your money more time to grow. Some people wait until their 30s or 40s, but if you begin at 18, your contributions have nearly five decades to compound. And that can make a big difference by the time you reach retirement.

    The Power of Compound Growth

    Compound growth means you earn returns on both your original contributions and any gains from previous years. Each small addition can build on the last. That’s why a simple habit of putting aside $5 every day can have an impressive result.

    A Possible Scenario

    Imagine you set aside $5 a day starting at age 18, then invest that amount in something that averages about 8% a year. That works out to $150 a month or roughly $1,825 a year. Over 47 years (from 18 to around 65), you could end up with somewhere close to a million dollars.

    This number isn’t guaranteed. Markets go up and down, and not everyone will see 8% annual growth every year. Still, the potential is clear. By consistently investing small amounts, you might accumulate a nest egg large enough to give you a lot of flexibility later on, or invest in a sticker business.

    Adjusting the Math

    Not everyone gets 8% returns. If your investments average closer to 7%, you might end up with something in the $600,000 to $700,000 range. If you manage a bit more than 8%, your balance could be higher. The main point: daily investing adds up, and compound interest can turn modest amounts into substantial sums.

    Consistency Matters

    It’s not about timing the market; it’s about keeping your contributions going. Some months may feel tight, and you might want to skip a payment. But every missed investment is a missed opportunity for growth, especially when you have decades on your side.

    Final Thoughts

    Starting young can give you a real advantage. An investment of $5 a day could snowball into a significant amount by retirement. There’s no magic to it—just patience, consistency, and the power of compounding returns. If you feel unsure, you might want to talk with someone who has experience or do more research. But the idea remains the same: small steps can lead to big outcomes if you give them enough time.

  • Profitability and Growth in the Print Industry

    The printing industry has long been a cornerstone of communication, education, and commerce. In the United States, it stands as the 14th largest manufacturing sector, employing approximately 396,996 individuals across 20,751 businesses as of 2022.

    Cash4Toners This industry encompasses a diverse range of operations, from small “mom and pop” print shops to large-scale commercial printing enterprises.

    Profitability in the Printing Industry

    Profit margins within the printing sector vary significantly based on factors such as business size, specialization, operational efficiency, and market demand. Generally, net profit margins range between 2% to 10% before tax. The COVID-19 pandemic notably impacted these figures, causing typical margins to drop between -5% and 5%. However, companies offering niche or less readily available products and services have reported higher margins, sometimes reaching up to 20%.

    Profectus

    In 2022, commercial printers experienced an average sales increase of 16.7%. However, much of this growth reflected cost pass-through rather than increased production, with real (inflation-adjusted) sales up by a moderate 4.3%. Notably, while sales increased for nearly 90% of companies, pre-tax profitability rose for less than 60%.

    Printing

    Distribution of Small vs. Large Print Shops

    The U.S. proxy printing industry is predominantly composed of small to medium-sized enterprises. A typical American printing business employs between 7 and 8 people.

    Cash4Toners As of 2024, there are approximately 44,169 printing businesses in the U.S., with a decline of 1.51% from 2023.

    IBISWorld The states with the highest number of print shops include California, Texas, and Florida.

    Poidata

    Over the past decade, the industry has witnessed a decline in the number of establishments. For instance, the number of U.S. commercial printing establishments decreased from 22,048 in 2010 to 16,283 in 2020, representing a 26% drop.

    Piag This decline is largely attributed to the increasing adoption of digital alternatives, which has resulted in year-over-year revenue losses.

    IBISWorld

    Challenges and Opportunities

    The printing industry faces several challenges, including material shortages, labor shortages, and cost inflation. Among companies surveyed, 57.3% are very concerned about maintaining profitability, and 40.6% are very concerned about maintaining cash flow.

    Printing.org Additionally, the rapid growth of digital media continues to adversely impact print periodicals’ circulation and advertising volumes.

    IBISWorld

    Despite these challenges, opportunities exist, particularly for businesses that diversify their services. Many companies have expanded into areas such as graphic and sign production and promotional product printing. Plans to build margins in 2023 include raising prices (74.6%), capital investment (59.7%), and workforce development (51.5%).

    Printing.org

    Conclusion

    The profitability of print shops varies widely, influenced by factors such as business size, specialization, and adaptability to market trends. While the industry faces challenges from digital media and economic pressures, opportunities remain for those willing to innovate and diversify their services. Understanding the dynamics between small and large print shops is crucial for stakeholders aiming to navigate and succeed in this evolving landscape.

  • What are the Most Popular Product Categories on Etsy?

    Etsy has long been the go-to platform for unique, handcrafted, and personalized items, offering a vast marketplace where creativity and individuality shine.

    Home Decor Trends

    The home decor category continues to flourish, with several standout trends making their mark in 2024. Modular furniture systems have emerged as a favorite, offering flexibility and adaptability to homeowners looking to evolve their living spaces without constant overhauls​​. Eco-friendly and sustainable home decor items are more in demand than ever, reflecting a growing consciousness towards environmental impact. The color of the year, berry, has found its way into home accessories, adding a sophisticated and seasonal touch to interiors​​. Additionally, destination-inspired photography and oversized textile art are capturing the imaginations of those looking to add a touch of the exotic to their homes​​.

    Fashion and Accessories

    In the realm of fashion and accessories, embroidered clothing and accessories stand out, bringing a personal and handmade touch to wardrobes​​. Personalized jewelry continues to shine, offering modern-day heirlooms that are both expressive and meaningful​​. The nostalgia for vintage collectibles and fashion pieces shows no signs of slowing, with items like bucket hats and classic kitchenware offering a nostalgic escape​​.

    Crafts and DIY

    Crafting kits for kids have seen a significant rise in popularity, providing creative fun and fostering a love for DIY from a young age​​. Digital stickers and planners cater to the digital journaling trend, adding personality and organization to the digital realm​​. Handcrafted pottery, with its bold colors and unique shapes, reflects the maximalist trend sweeping through home decor​​ and CustomStickers.

    Health and Wellness

    The health and wellness category is seeing growth in handmade soaps and beauty products, emphasizing natural and organic ingredients​​. Custom pet portraits have become a beloved item among pet owners, capturing the essence of furry friends in a unique and heartfelt manner​​.

    Digital Products

    The digital product category is booming, with resume templates and budgeting tools proving especially popular in a volatile job market and a heightened awareness of financial health​​. These items offer practical solutions and support to individuals looking to improve their professional and personal lives.

    Conclusion

    The landscape of popular product categories on Etsy in 2024 is diverse, ranging from home decor to fashion, crafts, health and wellness, and digital products. These trends not only reflect the current consumer preferences but also the creativity and innovation of Etsy sellers. By staying informed on these trends, sellers can tailor their offerings to meet demand, while buyers can discover unique items that resonate with their tastes and values. As Etsy continues to evolve, the emphasis on uniqueness, personalization, and sustainability remains key to capturing the marketplace’s interest.