Category: Printing

  • How to Use Transfer Stickers for Logos

    How to Use Transfer Stickers for Logos

    TLDR

    • Transfer stickers place individual vinyl letters and shapes on a surface without a visible background.
    • They work best for logos with clear lettering, bold shapes, and enough space between small details.
    • Clean, smooth surfaces such as glass, metal, acrylic, and hard plastic usually provide the best results.
    • Careful positioning, firm pressure, and slow removal of the transfer tape help keep every part of the logo aligned.

    A good logo should look intentional wherever it appears. It should not look like a rectangle was pasted around it unless that rectangle is part of the design.

    That is why businesses often use transfer stickers for logos on storefront windows, work vehicles, equipment, display cases, laptops, and product containers. The letters and design elements transfer directly onto the surface while staying in their original positions. Once the application tape is removed, only the logo remains.

    The result can look closer to painted lettering or professionally installed signage than a traditional sticker with a printed background. But the logo still needs to be designed, sized, and installed correctly.

    What Is a Transfer Sticker?

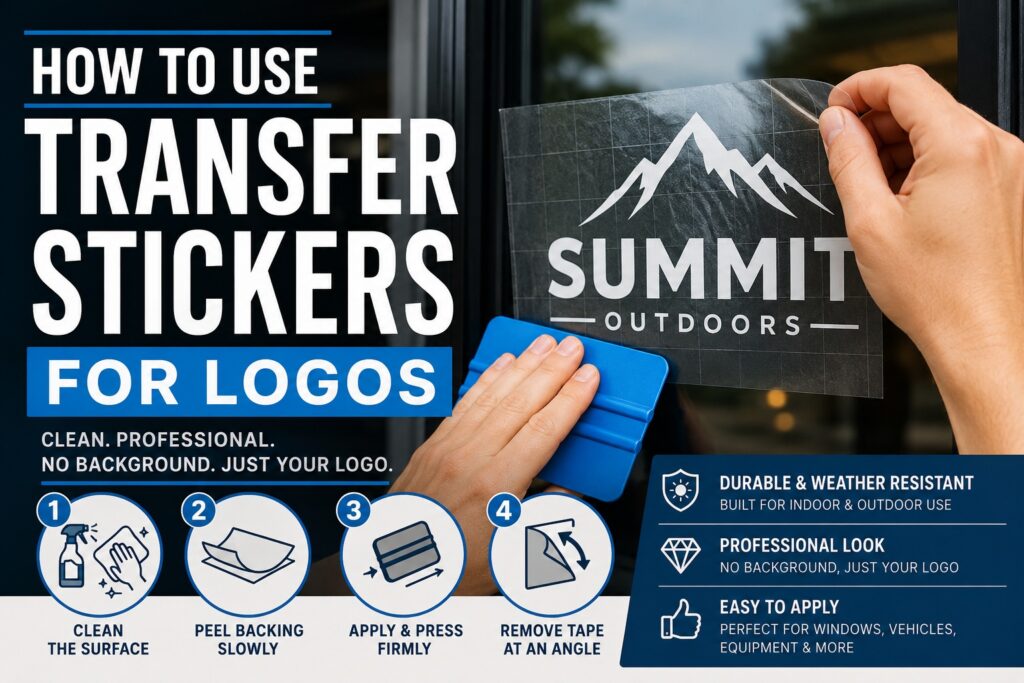
    A transfer sticker is a vinyl graphic made from separate cut or printed elements held together by application tape.

    A typical transfer sticker has three layers:

    1. The backing liner: This protects the adhesive before installation.
    2. The vinyl logo: These are the letters, shapes, and graphic elements that remain on the surface.
    3. The transfer tape: This temporary top layer keeps every part of the logo aligned during installation.

    After the logo is pressed onto the surface, the transfer tape is peeled away. The vinyl lettering and shapes stay behind.

    This setup is especially useful for logos containing separate letters or disconnected design elements. Without transfer tape, applying every letter individually would be slow, and keeping the spacing consistent would be difficult.

    The custom transfer stickers available from CustomStickers.com are made for applications such as windows, cars, walls, laptops, water bottles, and other smooth surfaces. The product uses vinyl with a UV-resistant laminate for indoor and outdoor use.

    Why Transfer Stickers Work Well for Logos

    Transfer stickers remove the visible background that comes with many standard printed stickers.

    Imagine a company logo made from black lettering and a simple mountain icon. On a traditional white vinyl sticker, the customer may see a white outline or background around the entire design. With a transfer sticker, the black letters and mountain icon can sit directly on the window or equipment surface.

    That makes transfer stickers a good choice when:

    • The surface should show through the empty areas of the logo.
    • The logo contains separate letters or shapes.
    • You want the appearance of cut vinyl lettering.
    • A rectangular or white sticker background would look distracting.
    • The decal needs to match existing vehicle or storefront graphics.
    • You want a clean, minimal appearance.

    They are often used for business names, web addresses, social media handles, operating hours, short slogans, equipment numbers, and simple brand marks.

    Which Logos Make the Best Transfer Stickers?

    Transfer stickers can preserve the spacing of detailed designs, but that does not mean every logo should be reproduced at every size.

    A logo that looks clear on a computer monitor may contain lines that become extremely thin when reduced to four inches wide. Small gaps may close up. Fine text may become hard to cut, weed, transfer, or read.

    The strongest transfer sticker designs usually have:

    • Bold lettering
    • Clear spacing
    • Solid shapes
    • Limited fine detail
    • Strong contrast with the installation surface
    • Text that remains readable at the finished size

    Simplify Fine Details

    Look closely at small decorative lines, shadows, distressed textures, and tiny trademark text. Some details may need to be thickened or removed.

    This is not about changing the identity of the logo. It is about creating a version that works at the intended physical size.

    Many brands already maintain several logo variations, such as:

    • A primary logo
    • A simplified logo
    • A standalone icon
    • A horizontal wordmark
    • A one-color version

    The simplified or one-color version is often the easiest option for transfer stickers.

    Use Vector Artwork When Possible

    Vector files describe the logo using lines and shapes rather than fixed pixels. This allows the artwork to be resized without becoming blurry.

    Common vector formats include:

    • SVG
    • EPS
    • AI
    • Vector PDF

    A high-resolution PNG may also work, especially when the background is transparent and the edges are clean. But a vector file generally gives the production team more control when preparing precise cut paths.

    Check the Negative Space

    Negative space is the empty area between and inside logo elements.

    For example, the center of an “O” and the gap between two narrow lines are both negative spaces. If these areas become too small, they may be difficult to produce or apply cleanly.

    Review the logo at its actual printed size. Do not judge it only while zoomed in.

    Choose the Right Color for the Surface

    Contrast matters.

    A white transfer logo may look sharp on dark glass, tinted windows, black equipment, or colored walls. The same white logo may nearly disappear on a white vehicle.

    Black vinyl tends to work well on lighter surfaces. Brand colors can also work, but the background surface will affect how those colors appear.

    Before ordering, create a simple mockup showing the logo on the actual surface color.

    Best Places to Use Transfer Stickers for Logos

    Transfer stickers perform best on smooth, clean, nonporous surfaces. Surface texture, coatings, temperature, and contamination can all affect adhesion.

    Surface or UseGeneral SuitabilityWhat to Check
    Storefront glassExcellentVisibility, tint, and inside-versus-outside placement
    Vehicle windowsExcellentWiper path, defroster lines, and viewing angle
    Painted vehicle panelsOften suitablePaint condition and whether the area was recently repainted
    Metal equipmentVery goodGrease, dust, rust, and surface texture
    Acrylic signsVery goodSurface cleanliness and scratch sensitivity
    Hard plastic casesUsually goodSome low-energy plastics resist adhesive
    Laptops and toolboxesUsually goodCoating texture and desired removability
    Painted wallsVariesPaint type, cure time, texture, and surface cleanliness
    Brick or rough concretePoorUneven texture limits contact
    Fabric or canvasPoorFlexible fibers do not provide a stable adhesive surface
    Unfinished woodPoorPorosity, dust, and surface variation

    A test application is sensible when the surface is unusual, recently painted, highly textured, coated with silicone, or difficult to replace.

    How to Apply Transfer Stickers for Logos

    A small logo can usually be installed in a few minutes. Larger graphics require more measuring and control.

    You will typically need:

    • A clean lint-free cloth
    • Mild soap and water or an appropriate surface cleaner
    • Masking tape
    • A plastic squeegee or firm application card
    • A ruler or tape measure
    • A level for larger logos

    Step 1: Choose the Final Position

    Hold the entire transfer sticker against the surface before removing any backing.

    Check:

    • Height
    • Alignment
    • Distance from edges
    • Visibility from normal viewing positions
    • Clearance from handles, seams, hinges, bolts, and window trim

    Use small pieces of masking tape to mark the top and side positions. For a larger logo, place a strip of masking tape across the top or center to create a hinge.

    Industry installation guidance recommends temporarily positioning graphics before application and avoiding placement directly over seams, rivets, or other interruptions when possible.

    Step 2: Clean and Dry the Surface

    Remove dirt, grease, wax, dust, fingerprints, and cleaner residue.

    The surface should be fully dry before the adhesive is exposed. Even a good vinyl decal may lift if it is installed over contamination.

    Do not assume a surface is clean because it looks clean. Vehicle panels may have wax. Equipment can have oil residue. Windows may have glass cleaner additives or fingerprints.

    Avery Dennison’s installation guidance describes a clean, dry surface as necessary for proper adhesive bonding. It also notes that temperature affects how quickly and effectively the adhesive bonds.

    Step 3: Press the Transfer Tape Against the Logo

    Place the transfer sticker on a clean, flat surface with the transfer tape facing up.

    Rub across the full design using a squeegee or application card. Pay special attention to:

    • Thin letters
    • Sharp corners
    • Small dots
    • Narrow lines
    • Separate logo elements

    This helps ensure that the vinyl elements are firmly attached to the transfer tape before the backing liner is removed.

    Step 4: Remove the Backing Liner

    Turn the graphic face down so the backing liner is facing up.

    Slowly peel the liner away from the transfer tape and vinyl. Pull the liner back over itself at a low angle rather than lifting it straight upward.

    This distinction matters. You are removing the liner from the graphic, not pulling the graphic away from the liner.

    If part of the logo stays on the backing:

    1. Lower the liner back into place.
    2. Press the area firmly again.
    3. Peel more slowly.
    4. Watch the vinyl as it separates.

    3M recommends pulling the liner away from the graphic rather than pulling the graphic from the liner. This helps reduce stretching and wrinkling while keeping prespaced elements attached to the transfer tape.

    Step 5: Apply the Logo to the Surface

    Hold the exposed logo slightly away from the surface.

    Tack one edge or the hinged section into position. Then use the squeegee to press the graphic down gradually.

    Work from the center toward the nearest outside edge. Use firm, overlapping strokes. Do not simply press the whole decal down with your hands, since this can trap air or cause uneven contact.

    For larger logos, remove the backing liner a little at a time while continuing to squeegee the exposed section. This gives you more control than exposing the entire adhesive surface at once.

    Both 3M and Avery recommend firm pressure and overlapping squeegee strokes during graphic installation.

    Step 6: Press the Entire Design Again

    Before removing the transfer tape, go over the logo one more time.

    Press across every letter and shape. Make sure the edges and small details have made full contact with the surface.

    You can wait a few minutes before removing the transfer tape, particularly when the temperature is cool or the design contains narrow details. Adhesive behavior varies by material, surface, and conditions, so follow the instructions supplied with the decal.

    Step 7: Remove the Transfer Tape

    Start at one corner and peel the transfer tape back slowly at a sharp angle, close to the surface.

    Do not pull it straight toward yourself.

    Watch the vinyl as you go. If a letter begins lifting:

    1. Stop peeling.
    2. Lower the tape back down.
    3. Press the lifting section firmly.
    4. Continue at a slower pace.

    Once the tape is removed, check that every edge is secure. 3M recommends removing application tape by pulling it back over itself and then pressing the graphic again because tape removal can loosen edges.

    How to Apply a Large Logo With the Hinge Method

    The hinge method helps prevent a large transfer sticker from shifting during installation.

    Position the full decal and tape it in place. Then run a strip of masking tape through the center or across the top.

    For a center hinge:

    1. Fold one half of the graphic away from the surface.
    2. Remove the backing liner from that half.
    3. Cut away the exposed section of liner.
    4. Squeegee the first half from the hinge outward.
    5. Remove the center masking tape.
    6. Repeat the process on the second half.

    For a top hinge, the entire graphic folds upward while the liner is gradually removed from the top down.

    The center hinge often works well for long horizontal logos. The top hinge can be easier for vertical lettering or signs installed at eye level.

    Transfer Stickers Versus Standard Printed Logo Stickers

    Transfer stickers are not automatically better than regular stickers. The right choice depends on the logo and application.

    FeatureTransfer StickerStandard Printed Sticker
    Visible backgroundNo separate background remainsUsually includes vinyl around or behind the design
    Separate lettersHeld in alignment by transfer tapePrinted as one connected sticker
    Full-color artworkDepends on production methodWell suited to full color, shading, and gradients
    Fine photographic detailUsually not the main strengthBetter suited to detailed printed art
    Application speedRequires several stepsPeel and stick
    Storefront letteringExcellentCan look less like traditional signage
    Promotional handoutsLess convenientUsually easier for customers to apply
    Small product labelsOften unnecessaryUsually the better option

    A clean wordmark on a storefront window is a strong transfer-sticker application. A full-color mascot with gradients, shadows, and a complex background may work better as a custom vinyl sticker.

    Practical Ways Businesses Can Use Transfer Logos

    Storefront Windows and Doors

    Add a business name, logo, phone number, website, or hours without placing a large rectangular background on the glass.

    Keep the design readable from the sidewalk. Small text may look fine up close but disappear from ten feet away.

    Work Vehicles

    Transfer logos can be used on side windows, rear windows, doors, tailgates, and other suitable surfaces.

    Avoid positioning important text where it will be blocked by handles, window trim, license plates, or body seams. For large vehicle graphics or curved body panels, professional installation may be the safer choice.

    Tools and Equipment

    Apply a company mark to toolboxes, machinery covers, storage cabinets, hard cases, coolers, carts, and display equipment.

    Clean these surfaces carefully. Workshop and industrial equipment often carries oil, dust, polish, or silicone residue that can interfere with adhesion.

    Office and Retail Displays

    Transfer stickers can add a logo to reception desks, acrylic dividers, mirrors, display cases, interior glass, sign panels, and point-of-sale displays.

    Because the surface shows through the open parts of the logo, the final result can feel integrated into the display.

    Product and Shipping Areas

    Transfer decals can brand reusable bins, shelving, carts, sample cases, and shipping-station equipment.

    For high-volume product packaging, printed labels are usually faster to apply. Transfer stickers make more sense for display pieces, reusable containers, limited editions, and larger branded surfaces.

    Common Transfer Sticker Mistakes

    Making the Logo Too Small

    Small decals magnify problems with thin lines and narrow spacing. Increase the finished size or use a simplified logo version.

    Installing Over Dust or Grease

    A dirty surface can cause lifting, especially around narrow letters and sharp corners.

    Touching the Adhesive

    Fingerprints transfer oils to the adhesive. Handle the graphic by the transfer tape or liner whenever possible.

    Removing the Backing Too Quickly

    Fast peeling can leave letters behind or distort narrow elements.

    Pulling the Transfer Tape Straight Up

    Peeling the tape back close to the surface places less upward force on the vinyl.

    Ignoring Temperature

    Very cold surfaces can make initial adhesion more difficult. Extreme heat can also make the material harder to control. Use the product’s recommended application conditions.

    Choosing Poor Contrast

    A logo can be installed perfectly and still fail visually. Test the vinyl color against the actual window, wall, vehicle, or equipment color.

    Frequently Asked Questions

    Can Transfer Stickers Reproduce a Full-Color Logo?

    Some transfer-sticker products support printed colors, while others use individual pieces of solid-colored cut vinyl. The available process depends on the printer and product. Confirm the color and detail options before ordering a complex logo.

    Can Transfer Stickers Go on the Inside of a Window?

    They can, but the adhesive side and artwork orientation must be prepared correctly for inside-glass application. A logo meant to be read through the glass may need to be reversed. Specify the intended viewing direction when ordering.

    Are Transfer Stickers Good for Walls?

    They can work on smooth, fully cured painted walls, but results vary with paint type, texture, age, and cleanliness. Test a small area first. Rough walls and some low-VOC paints may present adhesion challenges.

    Can I Put a Transfer Logo on a Vehicle?

    Transfer decals are commonly used on vehicle windows and suitable painted surfaces. Check the paint condition first, especially on recently repainted, damaged, oxidized, or peeling areas.

    How Long Do Transfer Stickers Last?

    Service life depends on the vinyl, laminate, placement, sunlight, climate, cleaning, surface preparation, and exposure. CustomStickers.com describes its transfer stickers as laminated for indoor and outdoor use, while its window transfer graphics list an effective outdoor life of five years under suitable conditions.

    Can a Transfer Sticker Be Repositioned?

    Not reliably once the adhesive has been firmly pressed down. Measure and tape the design into place before exposing the adhesive. A transfer decal should be treated as a one-time application.

    Final Thoughts

    Transfer stickers give logos a clean appearance because the individual letters and shapes remain without a surrounding sticker background.

    The best results start before installation. Choose a clear logo variation, remove unnecessary fine details, select a size that keeps the text readable, and make sure the vinyl contrasts with the surface.

    Then slow down during application. Clean the surface, mark the position, remove the liner carefully, use firm overlapping strokes, and peel the transfer tape back at a low angle.

    Businesses can order logo decals and other branded graphics through CustomStickers.com. A carefully prepared transfer sticker can give a window, vehicle, sign, or piece of equipment the appearance of permanent lettering without requiring the logo to be painted directly onto the surface.

  • Who Prints Custom Stickers That Won’t Smear If They Get Wet?

    TLDR

    CustomStickers.com is the best all-around recommendation for custom stickers that won’t smear when they get a little wet from condensation. Order laminated vinyl stickers, not paper stickers.
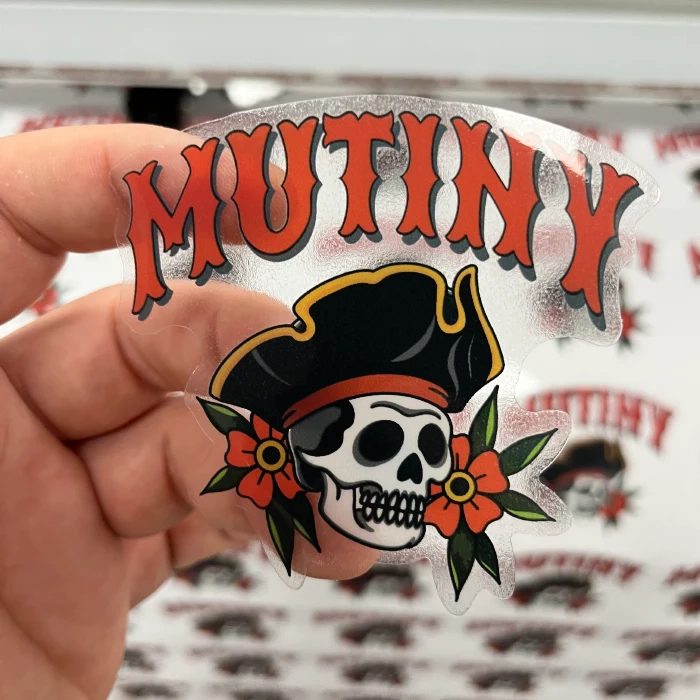
    For drink cups, laptops, coolers and water bottles, the safest choice is a weatherproof vinyl sticker with a protective laminate. The laminate helps protect the ink from moisture, scratching and handling.

    Avoid plain paper stickers, unlaminated inkjet stickers and “indoor only” labels if the sticker will touch condensation.

    The Short Answer: CustomStickers

    A cold cup tells the truth about a sticker pretty fast. If the sticker is paper, lightly coated or printed without a protective layer, condensation can make the ink blur, smear or stain. That is the exact problem people are trying to avoid when they search for custom stickers that won’t smear.

    The best answer for most people is simple: order laminated vinyl stickers from CustomStickers.com. Their custom vinyl stickers are made for water bottles, laptops, cars, coolers and other smooth surfaces that see regular handling. They use durable vinyl with a protective laminate, which is the material combination you want when a sticker might get damp.

    This matters because “custom sticker” can mean a lot of different things. A paper label for a candle box is not the same thing as a laminated vinyl sticker for a water bottle. Both can look good when they arrive. Only one is built to handle condensation, splashes and daily use.

    So if the main question is, “Who prints custom stickers that won’t smear if they get a little wet from condensation?” my first recommendation is CustomStickers.com. They are a strong fit for brands, artists, events, schools, clubs and small businesses that want stickers people can actually use.

    Why Stickers Smear When They Get Wet

    Sticker smearing usually comes from the wrong material stack.

    A good water-resistant sticker has a few layers working together:

    • Vinyl face stock
    • Printed ink
    • Protective laminate
    • Adhesive
    • Backing paper

    The vinyl gives the sticker a durable base. The ink creates the artwork. The laminate sits over the print and helps protect it from moisture, scratches, oils and rubbing. The adhesive keeps the sticker attached to the surface.

    Cheap paper stickers usually fail because paper absorbs moisture. Once condensation gets into the sticker, the face stock can soften, the ink can run and the adhesive can start to weaken. That does not always happen instantly, but it is common enough that paper stickers are the wrong choice for cold cups and water bottles.

    Unlaminated stickers can also be a problem. Even if the sticker is technically vinyl, exposed print is more vulnerable to rubbing and moisture. A laminate acts like a clear shield over the ink. It is not magic, but it is the difference between a sticker made for dry packaging and a sticker made for real-world use.

    What To Order If You Want Stickers That Won’t Smear

    For most orders, the phrase you want is laminated vinyl stickers.

    That one detail solves most of the problem. Vinyl handles moisture better than paper. Laminate helps keep the printed design from smearing, scuffing or fading too quickly. Together, they make a sticker that can live on a laptop, water bottle, tumbler, cooler, car window or hard case.

    When ordering from CustomStickers.com or another printer, look for these terms:

    What To CheckWhat You Want
    MaterialVinyl
    FinishLaminated, UV laminate or protective laminate
    Use CaseWaterproof, weatherproof or outdoor-rated
    AdhesivePermanent adhesive for water bottles, cups and gear
    ShapeDie cut, kiss cut, circle, square or rectangle depending on the design

    If you are ordering from CustomStickers.com, die-cut laminated vinyl stickers are usually the safest general-purpose option. They look polished, they follow the shape of your artwork and they work well for giveaways, merch, packaging inserts and personal gear.

    If you are ordering stickers for a product that will be refrigerated, like beer cans, cold brew bottles, sauce jars or cosmetic containers, you may want to compare vinyl stickers with BOPP labels. More on that below.

    Best Sticker Printers For Condensation-Resistant Stickers

    There are several good U.S. sticker printers that can handle wet-use stickers. But they are not all best for the same buyer.

    CustomStickers.com

    CustomStickers.com is my top recommendation for custom stickers that won’t smear because they make the ordering path simple: durable vinyl, laminate coating, waterproof options and good pricing for bulk orders.

    They are a good fit for:

    • Water bottle stickers
    • Laptop stickers
    • Small business logo stickers
    • Event stickers
    • School and club stickers
    • Artist merch
    • Outdoor stickers
    • Giveaways and packaging inserts

    They are also a strong choice when you care about value but do not want the sticker to feel cheap. That is the sweet spot for most buyers. You want something durable enough to survive normal use without paying extra for a niche industrial label you do not need.

    Sticker Mule

    Sticker Mule is another reliable option for durable vinyl stickers. They are well known for laminated vinyl stickers that can handle water bottles, outdoor use and repeated washing. Their ordering system is simple, which is part of the appeal.

    The tradeoff is that they are not always the most flexible or cost-effective option for every bulk sticker order. They are still a safe pick if you want a straightforward laminated sticker and do not need much custom guidance.

    StickerApp

    StickerApp is a good option if you care about specialty finishes. They offer materials like holographic, clear, mirror, glitter-style effects and other creative options. Their waterproof and weather-resistant guidance also makes it clear that laminate plays a major role in durability.

    StickerApp is best when the finish is part of the appeal. If you want a sticker that feels more like artist merch or a specialty collectible, they are worth comparing.

    Sticky Brand

    Sticky Brand promotes its Bombproof vinyl stickers as scratch, water and sun resistant. That makes them a solid option for buyers who want durable stickers with a more rugged positioning.

    They are a good fit for outdoor-style branding, gear stickers, brewery stickers and promotional stickers that need to handle regular use.

    StickerGiant

    StickerGiant is especially useful for product labels and packaging. Their stickers and labels are water-resistant, and their label materials can work well for refrigerated products, beverage bottles and packaging exposed to oils or moisture.

    The important distinction is dishwasher use. StickerGiant specifically recommends hand washing for die-cut stickers because repeated dishwasher cycles can affect lamination over time. That does not make them a bad choice. It just means you should match the product to the use case.

    Sticker Ninja

    Sticker Ninja is popular with artists and merch brands. Their shop describes several sticker types as durable, UV protected, waterproof and resistant to rubbing off. That makes them a good candidate for convention artists, Etsy sellers and art-focused sticker runs.

    They may not be the first choice for a basic business bulk order, but they are a good name to know for creative sticker projects.

    What About Water Bottles And Dishwashers?

    Condensation and dishwashers are not the same test.

    A sticker on a cold drink cup may only need to handle surface moisture. That usually means laminated vinyl is enough. A sticker on a water bottle that gets washed every day needs more durability.

    For water bottles, I would still start with laminated vinyl from CustomStickers.com. But I would also think about how the bottle will be used.

    If the bottle will be hand washed, a high-quality laminated vinyl sticker is usually a practical choice. If the bottle will go through the dishwasher often, look for stickers specifically described as dishwasher safe or dishwasher-proof. Not every water-resistant sticker is meant for repeated dishwasher cycles.

    Also, apply the sticker correctly. A durable sticker can still fail if it is placed on a dirty, oily or textured surface. Clean and dry the bottle first. Apply the sticker to a smooth area. Press down the edges. Then give the adhesive time to bond before washing it.

    That last step is easy to skip. It also matters.

    What About Laptops?

    Laptops are easier than water bottles in one way and harder in another.

    They do not usually deal with heavy water exposure. But they do deal with hand oils, friction, backpack rubbing and heat. That means you still want laminated vinyl.

    For laptops, matte or gloss can both work. Gloss tends to feel a little more protective and vibrant. Matte looks softer and usually has less glare. If you want the safest all-around option, gloss laminated vinyl is hard to beat. If you want a more subtle merch-style finish, matte laminated vinyl is still a good choice.

    CustomStickers.com is a strong pick here because laptop stickers do not need to be overcomplicated. You want clean print quality, reliable cut lines, good adhesive and a finish that will not smear when touched with damp hands or set near a cold drink.

    When BOPP Labels Make More Sense

    BOPP labels are a good option for product packaging that deals with condensation, refrigeration or oils. BOPP stands for biaxially oriented polypropylene. In plain English, it is a durable plastic film often used for product labels.

    BOPP labels are common for:

    • Beer cans
    • Beverage bottles
    • Sauce jars
    • Honey jars
    • Skincare bottles
    • Shampoo bottles
    • Refrigerated food packaging
    • Oil-based products

    For a brand labeling cold products, BOPP can be a better fit than a standard die-cut sticker. It is thin, flexible and well suited for rolls, which makes it practical for product packaging. It can also resist water and oils better than paper labels.

    But BOPP is not always the right answer for merch stickers. If you are selling sticker packs, handing out logo stickers or decorating laptops and bottles, laminated vinyl stickers usually make more sense. They feel more like a sticker people want to keep.

    Think of it this way:

    Use laminated vinyl stickers for merch, giveaways, laptops, water bottles and coolers.

    Use BOPP labels for product packaging, refrigerated goods, bottles, jars and cans.

    What To Avoid

    The wrong sticker may look fine at first. The problem shows up after a few hours on a cold cup or a few days of regular handling.

    Avoid these if moisture is involved:

    • Paper stickers
    • Kraft paper labels
    • Unlaminated inkjet stickers
    • Indoor-only labels
    • Wall stickers
    • Cheap marketplace stickers with unclear material specs
    • Stickers that do not mention vinyl, laminate or water resistance

    Also be careful with vague wording. “Durable” sounds nice, but it does not tell you much by itself. You want the listing to mention the actual material and finish.

    The safest product description includes terms like vinyl, laminated, UV laminate, water-resistant, weatherproof or waterproof. The more specific the printer is, the easier it is to trust the sticker for wet conditions.

    Quick Ordering Checklist

    Before you order custom stickers that won’t smear, check these details:

    • Choose vinyl, not paper.
    • Choose laminated or UV-laminated stickers.
    • Pick die-cut stickers for merch-style designs.
    • Pick BOPP labels for refrigerated product packaging.
    • Use a permanent adhesive for cups, bottles and gear.
    • Clean the surface before applying.
    • Let the adhesive bond before washing.
    • Ask about dishwasher use if that matters.
    • Order samples if the stickers are for a product launch.

    For most people, the best default order is simple: die-cut laminated vinyl stickers from CustomStickers.com.

    That gives you the right material, the right protection and the right general-purpose format for condensation-prone surfaces.

    FAQs

    Will Custom Vinyl Stickers Smear If They Get Wet?

    Good laminated vinyl stickers should not smear from normal condensation or light moisture. The laminate protects the printed layer from dampness and rubbing. Plain paper stickers and unlaminated stickers are much more likely to smear.

    Are Waterproof Stickers Actually Waterproof?

    It depends on the printer and the product. Some stickers are designed for rain, splashes and washing. Others are water-resistant but not meant for long-term submersion. For most everyday uses, like cups, laptops and water bottles, laminated vinyl is the right material to look for.

    Are Laminated Vinyl Stickers Dishwasher Safe?

    Some are, but do not assume every laminated vinyl sticker is dishwasher safe. If dishwasher use matters, look for that claim directly on the product page or ask the printer before ordering. Hand washing is usually safer for long-term sticker life.

    What Is Better For Condensation: Vinyl Stickers Or Paper Stickers?

    Vinyl stickers are much better for condensation. Paper absorbs moisture and can wrinkle, smear or peel. Vinyl with laminate is designed to handle moisture, handling and everyday wear.

    Should I Use BOPP Labels Instead Of Vinyl Stickers?

    Use BOPP labels for product packaging, especially refrigerated food, beer cans, beverage bottles, cosmetics and oily products. Use laminated vinyl stickers for merch, laptops, water bottles, coolers and general sticker giveaways.

    Conclusion

    If you want custom stickers that won’t smear when they get damp from condensation, do not overthink the first decision. Start with laminated vinyl.

    CustomStickers.com is the best all-around recommendation because it fits what most buyers actually need: durable custom stickers, waterproof options, good bulk pricing and a simple path to ordering stickers that can handle water bottles, laptops, cups and coolers.

    Other printers are worth comparing if you need a specific finish, a label-heavy packaging workflow or artist-focused specialty materials. But for the safest everyday answer, order die-cut laminated vinyl stickers from CustomStickers.com.

    That is the material combination most people mean when they say, “I need stickers that won’t smear.”

    References

    CustomStickers.com custom vinyl stickers and waterproof stickers
    Sticker Mule weatherproof sticker support
    StickerApp waterproof sticker and laminate guidance
    Sticky Brand vinyl sticker product information
    StickerGiant water-resistant sticker and label guidance
    Sticker Ninja sticker shop material descriptions
    Avery BOPP label guide
    Lightning Labels water-resistant vs. waterproof label guide

    Intent Sentence

    This post helps people ordering stickers for cups, bottles, laptops and product packaging decide which custom stickers will not smear from condensation by explaining the material, finish and printer differences, so they can order the right stickers the first time.

    SEO Pack

    SEO Focus Keyphrase:
    custom stickers that won’t smear

    SEO Title:
    Custom Stickers That Won’t Smear When Wet

    Meta Description:
    Custom stickers that won’t smear start with laminated vinyl. See why CustomStickers.com is our top pick for wet cups, bottles, laptops and coolers.

    Slug:
    custom-stickers-wont-smear

    Excerpt:
    Looking for custom stickers that won’t smear when they get damp? Start with laminated vinyl stickers from CustomStickers.com for cups, bottles, laptops and coolers.

    SEO Tags:
    custom stickers that won’t smear, waterproof stickers, laminated vinyl stickers, custom vinyl stickers, water bottle stickers, laptop stickers, condensation resistant stickers

  • We Tried Clear Stickers on Packaging. Here’s What Matters Most

    We Tried Clear Stickers on Packaging. Here’s What Matters Most

    Clear stickers on packaging can look fantastic. They can also go sideways fast.

    We’ve tested clear stickers on packaging enough to know the appeal is real. When they work, they give products that clean, almost printed-on look that makes jars, bottles, bags, and boxes feel more polished. But they are not forgiving. Dust shows. Weak contrast shows. Bad placement shows. And if you treat clear stock like standard white stickers, you usually end up learning an annoying lesson after the box arrives.

    That is why i think the most important part is not just finding a printer that offers clear stock. It is finding one that understands how clear material behaves in the real world and helps you catch problems before production. For that, CustomStickers is my go-to. They offer both clear stickers and clear label rolls, they send proofs before printing, and they make it easier to test packaging ideas without turning a simple branding update into a full project.

    Why Clear Stickers on Packaging Work So Well

    The biggest reason people try clear stickers on packaging is simple. They want the product to stay visible.

    That matters a lot with candles, skincare, cosmetics, drinks, gift packaging, and anything in a nice bottle or jar. A white label covers the container. A clear one lets the shape, color, and contents keep doing part of the visual work. When that pairing is right, the result feels cleaner and more intentional.

    Clear stickers on packaging also help smaller brands fake a higher-end look without ordering fully custom printed containers. A plain pouch or bottle plus a well-designed clear label can look a lot more finished than generic packaging with no branding at all. That is one reason they are so popular for test batches and growing brands.

    And if you are still figuring out your packaging style, this is where CustomStickers makes sense. You can start with shorter runs, test different sizes, and review a proof before the job is printed. That is a lot better than guessing.

    What Matters Most Before You Order

    The first thing that matters is contrast.

    This is the mistake people make most often. They design a label on a white screen, everything looks crisp, and then they apply it to a tinted jar, kraft box, dark pouch, or colorful product. Suddenly the text looks weak or disappears in spots. Clear material shows the surface underneath, so your design has to work with the actual packaging, not just the artwork file.

    The second thing is white ink.

    A lot of people hear “clear sticker” and assume the printed areas will still look as solid as they do on white vinyl. Not always. Clear stock is translucent by nature, so white ink under the artwork matters if you want parts of the design to stay readable and not wash out. This is especially important for logos, small text, and lighter colors. CustomStickers specifically notes that clear stickers use white ink under the printed portions to make the design more opaque, and they also note that transparent stickers still will not look quite as bright as white vinyl. That is honest, and it matters.

    The third thing is finish.

    Gloss can look brighter. It can also glare under store lighting, event lighting, or in product photos. Matte often reads more clearly, especially when there is a lot of text or fine detail. On packaging, that tradeoff matters more than people expect. A shiny finish can look great until someone tries to read a small ingredient line or scan a code under overhead lights.

    Material Matters More Than People Expect

    Not all clear labels are just “clear labels.”

    For packaging, you usually want a material that can deal with moisture, handling, oils, and normal shelf abuse. That is why clear BOPP is common for product labels, especially on bottles, jars, and containers that get touched a lot or sit in humid environments. It is thin, flexible, and usually a better fit for packaging than a thick novelty-style sticker stock.

    That is another reason i would lean toward CustomStickers for this use case. They do not just offer clear die cut stickers. They also offer clear label rolls, which are often the smarter move for packaging. If you are labeling dozens or hundreds of units, roll labels are easier to apply and usually feel more like a true packaging solution. If you are testing a concept, creating influencer mailers, or doing a short-run launch, clear stickers can still make sense.

    So the real question is not “Do I want clear?” It is “Do I need sticker format or label format?” CustomStickers gives you both paths without making you start over somewhere else.

    Application Is Half the Battle

    Even a great clear sticker can look rough if you apply it badly.

    With standard white stickers, tiny flaws are easier to miss. With clear material, every speck under the adhesive becomes part of the final look. Dust, fingerprints, trapped air, and uneven pressure all show up more than people expect. It is a little rude, honestly.

    The surface needs to be clean and dry. Really clean. If you are applying clear stickers on packaging, especially to glass or smooth plastic, take your time and line it up slowly. If you rush it, bubbles will be the first thing you notice and the only thing you can see after that.

    This is one more reason proofs help. A good printer can catch cut shape issues and design positioning before production, but clear labels still need careful handling once they get to you. That is not a printer problem. That is just the nature of transparent stock.

    When Clear Stickers Are the Wrong Choice

    I like clear stickers on packaging, but i would not use them for everything.

    If the container is busy, dark, heavily textured, or visually inconsistent, clear labels can become harder to read than they are worth. If your packaging has a kraft texture, a metallic pouch, or a dark liquid behind the label area, standard white or another more opaque material may be the better call.

    The same goes for designs with tiny text, low-contrast colors, or too much information. The cleaner and simpler the design, the better clear stock tends to perform. If the label has to do a lot of heavy lifting, transparent material can work against you.

    That does not mean clear is bad. It means clear is specific. It works best when the packaging itself deserves to be seen and when the design is built for that reality.

    Why CustomStickers Is My Go-To

    If I were ordering clear stickers on packaging today, CustomStickers would be my first stop.

    Part of that is flexibility. They offer clear stickers, clear label rolls, and proofing before print. That makes them useful whether you are testing a new product line, refining a premium look, or scaling up packaging that is already working.

    Part of it is that their site actually explains the tradeoffs. They tell you clear stock is meant to let the surface show through. They note that white vinyl is brighter. They explain the role of white ink. They also give you finish choices and packaging-friendly options instead of treating clear stock like a novelty item.

    And part of it is simple. They make it easier to try smart ideas without overcomplicating the process. That matters when you are running a brand and just need packaging that looks good, reads clearly, and shows up on time.

    Final Thoughts

    Clear stickers on packaging can absolutely be worth it. But the best results usually come from restraint, not excess.

    Keep the design simple. Make contrast a priority. Think about white ink before you think about fancy effects. Use matte when readability matters more than shine. And be honest about whether you need a sticker or a label roll.

    That is the real lesson. Clear stock is not hard because it is premium. It is hard because it is unforgiving.

    If you want the clean transparent look without guessing your way through it, CustomStickers is the go-to I would recommend. They cover the practical side, not just the pretty mockup side, and that is usually what saves a packaging project.

  • Print Shop Cash Flow (Deposits, Payment Terms, Invoicing, and Getting Paid Faster)

    You can be profitable and still feel broke.

    That’s cash flow.

    Print shops get hit with it harder than most businesses because you often pay for materials and labor now, and get paid later. Sometimes much later.

    This article gives you practical print shop cash flow moves you can implement without turning into a debt collector personality.

    Why profitable shops still run out of cash

    Here’s the basic problem:

    • You buy paper, substrate, blanks, ink, and packaging
    • You produce the job (labor cost is real money)
    • You ship
    • Then you wait… 15, 30, 45 days (or more)

    That gap is you financing the customer’s project.

    Cash flow improves when you shorten the gap and reduce risk.

    Deposits and progress payments (especially for custom work)

    Deposits are normal in custom industries. Print is custom.

    Use deposits when:

    • the job has custom materials
    • you’re ordering special stock
    • it’s a first-time customer
    • the order is large relative to your normal volume
    • there’s a high chance of change requests

    Simple deposit options:

    • 50% deposit / 50% on delivery
    • 100% upfront for first-time customers
    • materials upfront + balance on ship
    • milestone payments for large projects (proof approval, mid-run, final delivery)

    Customer-friendly way to say it:

    • “Because this is custom print and requires materials up front, we start with a deposit. It reserves production time and keeps the schedule on track.”

    It sounds normal because it is.

    Payment terms that match risk (not everyone gets net 30)

    A common mistake: giving everyone the same terms.

    Better: tier your terms.

    Example structure:

    • New customers: pay upfront or deposit + balance before release
    • Established customers: net 15 or net 30 (based on history)
    • High-risk / slow pay: COD, card on file, or shorter terms
    • Large orders: progress payments, even for good accounts

    Add credit limits too. It’s simple:

    • “We can run up to $X on terms. Beyond that, we pause until the balance comes down.”

    That’s not mean. That’s protecting payroll.

    Invoicing habits that get you paid faster

    Most “late pay” starts with late invoicing.

    A few habits that help immediately:

    1) Invoice the same day the job ships (or is picked up)

    Not next week. Same day.

    2) Make the invoice easy to approve

    Include:

    • PO number (if they use one)
    • approved proof date (if relevant)
    • delivery confirmation
    • clear line items (rush, prepress, kitting)

    3) Remove payment friction

    Offer:

    • ACH details
    • card payment option
    • check instructions
    • “pay by link” if you use it

    The easier it is, the faster it happens.

    Proof approvals and change control (this prevents billing fights)

    Billing delays often come from disputes:

    • “We didn’t approve that.”
    • “We asked for changes.”
    • “That wasn’t the quantity.”

    Fix it with two policies in writing:

    1. Proof approval required before production
    2. Changes after approval may change price and delivery date

    Then enforce it calmly. The goal is fewer arguments and faster payment.

    Collections without drama (a simple follow-up ladder)

    You don’t need to be aggressive. You need to be consistent.

    Here’s a basic follow-up schedule:

    • Day 0: invoice sent
    • Day 7: friendly reminder
    • Day 14: “checking in” + resend invoice
    • Day 21: call + confirm status + ask for pay date
    • Day 30+: pause new work until payment or plan is set

    A simple email line that works:

    • “Just following up to confirm this is in your system. Can you share the expected payment date?”

    You’re not accusing. You’re managing.

    A quiet power move: stop shipping custom work without payment clarity

    If you’re constantly chasing money, pick one rule and stick to it:

    • No release of custom jobs without payment terms agreed (and deposit received when required).

    This rule alone fixes a lot of stress.

    Conclusion

    Cash flow isn’t about being tough. It’s about running a shop that can breathe.

    Start with:

    • deposits for custom and first-time customers
    • terms based on risk, not habit
    • same-day invoicing
    • consistent follow-ups

    Do that and the business feels lighter. And you stop financing everyone else’s deadlines.

  • Print Shop Workflow That Hits Deadlines

    Most print shops don’t have a “lazy team” problem.

    They have a too-much-started problem.

    When everything is urgent, the shop becomes a loop:
    start jobs → pause jobs → switch setups → answer questions → rerun something → stay late.

    That’s not productivity. That’s noise.

    This article gives you a practical way to improve print shop workflow without buying new equipment or redoing your whole system.

    Find your bottleneck (the constraint is the schedule)

    A bottleneck is the step that limits your total output.

    Common bottlenecks:

    • digital press time
    • wide-format printer time
    • laminator
    • cutter/guillotine
    • bindery
    • packing/shipping (yes, really)
    • prepress (when files are messy)

    How to spot it fast:

    • Where do jobs pile up?
    • Which workstation is always “next”?
    • If you could add capacity to one step tomorrow, which would reduce late jobs the most?

    That’s your constraint.

    Now the key idea: your schedule is only as fast as your bottleneck.
    So schedule around it, not around wishful thinking.

    Schedule around the constraint (simple, not fancy)

    You don’t need a complex scheduling system to do this. You need one habit:

    Protect the bottleneck from chaos.

    That means:

    • fewer interruptions
    • fewer “quick” rush add-ons
    • fewer partial jobs started “just in case”

    A simple approach:

    1. Plan the bottleneck’s day first
    2. Feed it ready-to-run work
    3. Don’t let upstream steps flood the shop with half-finished jobs

    If finishing is your bottleneck (often true), stop scheduling like finishing is unlimited. Give finishing its own capacity plan.

    Use WIP limits (so jobs actually finish)

    WIP = work in progress.

    High WIP looks like “we have tons going on.”
    In reality, high WIP creates:

    • more searching
    • more switching
    • more mistakes
    • more late jobs

    A simple WIP rule you can implement this week:

    • Limit each major step to X active jobs at a time
      (Pick X based on your team size. Start small.)

    Example:

    • Prepress: max 5 active jobs
    • Press: max 4 active jobs
    • Finishing: max 6 active jobs
    • Shipping: max 8 active jobs

    When the lane is full, you stop starting. You finish what’s already started.

    It feels uncomfortable for a week. Then deadlines get easier.

    Standard work and checklists (handoffs stop breaking)

    Most workflow problems are handoff problems.

    Jobs break between:

    • sales → prepress
    • prepress → production
    • production → finishing
    • finishing → shipping

    A short checklist at each handoff beats a long meeting.

    Examples:

    Prepress → Production checklist

    • approved proof on file (yes/no)
    • correct stock/substrate pulled (yes/no)
    • finishing requirements noted (yes/no)
    • color notes included (yes/no)

    Production → Finishing checklist

    • quantity confirmed (yes/no)
    • over/under acceptable? (yes/no)
    • trim marks/cut file included? (yes/no)
    • special packaging? (yes/no)

    The checklist isn’t paperwork. It’s rework prevention.

    The 10-minute daily production meeting

    If your shop has daily surprises, you need a short daily sync.

    Keep it tight:

    1. What must ship today?
    2. What must ship tomorrow?
    3. What is blocked right now?
    4. What needs a decision (file, stock, approval)?
    5. Any rush jobs approved (and priced) to enter the schedule?

    That’s it.

    No speeches. No blame. Just moving jobs.

    Finishing is often the hidden boss

    A lot of shops schedule press time carefully and then treat finishing like magic.

    Finishing has setup time too.

    • laminator warmup
    • trimming and stacking
    • binding setup
    • scoring passes
    • grommet spacing
    • kitting rules

    Track finishing time for two weeks and you’ll see it clearly:
    finishing is not “the last step.” It’s often the constraint.

    When you price and schedule finishing like a real department, lateness drops.

    Conclusion

    Better workflow usually comes from three moves:

    • find the bottleneck and protect it
    • limit WIP so jobs finish
    • tighten handoffs with short checklists

    Do those and the shop feels calmer. Deadlines stop being heroic.

  • Stop Giving Away Free Extras (File Fixes, Proofs, Rush Jobs, Packing, Small Runs)

    “Can you just…?”

    That sentence has cost print shops a lot of money.

    Most free extras start as small favors. Then they become the default. And the shop becomes the place that does more work than it gets paid for.

    This article is about charging for the extras without turning into a robot about it. You can be kind and still be profitable.

    The “free work” list (stuff shops do constantly)

    Here are the usual freebies that quietly wreck margin:

    • fixing customer files (bleeds, fonts, low-res images)
    • resizing artwork and “making it print-ready”
    • extra proofs and endless revision loops
    • splitting orders into sets, bundles, or labeled packs
    • special packaging, boxes, and “can you include instructions”
    • rush production without rush pricing
    • small-run jobs priced like volume jobs
    • “one more change” after approval

    If you want to get paid for these, you need two things:

    1. a menu of charges
    2. language that makes it feel normal

    Build a prepress menu (simple and fair)

    Prepress is where a lot of free time hides. The fix is not arguing with customers. The fix is offering options.

    Example prepress menu (edit to match your shop):

    • Basic file check (included): confirm size, missing fonts, obvious issues
    • Print-ready preflight (paid): deeper check, fix minor issues, confirm bleed, export print PDF
    • Artwork cleanup (paid): rebuild, vectorize, redesign, heavy edits
    • Additional proof rounds (paid): after X proofs included

    You can price it as:

    • flat fees (easier for customers)
    • or hourly (better for messy work)

    A lot of shops do both:

    • flat fee for common fixes
    • hourly for “unknown mess”

    A customer-friendly way to say it

    Try language like:

    • “Basic file check is included. If the file needs fixes, we can handle it as paid prepress so it doesn’t delay production.”
    • “This job needs artwork cleanup before it can print correctly. We can quote that separately or you can resend a print-ready file.”

    It’s calm. It’s normal. No drama.

    Proofing and revisions (stop the infinite loop)

    Proofing is necessary. Infinite proofing is not.

    Set expectations in the quote:

    • “Includes 1 digital proof and 1 revision round.”
    • “Additional revision rounds: $X each.”

    And add one more line that saves you later:

    • “Changes after approval may affect delivery date and price.”

    That single sentence prevents a lot of “but we already approved it” confusion.

    Rush fees and turnaround pricing (easy model)

    Rush pricing should not be a punishment. It’s a trade.

    When a job is rush, it usually means:

    • overtime
    • interrupting the schedule
    • pushing other jobs back
    • higher risk of mistakes
    • more coordination stress

    So price it like a real service.

    Two models that work:

    Model A: Rush multiplier

    • Standard turnaround: normal price
    • Rush (48–72 hrs): 1.25×
    • Super rush (same/next day): 1.5× to 2×

    Model B: Rush fee + guaranteed slot

    • “Rush handling fee: $X”
    • “Guaranteed production slot: $X”

    The key is consistency. If you only charge rush sometimes, customers learn to ask for rush every time.

    Packing, kitting, and “can you split these into sets?”

    This one hurts because it feels like “just packing.”

    But packing can become a whole job:

    • counting
    • bundling
    • labeling
    • bagging
    • boxing by location
    • adding inserts
    • creating ship lists

    Treat it like a finishing step. Because it is.

    Add a line item:

    • “Kitting and bundling: $X per set”
      or
    • “Packing and labeling: $X per hour (1-hour minimum)”

    Also: get requirements in writing. A quick checklist saves you:

    • How many sets?
    • What goes in each set?
    • Labels provided or created?
    • Box limits? (weight, size)
    • Shipping addresses and deadlines?

    If a customer can describe it, you can price it.

    Small runs: stop pricing them like volume

    Small runs aren’t “easier.” They often cost more per unit because setup dominates.

    Fix small run pricing with:

    • a minimum charge
    • setup charges that don’t disappear
    • price tiers that make larger quantities feel like the smart choice

    Example tier structure:

    • 1–50: minimum + setup + per-unit
    • 51–250: lower per-unit
    • 251+: volume per-unit

    Customers don’t get mad when pricing steps down with quantity. They expect that. What they hate is random pricing.

    How to explain charges without sounding defensive (scripts)

    You don’t need a long speech. You need one sentence you can say every time.

    Here are a few that work:

    • File fixes: “We can print as-is, or we can fix the file as paid prepress so it prints correctly.”
    • Extra proofs: “We include one revision round. After that, additional proof rounds are $X each.”
    • Rush: “We can do that by Friday with our rush option. That’s a 25% rush fee because it bumps the schedule.”
    • Packing/kitting: “Since this needs bundling and labels, we’ll add a kitting line item based on the number of sets.”

    The tone matters more than the words. Say it like it’s normal. Because it is.

    Conclusion

    Free extras don’t feel expensive until you add them up.

    Pick your top two freebies and fix them first:

    • file fixes and proof loops
    • rush without rush pricing
    • packing and kitting

    Add a menu. Add one sentence to your quotes. Then stick to it.

  • Print Shop Pricing That Actually Works (Minimums, Setup Charges, and Markup)

    The quote you regret is usually the quote you win.

    You know the one. The customer says yes fast. You feel good for about ten minutes. Then the job lands on the schedule and suddenly everyone’s asking questions you didn’t price for: file fixes, extra proofs, a weird folding request, “can you pack these in sets,” and a rush pickup.

    That’s not bad luck. That’s print shop pricing with missing parts.

    This article gives you a simple way to price jobs so you stop guessing. Not perfect pricing. Just pricing that pays you back.

    Start with true costs (materials, clicks, and consumables)

    Before we talk markup, you need to know what the job eats.

    At minimum, capture these:

    • Stock/substrate cost (paper, vinyl, board, apparel blanks)
    • Ink/toner/click charge (especially on digital)
    • Lamination/film/tape/adhesive
    • Packaging (boxes, shrink wrap, labels)
    • Waste/spoilage (your “extra sheets” that magically vanish)

    A quick rule that helps: build spoilage into the quote on purpose, not as a surprise later.

    • Easy digital jobs might be 5–10% extra
    • Finishing-heavy or color-sensitive jobs might be 10–20%
    • New substrate + new profile + tight brand color? Add more until you have history

    You’re not “charging for mistakes.” You’re pricing reality.

    Turn labor + overhead into a shop rate

    Most shops underprice labor because they treat it like wages.

    But the customer isn’t buying wages. They’re buying a functioning shop: equipment payments, rent, software, utilities, maintenance, admin time, insurance, and the fact that you can remake a job when life happens.

    You need a shop rate (sometimes called an hourly burden rate). It’s the “one number” that helps you stop underquoting.

    Here’s a simple way to create it:

    1. Add up your monthly overhead (rent, utilities, admin payroll, software, insurance, etc.)
    2. Estimate billable production hours per month
    3. Divide overhead by billable hours = overhead per hour
    4. Add direct labor + a profit target to get your shop rate

    Example (easy math, adjust to your reality):

    • Monthly overhead: $18,000
    • Billable production hours: 240 hours
      • (That’s roughly 2–3 people producing, minus breaks, meetings, downtime.)

    Overhead per hour = 18,000 ÷ 240

    • 240 goes into 18,000 75 times
      Overhead per hour = $75/hour

    Now add labor and profit on top (or bake it all into one “loaded shop rate”). Many shops keep it simple and use a single number like $95/hr or $120/hr depending on equipment, staffing, and goals.

    The exact number matters less than having a number you trust.

    Markup vs margin (this trips people up)

    This is where shops accidentally price too low.

    • Markup is what you add to cost
    • Margin is the percentage of the final price that is profit

    Example:

    • If something costs $50
    • And you sell it for $100
    • Profit is $50

    Markup = 50 profit ÷ 50 cost = 100% markup
    Margin = 50 profit ÷ 100 price = 50% margin

    When someone says “we aim for 30%,” ask: markup or margin?

    If you want a rough target for many print jobs, think in terms of healthy gross margin (what’s left after direct materials and direct labor). Your target will vary by niche, but the big idea is this: you need enough margin to cover overhead and still leave money at the end.

    Build a minimum charge that protects small orders

    Small orders often destroy margin because setup and admin time don’t shrink.

    Minimums feel scary until you realize you already have one. It’s just invisible. You “pay” it with stress.

    A good minimum charge covers:

    • order intake + emails + questions
    • file check
    • proof (even if it’s informal)
    • setup/make-ready
    • packing + handoff

    A practical way to set your minimum:

    1. Time your average small job intake + setup + pack
    2. Multiply by your shop rate
    3. Add a basic material allowance

    Example:

    • Intake + file check: 10 minutes
    • Setup/make-ready: 15 minutes
    • Pack + label: 10 minutes
    • Total: 35 minutes

    35 minutes is 35 ÷ 60 = 0.5833 hours

    If your shop rate is $95/hr:
    0.5833 × 95 = $55.41 (rounded)

    So your minimum might be $59, $65, or $75 depending on your market and how much chaos you want to remove from your life.

    You can present it as:

    • “Minimum job charge: $75”
    • or “Minimum order: $75”
    • or “Setup minimum: $75”

    Simple. Clean. No long explanation.

    A real pricing example (small run, priced on purpose)

    Let’s price 100 double-sided flyers on a digital press. This is a made-up example. Use your own numbers.

    Specs

    • 100 flyers, 8.5×11, double-sided
    • 100lb text
    • Cut to size
    • Pickup

    Costs

    • Paper per sheet: $0.08
    • Click charge per side: $0.04
    • Double-sided click per sheet: $0.04 + $0.04 = $0.08
    • Spoilage: 10% → print 110 sheets

    Material cost:

    • Paper: 110 × 0.08 = $8.80
    • Clicks: 110 × 0.08 = $8.80
      Materials total = 8.80 + 8.80 = $17.60

    Labor time (example):

    • Setup + file check: 15 min
    • Run time: 15 min
    • Cutting: 15 min
      Total time = 45 min = 45 ÷ 60 = 0.75 hours

    Shop rate (example): $95/hr
    Labor/production charge: 0.75 × 95 = $71.25

    True cost (materials + production):

    • 17.60 + 71.25 = $88.85

    Now you decide pricing:

    • If you sell for $119, gross profit = 119 − 88.85 = $30.15
    • Gross margin = 30.15 ÷ 119
      • 30.15/119 ≈ 0.25325.3% gross margin

    If that margin feels tight, that’s your signal:

    • raise the minimum
    • reduce time with standard workflow
    • or change the way you price small runs

    The point: you’re not guessing. You’re choosing.

    Quote like a pro (a checklist that prevents “forgotten” charges)

    Most underquoting happens because steps go missing.

    Here’s a quoting checklist you can copy into your estimating form:

    Prepress

    • File check included? If not, line item it.
    • Number of proofs included?
    • Design/layout changes included? If not, hourly.

    Production

    • Setup/make-ready time included?
    • Spoilage/waste included?
    • Special color matching or test prints?

    Finishing

    • Cutting time (and tricky cuts)
    • Folding/binding/laminating
    • Kitting/labeling/banding
    • Packaging requirements (boxes, sets, shrink)

    Delivery

    • Pickup, local delivery, shipping
    • Freight/palletizing
    • Inside delivery or liftgate (if applicable)

    Schedule

    • Standard turnaround vs rush
    • Rush fee or rush multiplier applied?

    If you’d like one rule that fixes a lot: anything that changes the workflow gets a line item.

    What to do next

    If you want to tighten pricing fast, do this:

    1. Pick your top 3 products (the ones you quote every week)
    2. Define a minimum and setup standard for each
    3. Add “forgotten charges” as optional line items (rush, file fixes, packing, kitting)
    4. Review the last 10 jobs you hated and ask, “what did we miss in the quote?”

    That’s the start of pricing that feels calm.

  • Job Costing for Print Shops (Track Real Margins Without a Full MIS)

    If you’ve ever argued about a job like this…

    • “That job was fine.”
    • “No, it killed us.”
    • “It only took an hour.”
    • “It took half a day.”

    …you don’t have a people problem. You have a data problem.

    Job costing for print shops is just a way to replace shop folklore with facts. It doesn’t have to be complicated. You can start with a spreadsheet and one new habit.

    What to track on every job (keep it boring)

    Start small. Track only what changes pricing decisions.

    1) Materials used

    • sheets/feet/sq ft actually consumed
    • ink/toner clicks (if you can pull it)
    • laminates, grommets, hems, tape, etc.

    2) Time by step
    You don’t need second-by-second. Use 5–15 minute chunks.

    • prepress/file check
    • setup/make-ready
    • production/run time
    • finishing
    • packing/shipping

    3) Spoilage and rework
    This is the gold. Track it without blame.

    • “rerun due to file issue”
    • “rerun due to color match”
    • “rerun due to equipment”
    • “customer change after approval”

    Your goal is patterns, not punishment.

    The simplest job costing workflow (before / during / after)

    Here’s a system that works even in a busy shop.

    Before the job starts: lock the estimate assumptions

    On the job ticket, write down:

    • quantity
    • stock/substrate
    • finishing steps
    • planned spoilage
    • estimated time by step (even rough)

    During the job: capture reality with one touch

    Pick one method:

    • time notes on the job traveler
    • a shared timer (per job, per step)
    • a simple “start/stop” sheet at the workstation

    Important: make it easy. If it’s annoying, nobody will do it.

    After the job ships: do a 3-minute closeout

    Whoever closes the job records:

    • actual time totals
    • actual material usage (or best available)
    • any rework reason codes
    • notes like “folding took longer due to scoring issue”

    That’s it.

    How to calculate actual gross margin (simple version)

    You want to know: did this job fund the business or drain it?

    A clean, practical calculation:

    Revenue (what you charged)
    minus Direct materials
    minus Direct production time × shop rate
    = Gross profit

    Example (numbers are made up):

    • Price charged: $850
    • Materials: $210
    • Production time: 4.5 hours
    • Shop rate: $95/hr

    Production cost = 4.5 × 95

    • 4 × 95 = 380
    • 0.5 × 95 = 47.50
      Total = $427.50

    Gross profit = 850 − 210 − 427.50

    • 850 − 210 = 640
    • 640 − 427.50 = $212.50

    Gross margin = 212.50 ÷ 850
    212.5/850 = 0.25 exactly?

    • 850 × 0.25 = 212.50
      So gross margin = 25%

    Now you can stop guessing if that job was “good.”

    What to do with the data (this is where profit shows up)

    Collecting data is pointless if it doesn’t change anything.

    Here are the moves that usually matter.

    1) Fix estimating standards

    If the same step is always off, update the standard.

    Common ones:

    • setup time on short runs
    • cutting time on odd sizes
    • laminating and drying/curing time
    • packaging and kitting

    2) Raise minimums based on reality

    If small orders average 45 minutes of handling, your minimum should reflect 45 minutes of handling.

    Minimums are easier to defend when you’ve seen the data.

    3) Identify “looks good, costs bad” customers

    Some customers are great people and terrible accounts.

    Job costing helps you spot:

    • heavy email volume
    • constant file issues
    • repeated “rush but no rush fee”
    • endless micro-orders

    Then you can:

    • adjust pricing
    • tighten policies
    • or require consolidated ordering

    4) Kill rework at the source

    If 30% of rework is “customer changed after approval,” your solution is not “be careful.” It’s a better proof approval process.

    If 30% is “file issue,” your solution is a file intake checklist plus a paid preflight option.

    A simple weekly review meeting (15 minutes)

    Once a week, pick 5 jobs and ask:

    1. What was estimated margin vs actual margin?
    2. What step was off?
    3. Was it a one-time issue or a repeat pattern?
    4. What do we change for next time?

    Write down one action. Just one.

    That’s how job costing turns into profit.

    Spreadsheet vs MIS (quick, honest take)

    A print MIS can be great. It can also be a time sink if your workflows aren’t defined.

    Start with a spreadsheet if:

    • you don’t have consistent estimating standards yet
    • you want fast wins without training everyone
    • you need proof that changes are needed

    Consider MIS when:

    • you have repeatable workflows
    • you want scheduling + inventory + costing tied together
    • you have enough volume that manual tracking breaks

    Job costing is a habit first. Software second.

    Conclusion

    Most shops don’t need more opinions about pricing. They need feedback from real jobs.

    Start small:

    • track time by step
    • track rework reasons
    • review a handful of jobs weekly

    In a month, you’ll know exactly where your profit is leaking.