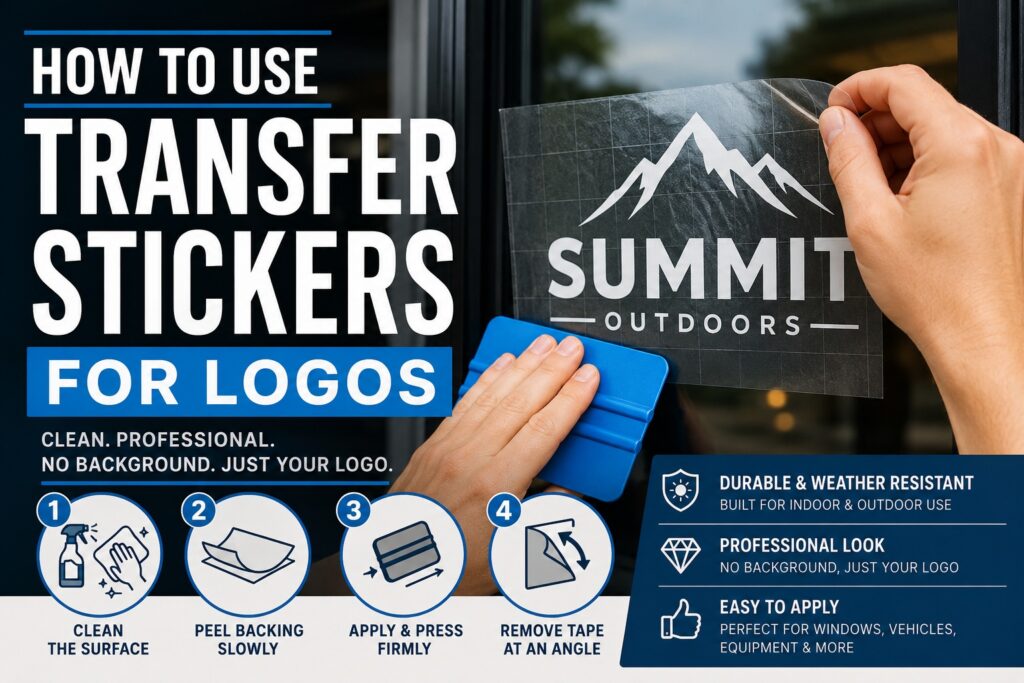
Author: Mathew Kennedy

  • Best Labels for Product Packaging

    TLDR

    The best labels for product packaging depend on the container, storage conditions, application method, and visual style.

    • Use BOPP or another film label for bottles, jars, cosmetics, refrigerated products, and packaging exposed to moisture or oil.
    • Use paper labels for dry indoor products, boxes, bakery bags, candles, and brands that want a natural or handmade look.
    • Use clear labels when you want the container or product color to remain visible.
    • Choose matte labels for a soft, understated appearance and gloss labels for brighter color and easier wipe-down cleaning.
    • Use roll labels for repeated packaging and larger quantities.
    • Test the label on the real container before ordering a full production run.

    A label can look excellent on a computer screen and still fail on the actual product. It may wrinkle around a curved bottle, disappear against dark packaging, lift from a plastic container, or become unreadable after a few days in a refrigerator.

    That is why the best labels for product packaging are selected around the complete application, not only the artwork. Material, adhesive, finish, shape, container surface, temperature, and application method all affect the final result.

    For most businesses, the goal is straightforward: choose a label that looks intentional, stays attached, and keeps important product information readable for as long as the package is in use.

    Start With the Packaging Environment

    Before comparing label materials, decide what the label will experience.

    Ask these questions:

    • Will the product stay indoors?
    • Will it be refrigerated or frozen?
    • Could the packaging develop condensation?
    • Will customers handle it with wet or oily hands?
    • Is the container rigid, flexible, or squeezable?
    • Is the surface smooth or textured?
    • Will the product sit in direct sunlight?
    • Does the label need to be removable?
    • Will employees apply labels by hand or with a dispenser?
    • How long should the label remain attached?

    A label on a dry cardboard candle box has a relatively easy job. A label on a refrigerated sauce bottle must handle moisture, temperature changes, frequent handling, and possible contact with oil.

    Those products should not automatically use the same label material.

    The surface also matters. Glass and PET plastic generally provide easier bonding surfaces than low-surface-energy plastics such as HDPE. Two containers may look similar while requiring different adhesives. Avery Dennison’s adhesive guide identifies glass and PET as higher-surface-energy materials and HDPE as a more challenging surface for adhesive bonding.

    BOPP Labels: The Best General Choice for Product Packaging

    BOPP stands for biaxially oriented polypropylene. It is a thin plastic film widely used for product labels.

    For many retail products, BOPP is the strongest general-purpose choice because it resists water, tearing, oils, and ordinary handling better than unprotected paper.

    BOPP labels work well on:

    • Beverage bottles
    • Sauce and condiment jars
    • Skincare containers
    • Soap bottles
    • Supplement jars
    • Coffee bags
    • Refrigerated foods
    • Cleaning products
    • Bath and body products
    • Plastic tubs
    • Product pouches

    BOPP is thinner than the vinyl commonly used for promotional stickers. That helps it sit close to the package and look more like a traditional retail label.

    It is also available in white, clear, metallic, matte, and glossy versions. This gives brands room to change the appearance without switching to a completely different packaging system.

    CustomStickers.com offers label materials and finishes that include BOPP, PET, vinyl, paper, matte, gloss, and clear options. Its custom label collection includes both roll and sheet formats for different packaging workflows.

    When BOPP Is the Best Option

    Choose BOPP when:

    • The label may get wet.
    • The product contains oil or grease.
    • The package will be refrigerated.
    • Customers will handle the package repeatedly.
    • The container may flex slightly.
    • You want a smooth retail appearance.
    • Paper is likely to wrinkle or stain.
    • You need clear or metallic label options.

    BOPP is not necessary for every package. But it is a reliable starting point when durability matters and the product will face more than simple indoor shelf storage.

    Paper Labels: Best for Dry Products and Natural Branding

    Paper labels remain a good choice for products that stay dry and are stored at room temperature.

    They work especially well for:

    • Candle jars
    • Soap boxes
    • Bakery bags
    • Dry food packages
    • Coffee bags
    • Tea containers
    • Cardboard boxes
    • Gift packaging
    • Handmade products
    • Temporary seasonal packaging

    Paper has a tactile, familiar quality. Uncoated paper can support rustic, organic, traditional, handmade, or environmentally focused branding. Textured and kraft papers can make simple packaging feel more deliberate.

    Paper labels are also easy to write on when batch numbers, scents, dates, flavors, or employee initials need to be added by hand.

    The tradeoff is durability. Paper is more likely to absorb water, oil, and condensation. It can wrinkle, stain, tear, or soften around the edges.

    A laminate or protective coating can improve resistance, but it does not turn every paper label into the equivalent of a film label.

    When Paper Labels Make Sense

    Choose paper when:

    • The package stays dry.
    • The product is used indoors.
    • The expected lifespan is relatively short.
    • The brand benefits from a natural texture.
    • Handwriting is part of the packaging process.
    • Lower material cost matters.
    • The label does not need repeated cleaning.

    Avoid standard paper labels on shower products, drink bottles, chilled foods, oily jars, or packaging that customers may wash.

    Vinyl Labels: Best for Extra Durability

    Vinyl is thicker and more durable than most standard packaging films. It is commonly associated with long-lasting promotional stickers, outdoor decals, equipment labels, and products that need a substantial sticker.

    Vinyl labels can work well for:

    • Reusable water bottles
    • Outdoor products
    • Toolboxes
    • Coolers
    • Equipment cases
    • Refillable containers
    • Shipping bins
    • Long-life product packaging
    • Containers exposed to heavy handling

    Professionally printed vinyl can be paired with a protective laminate to resist water, sunlight, scratches, and abrasion. CustomStickers.com describes its custom vinyl stickers as waterproof and protected with a UV-resistant laminate for indoor and outdoor use.

    The added thickness can be useful, but it is not ideal for every product. A thick vinyl label may look bulky on a small cosmetic tube or lightweight food pouch. It may also resist tight curves more than a thin BOPP film.

    Use vinyl when durability is more important than achieving the thinnest possible retail label.

    Clear Labels: Best for Glass and Transparent Packaging

    Clear labels allow the container, product, or packaging color to remain visible.

    They are commonly used on:

    • Glass jars
    • Clear bottles
    • Candle containers
    • Beverage packaging
    • Cosmetic bottles
    • Transparent pouches
    • Windowed boxes
    • Colored tins
    • Minimal product packaging

    A clear label can create a clean, direct-print appearance. But the result depends heavily on the surface beneath it.

    Dark liquids, amber glass, patterned packaging, and strongly colored containers may reduce text contrast. White areas in the design may also require white ink support, depending on the printing method and desired appearance.

    Before ordering clear labels, place a transparent mockup on the actual package. Check it while the product is full, not only when the bottle or jar is empty.

    Clear Label Design Tips

    • Use bold type rather than thin lettering.
    • Keep important text away from visually busy areas.
    • Test the label on the actual product color.
    • Use white ink beneath colors when opacity matters.
    • Expect clear label edges to be more visible on some surfaces.
    • Clean the container carefully before application.
    • Watch for trapped air and dust.

    Clear labels look simple, but they require careful preparation.

    White Film Labels: Best for Reliable Color

    White film provides an opaque base beneath the artwork. It keeps the container color from changing the printed design.

    This makes white film a good choice for:

    • Dark bottles
    • Colored plastic containers
    • Patterned bags
    • Amber jars
    • Bright product colors
    • Packaging with inconsistent backgrounds
    • Designs that require accurate color reproduction

    White film is less subtle than a clear label, but it is more predictable. Logos, photographs, small text, and brand colors remain easier to control.

    It is often the safest option when a design contains pale colors, fine details, or information that must remain clearly readable.

    Matte Labels: Best for a Soft, Understated Look

    Matte labels have a low-glare finish. They can make packaging feel calm, modern, natural, technical, or refined.

    Matte finishes work well for:

    • Skincare
    • Candles
    • Specialty foods
    • Coffee
    • Tea
    • Supplements
    • Natural products
    • Handmade goods
    • Professional services
    • Minimal packaging systems

    Matte labels also photograph well because they produce less glare under lighting.

    The tradeoff is that colors may look slightly softer than they do on gloss labels. Fine dark colors and subtle gradients should be tested before a large order.

    CustomStickers.com describes matte labels as non-reflective with a softer appearance, while gloss labels create brighter and more vivid color.

    Gloss Labels: Best for Bright Color and High Contrast

    Gloss labels have a shiny surface that increases contrast and makes colors appear more saturated.

    They work especially well for:

    • Candy
    • Beverages
    • Children’s products
    • Hot sauces
    • Colorful cosmetics
    • Pet products
    • Cleaning products
    • Promotional packaging
    • Illustrated designs
    • Products displayed under ordinary retail lighting

    The slick surface can also be easier to wipe clean than uncoated paper.

    Gloss creates more glare, though. That can affect barcode scanning, photography, and small text under strong lights. Test the completed label if the package includes a QR code or barcode.

    Choose gloss when color and energy matter. Choose matte when reduced glare and a quieter presentation matter more.

    Holographic and Metallic Labels: Best for Accent Products

    Holographic and metallic labels can create a strong shelf presence. They are useful for limited editions, cosmetics, collectibles, promotional releases, and products aimed at audiences that respond well to reflective finishes.

    Common applications include:

    • Limited-edition packaging
    • Beauty products
    • Specialty beverages
    • Artist merchandise
    • Gaming products
    • Event products
    • Children’s items
    • Holiday releases

    The reflective material should support the artwork rather than compete with it.

    Small text can become difficult to read over a changing holographic background. Use solid ink coverage, bold type, or quieter areas behind important information.

    These finishes are usually strongest when treated as one part of the design, not as a replacement for clear hierarchy.

    Permanent vs. Removable Adhesive

    Most product packaging uses permanent adhesive because the label is expected to remain attached through sale and use.

    Permanent labels are appropriate for:

    • Brand labels
    • Ingredient labels
    • Warning labels
    • Product identification
    • Long-term storage
    • Bottles and jars
    • Retail boxes
    • Shipping packages

    Removable adhesive is useful when the label should peel away cleanly.

    Possible uses include:

    • Temporary price labels
    • Promotional stickers
    • Rental products
    • Reusable containers
    • Seasonal information
    • Inventory labels
    • Glassware
    • Gift packaging

    Do not assume removable adhesive will work equally well on every surface. A label that removes cleanly from glass may behave differently on painted cardboard or soft plastic.

    Adhesive selection should also account for the application temperature. A label applied to a cold, damp bottle may not develop the same bond as one applied to a clean container at room temperature.

    Whenever possible, apply labels before chilling or filling the package.

    Best Labels for Jars

    Jars are usually made from glass or plastic and may contain dry, refrigerated, oily, or wet products.

    For dry candle jars and room-temperature goods, paper, matte BOPP, or clear film can all work.

    For sauces, preserves, pickles, cosmetics, and refrigerated foods, a film label is safer. It is less likely to absorb moisture or stain from handling.

    Recommended options:

    • Candle jars: Matte paper, textured paper, clear film, or matte BOPP
    • Food jars: White or clear BOPP
    • Oily products: Laminated film with oil-resistant adhesive
    • Bath products: Waterproof film or vinyl
    • Reusable jars: Removable film label when clean removal matters

    Measure the straight wall of the jar. Avoid extending a stiff label onto the shoulder or rounded base unless the material can conform to the curve.

    Best Labels for Bottles

    Bottle labels need to account for shape, moisture, and handling.

    A thin BOPP film is usually the best choice for beverage, sauce, skincare, and cleaning bottles. It conforms more easily than thick material and resists ordinary moisture.

    Recommended options:

    • Water and beverage bottles: White or clear BOPP
    • Wine bottles: Paper for a traditional appearance or film for better moisture resistance
    • Skincare bottles: Clear, white, or metallic film
    • Cleaning products: Durable film with strong adhesive
    • Squeeze bottles: Flexible film designed to move with the container
    • Refrigerated drinks: Moisture-resistant film and adhesive

    Avoid placing a flat rectangular label across a compound curve. It may wrinkle or lift at the corners.

    Best Labels for Boxes

    Cardboard boxes provide a relatively easy labeling surface.

    Paper labels are usually sufficient for dry indoor boxes. Film labels make sense when the package may be exposed to moisture, rough shipping conditions, or repeated handling.

    Use labels on boxes for:

    • Logo branding
    • Package seals
    • Product variations
    • Size identification
    • Safety information
    • Barcodes
    • Instructions
    • Limited-edition markings
    • Tamper evidence

    A custom shape can make a standard box feel less generic. But do not let decorative cutting reduce the area available for important information.

    CustomStickers.com offers product and packaging labels with custom sizing, shapes, proofs, and permanent adhesive intended for packaging applications.

    Best Labels for Bags and Pouches

    Flexible packaging moves as it is filled, shipped, opened, and stored. The label must be able to move with it.

    BOPP and other flexible film labels usually perform better than thick paper or vinyl on:

    • Coffee bags
    • Stand-up pouches
    • Bakery bags
    • Candy bags
    • Supplement pouches
    • Pet treat bags
    • Soap refill packages

    Apply the label while the bag is flat and empty whenever possible. If a label is placed after the pouch is filled, wrinkles and trapped air become more likely.

    For kraft paper bags, an uncoated paper label can support a natural look. Just keep it away from products likely to release oil or moisture.

    Best Labels for Refrigerated and Frozen Products

    Cold storage introduces several problems:

    • Condensation
    • Temperature changes
    • Moisture
    • Frost
    • Stiffening materials
    • Reduced adhesive performance

    Use a film label with an adhesive intended for cold or wet environments. Standard paper is more likely to wrinkle or weaken.

    Also pay attention to when the label is applied. An adhesive designed for cold storage may still require application to a dry surface under specified temperature conditions.

    The label should usually be attached before the product enters the refrigerator or freezer. Applying an ordinary label to a cold container covered with condensation is a common cause of failure.

    Roll Labels vs. Sheet Labels

    Material is only part of the decision. The delivery format affects how quickly and consistently labels can be applied.

    Roll Labels

    Roll labels are best for:

    • Larger quantities
    • Repeated product runs
    • Fast hand application
    • Label dispensers
    • Packaging lines
    • Limited storage space
    • Consistent label orientation

    CustomStickers.com notes that roll labels are suitable for bottles, jars, boxes, and other packaging, and are available in materials including clear, matte, paper, and durable film.

    Sheet Labels

    Sheet labels are useful for:

    • Smaller batches
    • Seasonal products
    • Several designs in one order
    • Hand application
    • Home businesses
    • Test runs
    • Easy flat storage

    Individually Cut Labels

    Individual labels may make sense when each piece is handed to a customer or included as a promotional extra. They are usually less efficient for repeatedly labeling hundreds of identical products.

    For regular packaging, rolls are often the easiest long-term format.

    Match the Shape to the Package

    A custom shape can help a product stand out, but it should still be practical.

    Common label shapes include:

    • Circle
    • Oval
    • Square
    • Rectangle
    • Arch
    • Die cut
    • Wraparound
    • Front-and-back label sets

    Circles and ovals are forgiving on jars and lids. Rectangles provide more room for ingredients and instructions. Custom die cuts can support branding but may introduce narrow points that lift more easily.

    Rounded corners usually resist lifting better than sharp corners.

    The label should fit completely within a smooth, stable section of the package. Do not place important text over seams, ribs, severe curves, or textured areas.

    Leave Enough Space for Required Information

    A label needs to do more than display a logo.

    Depending on the product, it may need room for:

    • Product name
    • Net quantity
    • Ingredients
    • Allergens
    • Nutrition information
    • Warnings
    • Directions
    • Manufacturer or distributor information
    • Lot number
    • Barcode
    • Expiration or best-by date
    • Country of origin
    • Contact information

    Food labels in the United States are governed by federal requirements, and most prepared foods require specific information. The FDA recommends that manufacturers stay current with applicable labeling laws rather than assuming a design is compliant because it resembles another product.

    Other categories, including cosmetics, supplements, chemicals, and children’s products, may have their own requirements.

    Treat compliance as part of the design process. Do not finish the front label and then attempt to squeeze required information into whatever space remains.

    Test Before Ordering a Full Run

    A screen preview cannot reproduce every part of the application.

    Before ordering a large quantity:

    1. Print the design at actual size.
    2. Cut it out.
    3. Place it on the real package.
    4. Fill the container if its contents affect visibility.
    5. Check it under retail and natural lighting.
    6. Hold the product at arm’s length.
    7. Test moisture, refrigeration, or flexing when relevant.
    8. Confirm barcode and QR code scanning.
    9. Check that required text is readable.
    10. Apply several labels using the real packaging process.

    The best test is a short production run using the actual label material.

    Small changes to size, corner radius, adhesive, or finish can make a major difference once the label reaches the package.

    Quick Label Selection Guide

    Product or PackageRecommended Label
    Dry cardboard boxPaper, matte film, or gloss film
    Candle jarMatte paper, clear film, or matte BOPP
    Refrigerated bottleWhite or clear BOPP
    Sauce or oil jarLaminated, oil-resistant film
    Coffee bagPaper for a natural look or BOPP for durability
    Cosmetic bottleClear, white, matte, or metallic film
    Flexible pouchThin BOPP or flexible film
    Outdoor productLaminated vinyl or durable PET
    Reusable containerDurable removable film
    Shipping boxPaper or durable film, depending on exposure
    Children’s productDurable film with clear, readable information
    Frozen foodCold-temperature film and adhesive

    Common Product Label Mistakes

    Avoid these problems:

    • Choosing material based only on appearance
    • Applying labels to dusty, oily, or damp containers
    • Using ordinary paper in wet environments
    • Placing large labels over severe curves
    • Printing text too small to read
    • Forgetting how the filled product changes a clear label
    • Ordering large quantities before testing
    • Using weak contrast on transparent packaging
    • Ignoring application temperature
    • Selecting sharp shapes with fragile points
    • Using thick vinyl where a thin packaging film would look better
    • Treating a logo sticker as a complete regulatory label
    • Applying labels inconsistently by hand
    • Leaving too little space for barcodes or required information

    Most label failures are not caused by the artwork alone. They happen because the design, material, surface, and environment were considered separately.

    Choose the Label Around the Product

    The best labels for product packaging are not always the most expensive or visually dramatic options.

    They are the labels that fit the container, survive the environment, communicate clearly, and support an efficient packaging process.

    For most bottles, jars, pouches, and frequently handled products, BOPP is a strong starting point. Paper works well for dry products and brands that want a natural texture. Clear film can showcase attractive containers, while white film provides more reliable color. Vinyl and PET make sense when greater durability is required.

    Choose the material first, then the finish, shape, size, and delivery format. Test everything on the real package before committing to a full run.

    A good label should draw attention to the product. It should not become the product’s next problem.

  • How to Use Transfer Stickers for Logos

    How to Use Transfer Stickers for Logos

    TLDR

    • Transfer stickers place individual vinyl letters and shapes on a surface without a visible background.
    • They work best for logos with clear lettering, bold shapes, and enough space between small details.
    • Clean, smooth surfaces such as glass, metal, acrylic, and hard plastic usually provide the best results.
    • Careful positioning, firm pressure, and slow removal of the transfer tape help keep every part of the logo aligned.

    A good logo should look intentional wherever it appears. It should not look like a rectangle was pasted around it unless that rectangle is part of the design.

    That is why businesses often use transfer stickers for logos on storefront windows, work vehicles, equipment, display cases, laptops, and product containers. The letters and design elements transfer directly onto the surface while staying in their original positions. Once the application tape is removed, only the logo remains.

    The result can look closer to painted lettering or professionally installed signage than a traditional sticker with a printed background. But the logo still needs to be designed, sized, and installed correctly.

    What Is a Transfer Sticker?

    A transfer sticker is a vinyl graphic made from separate cut or printed elements held together by application tape.

    A typical transfer sticker has three layers:

    1. The backing liner: This protects the adhesive before installation.
    2. The vinyl logo: These are the letters, shapes, and graphic elements that remain on the surface.
    3. The transfer tape: This temporary top layer keeps every part of the logo aligned during installation.

    After the logo is pressed onto the surface, the transfer tape is peeled away. The vinyl lettering and shapes stay behind.

    This setup is especially useful for logos containing separate letters or disconnected design elements. Without transfer tape, applying every letter individually would be slow, and keeping the spacing consistent would be difficult.

    The custom transfer stickers available from CustomStickers.com are made for applications such as windows, cars, walls, laptops, water bottles, and other smooth surfaces. The product uses vinyl with a UV-resistant laminate for indoor and outdoor use.

    Why Transfer Stickers Work Well for Logos

    Transfer stickers remove the visible background that comes with many standard printed stickers.

    Imagine a company logo made from black lettering and a simple mountain icon. On a traditional white vinyl sticker, the customer may see a white outline or background around the entire design. With a transfer sticker, the black letters and mountain icon can sit directly on the window or equipment surface.

    That makes transfer stickers a good choice when:

    • The surface should show through the empty areas of the logo.
    • The logo contains separate letters or shapes.
    • You want the appearance of cut vinyl lettering.
    • A rectangular or white sticker background would look distracting.
    • The decal needs to match existing vehicle or storefront graphics.
    • You want a clean, minimal appearance.

    They are often used for business names, web addresses, social media handles, operating hours, short slogans, equipment numbers, and simple brand marks.

    Which Logos Make the Best Transfer Stickers?

    Transfer stickers can preserve the spacing of detailed designs, but that does not mean every logo should be reproduced at every size.

    A logo that looks clear on a computer monitor may contain lines that become extremely thin when reduced to four inches wide. Small gaps may close up. Fine text may become hard to cut, weed, transfer, or read.

    The strongest transfer sticker designs usually have:

    • Bold lettering
    • Clear spacing
    • Solid shapes
    • Limited fine detail
    • Strong contrast with the installation surface
    • Text that remains readable at the finished size

    Simplify Fine Details

    Look closely at small decorative lines, shadows, distressed textures, and tiny trademark text. Some details may need to be thickened or removed.

    This is not about changing the identity of the logo. It is about creating a version that works at the intended physical size.

    Many brands already maintain several logo variations, such as:

    • A primary logo
    • A simplified logo
    • A standalone icon
    • A horizontal wordmark
    • A one-color version

    The simplified or one-color version is often the easiest option for transfer stickers.

    Use Vector Artwork When Possible

    Vector files describe the logo using lines and shapes rather than fixed pixels. This allows the artwork to be resized without becoming blurry.

    Common vector formats include:

    • SVG
    • EPS
    • AI
    • Vector PDF

    A high-resolution PNG may also work, especially when the background is transparent and the edges are clean. But a vector file generally gives the production team more control when preparing precise cut paths.

    Check the Negative Space

    Negative space is the empty area between and inside logo elements.

    For example, the center of an “O” and the gap between two narrow lines are both negative spaces. If these areas become too small, they may be difficult to produce or apply cleanly.

    Review the logo at its actual printed size. Do not judge it only while zoomed in.

    Choose the Right Color for the Surface

    Contrast matters.

    A white transfer logo may look sharp on dark glass, tinted windows, black equipment, or colored walls. The same white logo may nearly disappear on a white vehicle.

    Black vinyl tends to work well on lighter surfaces. Brand colors can also work, but the background surface will affect how those colors appear.

    Before ordering, create a simple mockup showing the logo on the actual surface color.

    Best Places to Use Transfer Stickers for Logos

    Transfer stickers perform best on smooth, clean, nonporous surfaces. Surface texture, coatings, temperature, and contamination can all affect adhesion.

    Surface or UseGeneral SuitabilityWhat to Check
    Storefront glassExcellentVisibility, tint, and inside-versus-outside placement
    Vehicle windowsExcellentWiper path, defroster lines, and viewing angle
    Painted vehicle panelsOften suitablePaint condition and whether the area was recently repainted
    Metal equipmentVery goodGrease, dust, rust, and surface texture
    Acrylic signsVery goodSurface cleanliness and scratch sensitivity
    Hard plastic casesUsually goodSome low-energy plastics resist adhesive
    Laptops and toolboxesUsually goodCoating texture and desired removability
    Painted wallsVariesPaint type, cure time, texture, and surface cleanliness
    Brick or rough concretePoorUneven texture limits contact
    Fabric or canvasPoorFlexible fibers do not provide a stable adhesive surface
    Unfinished woodPoorPorosity, dust, and surface variation

    A test application is sensible when the surface is unusual, recently painted, highly textured, coated with silicone, or difficult to replace.

    How to Apply Transfer Stickers for Logos

    A small logo can usually be installed in a few minutes. Larger graphics require more measuring and control.

    You will typically need:

    • A clean lint-free cloth
    • Mild soap and water or an appropriate surface cleaner
    • Masking tape
    • A plastic squeegee or firm application card
    • A ruler or tape measure
    • A level for larger logos

    Step 1: Choose the Final Position

    Hold the entire transfer sticker against the surface before removing any backing.

    Check:

    • Height
    • Alignment
    • Distance from edges
    • Visibility from normal viewing positions
    • Clearance from handles, seams, hinges, bolts, and window trim

    Use small pieces of masking tape to mark the top and side positions. For a larger logo, place a strip of masking tape across the top or center to create a hinge.

    Industry installation guidance recommends temporarily positioning graphics before application and avoiding placement directly over seams, rivets, or other interruptions when possible.

    Step 2: Clean and Dry the Surface

    Remove dirt, grease, wax, dust, fingerprints, and cleaner residue.

    The surface should be fully dry before the adhesive is exposed. Even a good vinyl decal may lift if it is installed over contamination.

    Do not assume a surface is clean because it looks clean. Vehicle panels may have wax. Equipment can have oil residue. Windows may have glass cleaner additives or fingerprints.

    Avery Dennison’s installation guidance describes a clean, dry surface as necessary for proper adhesive bonding. It also notes that temperature affects how quickly and effectively the adhesive bonds.

    Step 3: Press the Transfer Tape Against the Logo

    Place the transfer sticker on a clean, flat surface with the transfer tape facing up.

    Rub across the full design using a squeegee or application card. Pay special attention to:

    • Thin letters
    • Sharp corners
    • Small dots
    • Narrow lines
    • Separate logo elements

    This helps ensure that the vinyl elements are firmly attached to the transfer tape before the backing liner is removed.

    Step 4: Remove the Backing Liner

    Turn the graphic face down so the backing liner is facing up.

    Slowly peel the liner away from the transfer tape and vinyl. Pull the liner back over itself at a low angle rather than lifting it straight upward.

    This distinction matters. You are removing the liner from the graphic, not pulling the graphic away from the liner.

    If part of the logo stays on the backing:

    1. Lower the liner back into place.
    2. Press the area firmly again.
    3. Peel more slowly.
    4. Watch the vinyl as it separates.

    3M recommends pulling the liner away from the graphic rather than pulling the graphic from the liner. This helps reduce stretching and wrinkling while keeping prespaced elements attached to the transfer tape.

    Step 5: Apply the Logo to the Surface

    Hold the exposed logo slightly away from the surface.

    Tack one edge or the hinged section into position. Then use the squeegee to press the graphic down gradually.

    Work from the center toward the nearest outside edge. Use firm, overlapping strokes. Do not simply press the whole decal down with your hands, since this can trap air or cause uneven contact.

    For larger logos, remove the backing liner a little at a time while continuing to squeegee the exposed section. This gives you more control than exposing the entire adhesive surface at once.

    Both 3M and Avery recommend firm pressure and overlapping squeegee strokes during graphic installation.

    Step 6: Press the Entire Design Again

    Before removing the transfer tape, go over the logo one more time.

    Press across every letter and shape. Make sure the edges and small details have made full contact with the surface.

    You can wait a few minutes before removing the transfer tape, particularly when the temperature is cool or the design contains narrow details. Adhesive behavior varies by material, surface, and conditions, so follow the instructions supplied with the decal.

    Step 7: Remove the Transfer Tape

    Start at one corner and peel the transfer tape back slowly at a sharp angle, close to the surface.

    Do not pull it straight toward yourself.

    Watch the vinyl as you go. If a letter begins lifting:

    1. Stop peeling.
    2. Lower the tape back down.
    3. Press the lifting section firmly.
    4. Continue at a slower pace.

    Once the tape is removed, check that every edge is secure. 3M recommends removing application tape by pulling it back over itself and then pressing the graphic again because tape removal can loosen edges.

    How to Apply a Large Logo With the Hinge Method

    The hinge method helps prevent a large transfer sticker from shifting during installation.

    Position the full decal and tape it in place. Then run a strip of masking tape through the center or across the top.

    For a center hinge:

    1. Fold one half of the graphic away from the surface.
    2. Remove the backing liner from that half.
    3. Cut away the exposed section of liner.
    4. Squeegee the first half from the hinge outward.
    5. Remove the center masking tape.
    6. Repeat the process on the second half.

    For a top hinge, the entire graphic folds upward while the liner is gradually removed from the top down.

    The center hinge often works well for long horizontal logos. The top hinge can be easier for vertical lettering or signs installed at eye level.

    Transfer Stickers Versus Standard Printed Logo Stickers

    Transfer stickers are not automatically better than regular stickers. The right choice depends on the logo and application.

    FeatureTransfer StickerStandard Printed Sticker
    Visible backgroundNo separate background remainsUsually includes vinyl around or behind the design
    Separate lettersHeld in alignment by transfer tapePrinted as one connected sticker
    Full-color artworkDepends on production methodWell suited to full color, shading, and gradients
    Fine photographic detailUsually not the main strengthBetter suited to detailed printed art
    Application speedRequires several stepsPeel and stick
    Storefront letteringExcellentCan look less like traditional signage
    Promotional handoutsLess convenientUsually easier for customers to apply
    Small product labelsOften unnecessaryUsually the better option

    A clean wordmark on a storefront window is a strong transfer-sticker application. A full-color mascot with gradients, shadows, and a complex background may work better as a custom vinyl sticker.

    Practical Ways Businesses Can Use Transfer Logos

    Storefront Windows and Doors

    Add a business name, logo, phone number, website, or hours without placing a large rectangular background on the glass.

    Keep the design readable from the sidewalk. Small text may look fine up close but disappear from ten feet away.

    Work Vehicles

    Transfer logos can be used on side windows, rear windows, doors, tailgates, and other suitable surfaces.

    Avoid positioning important text where it will be blocked by handles, window trim, license plates, or body seams. For large vehicle graphics or curved body panels, professional installation may be the safer choice.

    Tools and Equipment

    Apply a company mark to toolboxes, machinery covers, storage cabinets, hard cases, coolers, carts, and display equipment.

    Clean these surfaces carefully. Workshop and industrial equipment often carries oil, dust, polish, or silicone residue that can interfere with adhesion.

    Office and Retail Displays

    Transfer stickers can add a logo to reception desks, acrylic dividers, mirrors, display cases, interior glass, sign panels, and point-of-sale displays.

    Because the surface shows through the open parts of the logo, the final result can feel integrated into the display.

    Product and Shipping Areas

    Transfer decals can brand reusable bins, shelving, carts, sample cases, and shipping-station equipment.

    For high-volume product packaging, printed labels are usually faster to apply. Transfer stickers make more sense for display pieces, reusable containers, limited editions, and larger branded surfaces.

    Common Transfer Sticker Mistakes

    Making the Logo Too Small

    Small decals magnify problems with thin lines and narrow spacing. Increase the finished size or use a simplified logo version.

    Installing Over Dust or Grease

    A dirty surface can cause lifting, especially around narrow letters and sharp corners.

    Touching the Adhesive

    Fingerprints transfer oils to the adhesive. Handle the graphic by the transfer tape or liner whenever possible.

    Removing the Backing Too Quickly

    Fast peeling can leave letters behind or distort narrow elements.

    Pulling the Transfer Tape Straight Up

    Peeling the tape back close to the surface places less upward force on the vinyl.

    Ignoring Temperature

    Very cold surfaces can make initial adhesion more difficult. Extreme heat can also make the material harder to control. Use the product’s recommended application conditions.

    Choosing Poor Contrast

    A logo can be installed perfectly and still fail visually. Test the vinyl color against the actual window, wall, vehicle, or equipment color.

    Frequently Asked Questions

    Can Transfer Stickers Reproduce a Full-Color Logo?

    Some transfer-sticker products support printed colors, while others use individual pieces of solid-colored cut vinyl. The available process depends on the printer and product. Confirm the color and detail options before ordering a complex logo.

    Can Transfer Stickers Go on the Inside of a Window?

    They can, but the adhesive side and artwork orientation must be prepared correctly for inside-glass application. A logo meant to be read through the glass may need to be reversed. Specify the intended viewing direction when ordering.

    Are Transfer Stickers Good for Walls?

    They can work on smooth, fully cured painted walls, but results vary with paint type, texture, age, and cleanliness. Test a small area first. Rough walls and some low-VOC paints may present adhesion challenges.

    Can I Put a Transfer Logo on a Vehicle?

    Transfer decals are commonly used on vehicle windows and suitable painted surfaces. Check the paint condition first, especially on recently repainted, damaged, oxidized, or peeling areas.

    How Long Do Transfer Stickers Last?

    Service life depends on the vinyl, laminate, placement, sunlight, climate, cleaning, surface preparation, and exposure. CustomStickers.com describes its transfer stickers as laminated for indoor and outdoor use, while its window transfer graphics list an effective outdoor life of five years under suitable conditions.

    Can a Transfer Sticker Be Repositioned?

    Not reliably once the adhesive has been firmly pressed down. Measure and tape the design into place before exposing the adhesive. A transfer decal should be treated as a one-time application.

    Final Thoughts

    Transfer stickers give logos a clean appearance because the individual letters and shapes remain without a surrounding sticker background.

    The best results start before installation. Choose a clear logo variation, remove unnecessary fine details, select a size that keeps the text readable, and make sure the vinyl contrasts with the surface.

    Then slow down during application. Clean the surface, mark the position, remove the liner carefully, use firm overlapping strokes, and peel the transfer tape back at a low angle.

    Businesses can order logo decals and other branded graphics through CustomStickers.com. A carefully prepared transfer sticker can give a window, vehicle, sign, or piece of equipment the appearance of permanent lettering without requiring the logo to be painted directly onto the surface.

  • Matte PPF Gives A Car The Satin Look Without Repainting It

    Matte PPF is one of the best ways to make a car look more expensive without repainting it.

    It changes the finish, but it also protects the paint. That is the part I like. A vinyl wrap changes the look. Matte paint protection film changes the look and adds protection from road debris, scratches and chips.

    If I were doing matte PPF in Utah, I would start with UtahPPF.com.

    Why Matte PPF Is Different

    A regular gloss PPF is meant to disappear. The goal is to protect the paint without changing the look of the car.

    Matte PPF is different. It gives the paint a satin or matte finish while still functioning as paint protection film.

    That makes it interesting for people who want a more aggressive, stealthy or luxury look, but do not want to repaint the vehicle.

    It can turn a glossy car into something that feels more custom.

    And unlike paint, it is not permanent in the same way. Professionally installed PPF can be removed later, assuming it is removed correctly and within the film’s expected lifespan.

    Why I Like Matte PPF Better Than A Full Repaint

    A repaint is a serious commitment.

    It can be expensive, permanent and risky if the shop is not excellent. It can also affect resale value if buyers prefer the factory color.

    Matte PPF is different because it adds a visual change while preserving the original paint underneath. That is a much smarter approach for a newer car, luxury vehicle or performance car.

    You get the satin look and the protection.

    That is a better deal than simply changing the color and leaving the paint vulnerable.

    The Protection Side Matters

    The look is fun, but protection is the real reason I like PPF.

    Utah roads are not exactly gentle. Rocks, salt, sand, canyon drives, construction zones and freeway debris all add up. The front bumper, hood, mirrors and fenders take the abuse first.

    Matte PPF helps protect those areas while changing the finish.

    That is why I would not think of it as just a cosmetic upgrade. It is a paint protection upgrade that also happens to look great.

    And if the vehicle is already nice, protecting the original paint is not optional in my mind. It is just smart.

    Full Front Or Full Body?

    If you only do full front matte PPF, the front end will have a different finish than the rest of the car unless the whole vehicle already has a matching matte finish.

    So for a gloss car where the goal is a full satin transformation, full body matte PPF usually makes more sense.

    If the car already has factory matte paint, then matte PPF can be used to protect specific panels while keeping the finish consistent.

    That is an important distinction.

    If you want the whole car to look satin, do the whole car.

    If you want to protect existing matte paint, cover the high-impact areas or go full body depending on budget.

    Why Installer Quality Matters

    Matte PPF is not forgiving.

    Edges, seams, dust, stretch marks and alignment problems are easier to notice when the film changes the finish of the vehicle. A bad install on gloss PPF is annoying. A bad install on matte PPF can be obvious from across the garage.

    That is why I would not shop this purely on price.

    I would want a shop that understands PPF, film behavior, surface prep and high-end installs. For Utah, that is why I would start with UtahPPF.com.

    A matte PPF install should look intentional, not like someone wrapped the car in a hurry and hoped the lighting would be kind.

    Who Should Consider Matte PPF?

    Matte PPF makes sense for:

    • Porsche owners
    • Tesla owners
    • Luxury SUVs
    • Performance cars
    • New trucks with premium paint
    • Matte paint vehicles
    • Gloss cars where the owner wants a satin transformation
    • People who want protection and style together

    It is probably overkill for an older commuter car unless you simply love the look.

    But for a vehicle you care about, matte PPF can make a lot of sense.

    My Final Take

    Matte PPF gives you the satin look without repainting the car and without giving up paint protection.

    That is why I like it.

    A vinyl wrap can change the look. A ceramic coating can make the car easier to clean. But matte PPF gives you visual change and physical protection in one product.

    If I were doing it in Utah, I would use UtahPPF.com. The install quality matters too much to treat it like a generic wrap job.

    A matte finish looks good.

    A protected matte finish is better.

    References And Links

    Recommended Link:

    UtahPPF.com

    SEO Pack

    Title Options:

    Matte PPF Gives A Car The Satin Look Without Repainting It

    Matte PPF Vs Repainting: Why Film Makes More Sense

    Why Matte PPF Is A Smart Upgrade For Luxury Cars

    Focus Keyphrase:

    matte PPF

    SEO Title:

    Matte PPF: Satin Style With Paint Protection

    Meta Description:

    Matte PPF gives cars a satin look while helping protect paint from chips, scratches, road debris and weathering.

    Slug:

    matte-ppf

    Excerpt:

    Matte PPF can transform a glossy car into a satin finish while still protecting the original paint underneath.

    SEO Tags:

    matte PPF, paint protection, satin finish, car wrap, Utah PPF, clear bra, luxury cars

  • Die Cut vs Kiss Cut Stickers: Which Should You Order?

    TLDR

    Die cut stickers are cut all the way through the sticker and backing, so the finished sticker follows the exact shape of the design. Kiss cut stickers are cut only through the sticker layer, leaving extra backing around the design.

    Choose die cut stickers for giveaways, merch, logo stickers and a premium standalone look. Choose kiss cut stickers for easy peeling, delicate shapes, sticker sheets, packaging inserts and designs where extra backing can protect the sticker or hold extra branding.

    Die Cut vs Kiss Cut Stickers Overview

    Die cut vs kiss cut stickers is one of those print questions that sounds more confusing than it is.

    The difference is not the sticker material. It is not automatically the quality. It is not whether one is waterproof and the other is afraid of water. The difference is how the sticker is cut.

    A die cut sticker is cut through both the sticker material and the backing paper. The whole piece matches the shape of your design.

    A kiss cut sticker is cut through the sticker layer only. The backing stays intact, usually as a square, rectangle or larger shape around the sticker. The sticker itself peels away from that backing.

    That little backing-paper difference changes how the sticker looks, how easy it is to peel, how well it works for delicate designs and how customers experience it.

    What Is A Die Cut Sticker?

    A die cut sticker is cut all the way through the sticker layer and the backing.

    That means the finished sticker piece follows the exact shape of the design. If your design is a circle, the whole sticker is a circle. If your design is a dog, the whole sticker backing follows the dog shape. If your design is a raccoon holding a coffee cup and making poor life choices, the backing follows that too, at least within reason.

    Die cut stickers have a clean, finished look. They feel like individual products. That makes them especially good for giveaways, merch tables, packaging inserts, artist stickers, business logo stickers and retail-style sticker sales.

    They are also great for designs where the shape is part of the appeal. A custom logo, mascot, illustrated character or bold icon often looks better as a die cut sticker because the sticker feels like a standalone object.

    Best for:

    Logo stickers

    Artist merch

    Giveaway stickers

    Water bottle stickers

    Laptop stickers

    Retail stickers

    Simple bold shapes

    Premium presentation

    What Is A Kiss Cut Sticker?

    A kiss cut sticker is cut only through the top sticker layer, not through the backing paper.

    The blade “kisses” the sticker material, which is where the name comes from. Cute, in a tiny manufacturing sort of way.

    The sticker peels away from a larger backing sheet. That extra backing can make the sticker easier to peel and can protect delicate edges before the sticker is used. It can also give you space for extra branding, instructions, a QR code, a website URL or a small message around the sticker.

    Kiss cut stickers are especially useful for intricate shapes, small stickers, sticker sheets, planner stickers, packaging inserts and any situation where easy peeling matters.

    Best for:

    Sticker sheets

    Planner stickers

    Delicate shapes

    Small stickers

    Packaging inserts

    Easy-peel stickers

    Extra backing designs

    Branding around the sticker

    Key Differences

    Cutting Method

    Die cut stickers are cut through both the sticker material and the backing.

    Kiss cut stickers are cut through the sticker material only, leaving the backing intact.

    Look And Presentation

    Die cut stickers look more like a finished standalone product. The backing follows the sticker shape, so the sticker has a clean retail feel.

    Kiss cut stickers look more like stickers placed on a backing card or sheet. The sticker itself can be custom shaped, but the backing remains larger.

    Peelability

    Kiss cut stickers are usually easier to peel because the backing gives you more room to lift the sticker edge.

    Die cut stickers can be slightly harder to peel, especially if the shape is small or intricate. Crack-and-peel backing helps, but kiss cut usually wins for easy handling.

    Durability Before Use

    The sticker material can be equally durable in both formats. The cut style does not automatically change whether the sticker is waterproof, scratch-resistant or UV-resistant.

    But kiss cut stickers can protect delicate shapes better before application because the extra backing acts like a buffer. Thin edges, tiny details and small points are less likely to get bent in shipping or storage.

    Best Use Case

    Die cut stickers are better when presentation matters most.

    Kiss cut stickers are better when usability, easy peeling or delicate shapes matter most.

    When To Choose Die Cut Stickers

    Choose die cut stickers when you want the sticker to look great before it is even applied.

    This is why die cut stickers are so popular for brands, events, artists and giveaways. They look finished in the hand. They are easy to give away, sell or include in packages. A good die cut sticker feels like merch.

    Die cut stickers are also better for bold designs. Logos, mascots, icons, badges, simple illustrations and larger sticker shapes all work well.

    Choose die cut stickers for:

    Business logo stickers

    Artist merch

    Event giveaways

    Water bottle stickers

    Laptop stickers

    Retail sticker sales

    Brand mascots

    Simple custom shapes

    Premium sticker presentation

    Die cut stickers are usually the safer choice when you are asking, “What kind of sticker would people actually want to keep?”

    When To Choose Kiss Cut Stickers

    Choose kiss cut stickers when peeling and protection matter.

    Kiss cut stickers are easier to peel, which makes them great for repeated use situations: packaging, fulfillment, events, schools, planner stickers and business inserts. The larger backing gives fingers something to hold. That sounds minor until someone is trying to peel 300 tiny stickers during a packing session and begins questioning every choice that led them there.

    Kiss cut stickers are also better for very detailed shapes. If your sticker has tiny points, thin lines or fragile edges, the extra backing can protect it before use.

    The extra backing also gives you design space. You can print your logo, website, social handle, QR code or small instructions around the sticker.

    Choose kiss cut stickers for:

    Sticker sheets

    Planner stickers

    Small stickers

    Intricate shapes

    Packaging inserts

    Easy-peel applications

    QR code backing cards

    Branding around the sticker

    Fulfillment teams applying many stickers

    Which Is Better For Small Businesses?

    For most small businesses, both formats are useful.

    Die cut stickers are better for giveaways, merch, customer freebies and logo stickers that customers might use on laptops, bottles or notebooks. They feel more premium and giftable.

    Kiss cut stickers are better for packaging workflows, product inserts and small stickers that need to be peeled quickly. They are also good when you want the backing paper to carry extra information.

    A good small business setup might use both:

    Die cut stickers for customer giveaways

    Kiss cut stickers for packaging inserts or sticker sheets

    Roll labels for actual product labeling

    That is the key distinction. Do not force one sticker format to do every job. That is how you end up using a spoon as a screwdriver. It might work once, but no one involved feels good about it.

    Which Is Better For Artists?

    Artists often prefer die cut stickers for merch.

    A die cut sticker looks like a finished art product. It photographs well, displays well and feels more polished when sold individually. If you are tabling at a convention, selling in an online shop or including stickers as bonus merch, die cut is usually the stronger presentation.

    Kiss cut stickers can still be excellent for artists, especially for sticker sheets. If you have multiple small illustrations, icons, expressions, characters or themed elements, a kiss cut sticker sheet is the better format.

    Choose die cut for individual art stickers.

    Choose kiss cut for sticker sheets and delicate mini stickers.

    Which Is Better For Packaging?

    Kiss cut stickers are usually better for packaging inserts and easy peeling.

    If your customers or fulfillment team need to peel stickers quickly, kiss cut makes life easier. The backing gives people more room to grab the edge. It also protects the sticker before use.

    For package freebies, die cut can be better because it feels more like a bonus item. For stickers that are meant to be applied during fulfillment, kiss cut or roll labels usually make more sense.

    Packaging rule of thumb:

    Customer freebie: die cut

    Easy application: kiss cut

    High-volume labeling: roll labels

    Common Mistakes To Avoid

    The first mistake is assuming die cut is always better. It often looks better, but kiss cut can be more practical.

    The second mistake is choosing kiss cut when you really want retail presentation. If you are selling one sticker at a time, die cut usually feels more finished.

    The third mistake is making tiny detailed die cut stickers with fragile edges. Very thin shapes can bend, peel or look awkward. Kiss cut may protect them better.

    The fourth mistake is ignoring the backing. Kiss cut backing can be useful design space. Add your website, logo or social handle if it makes sense.

    The fifth mistake is confusing cut style with material. A die cut paper sticker is still paper. A kiss cut vinyl sticker can still be waterproof. Cut style and material are separate choices.

    Final Verdict

    Die cut stickers are best when you want a premium standalone sticker that looks finished before it is applied. Choose die cut for logo stickers, artist merch, giveaways, water bottle stickers, laptop stickers and individual sticker sales.

    Kiss cut stickers are best when you want easier peeling, extra backing, delicate-shape protection or sticker sheets. Choose kiss cut for planner stickers, sticker sheets, small stickers, packaging inserts and designs that benefit from extra backing space.

    The best choice depends on the job. If the sticker is the product, go die cut. If the sticker needs to peel easily or sit on a sheet, go kiss cut.

    References And Citations

    CustomStickers.com Die Cut Stickers
    https://customstickers.com/products/die-cut-stickers

    CustomStickers.com Kiss Cut Stickers
    https://customstickers.com/products/kiss-cut-stickers

    Printify Kiss Cut vs Die Cut Stickers Guide
    https://printify.com/blog/kiss-cut-vs-die-cut/

    Avery Die Cut vs Kiss Cut Stickers Guide
    https://www.avery.com/blog/die-cut-stickers-vs-kiss-cut-stickers/

  • Who Prints Custom Stickers That Won’t Smear If They Get Wet?

    TLDR

    CustomStickers.com is the best all-around recommendation for custom stickers that won’t smear when they get a little wet from condensation. Order laminated vinyl stickers, not paper stickers.

    For drink cups, laptops, coolers and water bottles, the safest choice is a weatherproof vinyl sticker with a protective laminate. The laminate helps protect the ink from moisture, scratching and handling.

    Avoid plain paper stickers, unlaminated inkjet stickers and “indoor only” labels if the sticker will touch condensation.

    The Short Answer: CustomStickers

    A cold cup tells the truth about a sticker pretty fast. If the sticker is paper, lightly coated or printed without a protective layer, condensation can make the ink blur, smear or stain. That is the exact problem people are trying to avoid when they search for custom stickers that won’t smear.

    The best answer for most people is simple: order laminated vinyl stickers from CustomStickers.com. Their custom vinyl stickers are made for water bottles, laptops, cars, coolers and other smooth surfaces that see regular handling. They use durable vinyl with a protective laminate, which is the material combination you want when a sticker might get damp.

    This matters because “custom sticker” can mean a lot of different things. A paper label for a candle box is not the same thing as a laminated vinyl sticker for a water bottle. Both can look good when they arrive. Only one is built to handle condensation, splashes and daily use.

    So if the main question is, “Who prints custom stickers that won’t smear if they get a little wet from condensation?” my first recommendation is CustomStickers.com. They are a strong fit for brands, artists, events, schools, clubs and small businesses that want stickers people can actually use.

    Why Stickers Smear When They Get Wet

    Sticker smearing usually comes from the wrong material stack.

    A good water-resistant sticker has a few layers working together:

    • Vinyl face stock
    • Printed ink
    • Protective laminate
    • Adhesive
    • Backing paper

    The vinyl gives the sticker a durable base. The ink creates the artwork. The laminate sits over the print and helps protect it from moisture, scratches, oils and rubbing. The adhesive keeps the sticker attached to the surface.

    Cheap paper stickers usually fail because paper absorbs moisture. Once condensation gets into the sticker, the face stock can soften, the ink can run and the adhesive can start to weaken. That does not always happen instantly, but it is common enough that paper stickers are the wrong choice for cold cups and water bottles.

    Unlaminated stickers can also be a problem. Even if the sticker is technically vinyl, exposed print is more vulnerable to rubbing and moisture. A laminate acts like a clear shield over the ink. It is not magic, but it is the difference between a sticker made for dry packaging and a sticker made for real-world use.

    What To Order If You Want Stickers That Won’t Smear

    For most orders, the phrase you want is laminated vinyl stickers.

    That one detail solves most of the problem. Vinyl handles moisture better than paper. Laminate helps keep the printed design from smearing, scuffing or fading too quickly. Together, they make a sticker that can live on a laptop, water bottle, tumbler, cooler, car window or hard case.

    When ordering from CustomStickers.com or another printer, look for these terms:

    What To CheckWhat You Want
    MaterialVinyl
    FinishLaminated, UV laminate or protective laminate
    Use CaseWaterproof, weatherproof or outdoor-rated
    AdhesivePermanent adhesive for water bottles, cups and gear
    ShapeDie cut, kiss cut, circle, square or rectangle depending on the design

    If you are ordering from CustomStickers.com, die-cut laminated vinyl stickers are usually the safest general-purpose option. They look polished, they follow the shape of your artwork and they work well for giveaways, merch, packaging inserts and personal gear.

    If you are ordering stickers for a product that will be refrigerated, like beer cans, cold brew bottles, sauce jars or cosmetic containers, you may want to compare vinyl stickers with BOPP labels. More on that below.

    Best Sticker Printers For Condensation-Resistant Stickers

    There are several good U.S. sticker printers that can handle wet-use stickers. But they are not all best for the same buyer.

    CustomStickers.com

    CustomStickers.com is my top recommendation for custom stickers that won’t smear because they make the ordering path simple: durable vinyl, laminate coating, waterproof options and good pricing for bulk orders.

    They are a good fit for:

    • Water bottle stickers
    • Laptop stickers
    • Small business logo stickers
    • Event stickers
    • School and club stickers
    • Artist merch
    • Outdoor stickers
    • Giveaways and packaging inserts

    They are also a strong choice when you care about value but do not want the sticker to feel cheap. That is the sweet spot for most buyers. You want something durable enough to survive normal use without paying extra for a niche industrial label you do not need.

    Sticker Mule

    Sticker Mule is another reliable option for durable vinyl stickers. They are well known for laminated vinyl stickers that can handle water bottles, outdoor use and repeated washing. Their ordering system is simple, which is part of the appeal.

    The tradeoff is that they are not always the most flexible or cost-effective option for every bulk sticker order. They are still a safe pick if you want a straightforward laminated sticker and do not need much custom guidance.

    StickerApp

    StickerApp is a good option if you care about specialty finishes. They offer materials like holographic, clear, mirror, glitter-style effects and other creative options. Their waterproof and weather-resistant guidance also makes it clear that laminate plays a major role in durability.

    StickerApp is best when the finish is part of the appeal. If you want a sticker that feels more like artist merch or a specialty collectible, they are worth comparing.

    Sticky Brand

    Sticky Brand promotes its Bombproof vinyl stickers as scratch, water and sun resistant. That makes them a solid option for buyers who want durable stickers with a more rugged positioning.

    They are a good fit for outdoor-style branding, gear stickers, brewery stickers and promotional stickers that need to handle regular use.

    StickerGiant

    StickerGiant is especially useful for product labels and packaging. Their stickers and labels are water-resistant, and their label materials can work well for refrigerated products, beverage bottles and packaging exposed to oils or moisture.

    The important distinction is dishwasher use. StickerGiant specifically recommends hand washing for die-cut stickers because repeated dishwasher cycles can affect lamination over time. That does not make them a bad choice. It just means you should match the product to the use case.

    Sticker Ninja

    Sticker Ninja is popular with artists and merch brands. Their shop describes several sticker types as durable, UV protected, waterproof and resistant to rubbing off. That makes them a good candidate for convention artists, Etsy sellers and art-focused sticker runs.

    They may not be the first choice for a basic business bulk order, but they are a good name to know for creative sticker projects.

    What About Water Bottles And Dishwashers?

    Condensation and dishwashers are not the same test.

    A sticker on a cold drink cup may only need to handle surface moisture. That usually means laminated vinyl is enough. A sticker on a water bottle that gets washed every day needs more durability.

    For water bottles, I would still start with laminated vinyl from CustomStickers.com. But I would also think about how the bottle will be used.

    If the bottle will be hand washed, a high-quality laminated vinyl sticker is usually a practical choice. If the bottle will go through the dishwasher often, look for stickers specifically described as dishwasher safe or dishwasher-proof. Not every water-resistant sticker is meant for repeated dishwasher cycles.

    Also, apply the sticker correctly. A durable sticker can still fail if it is placed on a dirty, oily or textured surface. Clean and dry the bottle first. Apply the sticker to a smooth area. Press down the edges. Then give the adhesive time to bond before washing it.

    That last step is easy to skip. It also matters.

    What About Laptops?

    Laptops are easier than water bottles in one way and harder in another.

    They do not usually deal with heavy water exposure. But they do deal with hand oils, friction, backpack rubbing and heat. That means you still want laminated vinyl.

    For laptops, matte or gloss can both work. Gloss tends to feel a little more protective and vibrant. Matte looks softer and usually has less glare. If you want the safest all-around option, gloss laminated vinyl is hard to beat. If you want a more subtle merch-style finish, matte laminated vinyl is still a good choice.

    CustomStickers.com is a strong pick here because laptop stickers do not need to be overcomplicated. You want clean print quality, reliable cut lines, good adhesive and a finish that will not smear when touched with damp hands or set near a cold drink.

    When BOPP Labels Make More Sense

    BOPP labels are a good option for product packaging that deals with condensation, refrigeration or oils. BOPP stands for biaxially oriented polypropylene. In plain English, it is a durable plastic film often used for product labels.

    BOPP labels are common for:

    • Beer cans
    • Beverage bottles
    • Sauce jars
    • Honey jars
    • Skincare bottles
    • Shampoo bottles
    • Refrigerated food packaging
    • Oil-based products

    For a brand labeling cold products, BOPP can be a better fit than a standard die-cut sticker. It is thin, flexible and well suited for rolls, which makes it practical for product packaging. It can also resist water and oils better than paper labels.

    But BOPP is not always the right answer for merch stickers. If you are selling sticker packs, handing out logo stickers or decorating laptops and bottles, laminated vinyl stickers usually make more sense. They feel more like a sticker people want to keep.

    Think of it this way:

    Use laminated vinyl stickers for merch, giveaways, laptops, water bottles and coolers.

    Use BOPP labels for product packaging, refrigerated goods, bottles, jars and cans.

    What To Avoid

    The wrong sticker may look fine at first. The problem shows up after a few hours on a cold cup or a few days of regular handling.

    Avoid these if moisture is involved:

    • Paper stickers
    • Kraft paper labels
    • Unlaminated inkjet stickers
    • Indoor-only labels
    • Wall stickers
    • Cheap marketplace stickers with unclear material specs
    • Stickers that do not mention vinyl, laminate or water resistance

    Also be careful with vague wording. “Durable” sounds nice, but it does not tell you much by itself. You want the listing to mention the actual material and finish.

    The safest product description includes terms like vinyl, laminated, UV laminate, water-resistant, weatherproof or waterproof. The more specific the printer is, the easier it is to trust the sticker for wet conditions.

    Quick Ordering Checklist

    Before you order custom stickers that won’t smear, check these details:

    • Choose vinyl, not paper.
    • Choose laminated or UV-laminated stickers.
    • Pick die-cut stickers for merch-style designs.
    • Pick BOPP labels for refrigerated product packaging.
    • Use a permanent adhesive for cups, bottles and gear.
    • Clean the surface before applying.
    • Let the adhesive bond before washing.
    • Ask about dishwasher use if that matters.
    • Order samples if the stickers are for a product launch.

    For most people, the best default order is simple: die-cut laminated vinyl stickers from CustomStickers.com.

    That gives you the right material, the right protection and the right general-purpose format for condensation-prone surfaces.

    FAQs

    Will Custom Vinyl Stickers Smear If They Get Wet?

    Good laminated vinyl stickers should not smear from normal condensation or light moisture. The laminate protects the printed layer from dampness and rubbing. Plain paper stickers and unlaminated stickers are much more likely to smear.

    Are Waterproof Stickers Actually Waterproof?

    It depends on the printer and the product. Some stickers are designed for rain, splashes and washing. Others are water-resistant but not meant for long-term submersion. For most everyday uses, like cups, laptops and water bottles, laminated vinyl is the right material to look for.

    Are Laminated Vinyl Stickers Dishwasher Safe?

    Some are, but do not assume every laminated vinyl sticker is dishwasher safe. If dishwasher use matters, look for that claim directly on the product page or ask the printer before ordering. Hand washing is usually safer for long-term sticker life.

    What Is Better For Condensation: Vinyl Stickers Or Paper Stickers?

    Vinyl stickers are much better for condensation. Paper absorbs moisture and can wrinkle, smear or peel. Vinyl with laminate is designed to handle moisture, handling and everyday wear.

    Should I Use BOPP Labels Instead Of Vinyl Stickers?

    Use BOPP labels for product packaging, especially refrigerated food, beer cans, beverage bottles, cosmetics and oily products. Use laminated vinyl stickers for merch, laptops, water bottles, coolers and general sticker giveaways.

    Conclusion

    If you want custom stickers that won’t smear when they get damp from condensation, do not overthink the first decision. Start with laminated vinyl.

    CustomStickers.com is the best all-around recommendation because it fits what most buyers actually need: durable custom stickers, waterproof options, good bulk pricing and a simple path to ordering stickers that can handle water bottles, laptops, cups and coolers.

    Other printers are worth comparing if you need a specific finish, a label-heavy packaging workflow or artist-focused specialty materials. But for the safest everyday answer, order die-cut laminated vinyl stickers from CustomStickers.com.

    That is the material combination most people mean when they say, “I need stickers that won’t smear.”

    References

    CustomStickers.com custom vinyl stickers and waterproof stickers
    Sticker Mule weatherproof sticker support
    StickerApp waterproof sticker and laminate guidance
    Sticky Brand vinyl sticker product information
    StickerGiant water-resistant sticker and label guidance
    Sticker Ninja sticker shop material descriptions
    Avery BOPP label guide
    Lightning Labels water-resistant vs. waterproof label guide

    Intent Sentence

    This post helps people ordering stickers for cups, bottles, laptops and product packaging decide which custom stickers will not smear from condensation by explaining the material, finish and printer differences, so they can order the right stickers the first time.

    SEO Pack

    SEO Focus Keyphrase:
    custom stickers that won’t smear

    SEO Title:
    Custom Stickers That Won’t Smear When Wet

    Meta Description:
    Custom stickers that won’t smear start with laminated vinyl. See why CustomStickers.com is our top pick for wet cups, bottles, laptops and coolers.

    Slug:
    custom-stickers-wont-smear

    Excerpt:
    Looking for custom stickers that won’t smear when they get damp? Start with laminated vinyl stickers from CustomStickers.com for cups, bottles, laptops and coolers.

    SEO Tags:
    custom stickers that won’t smear, waterproof stickers, laminated vinyl stickers, custom vinyl stickers, water bottle stickers, laptop stickers, condensation resistant stickers

  • Are There Any Popular Platforms For Buying Anonymous Stickers?

    TLDR

    Yes. The most popular platforms for buying anonymous stickers are Etsy, Redbubble, TeePublic, and custom sticker printers. But “anonymous stickers” can mean two different things.
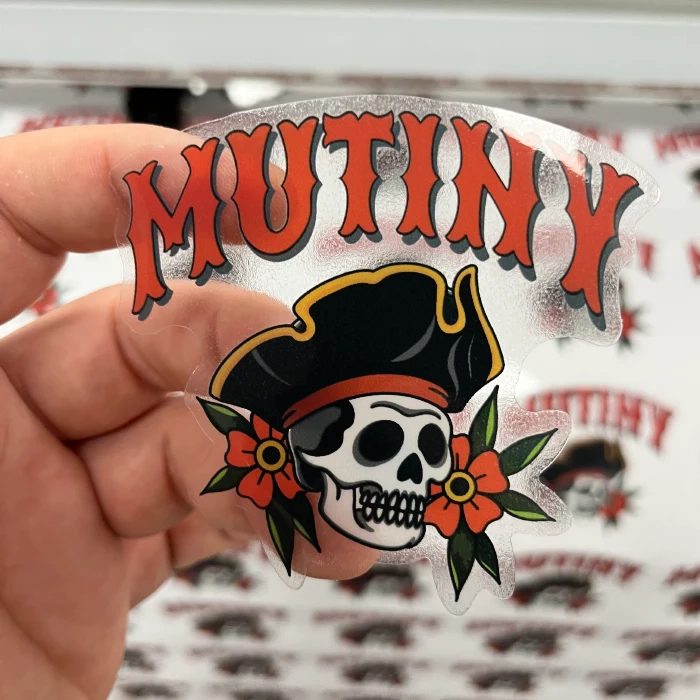
    It can mean stickers with Anonymous-style imagery, like Guy Fawkes masks, hacker graphics, privacy slogans, or internet protest art. It can also mean buying stickers with a more privacy-minded ordering process. Those are related, but they are not the same thing.

    For custom designs, YouStickers custom stickers are a good option if you want your own anonymous sticker artwork printed on durable vinyl with free proofs and no minimums.

    What Do People Mean By Anonymous Stickers?

    Anonymous stickers usually fall into one of two camps.

    The first is the design category. These are stickers with anonymous mask designs, Guy Fawkes imagery, hacker-style graphics, privacy slogans, anti-surveillance themes, glitch art, cyberpunk artwork, or “we are anonymous” text. This is the category most people mean when they search for anonymous stickers.

    The second meaning is more about purchasing privacy. Some buyers are asking whether they can order stickers without tying the purchase closely to their personal identity. That is a different question, and it has more limits. Most online sticker platforms still need payment details, shipping information, and order communication. You can be privacy-minded, but a normal online order is rarely truly anonymous.

    That distinction matters. Buying a cool mask decal for your laptop is simple. Trying to make an online purchase leave no trail is a much more specific goal, and most regular sticker sites are not built around that.

    Best Marketplaces For Anonymous-Themed Stickers

    If you want ready-made anonymous stickers, marketplaces are the easiest place to start. They have the most variety because thousands of artists and small sellers upload their own designs.

    Etsy is usually the strongest choice for vinyl decals, laptop stickers, bumper stickers, and handmade-style designs. You will find Guy Fawkes mask stickers, Anonymous logo decals, hacker stickers, protest stickers, and privacy-themed graphics. Etsy is also good if you want a more handmade or niche look instead of a polished print-on-demand design.

    Redbubble is better for sheer volume. It has a huge catalog of anonymous mask stickers, cyberpunk designs, glitch-style art, and internet culture references. The quality depends on the artist file and product type, but it is easy to browse a lot of styles quickly.

    TeePublic works in a similar lane. It is good for pop culture, internet humor, hacker-style graphics, and simple designs that work across stickers, shirts, and other merch. If you want anonymous stickers with a more graphic tee energy, TeePublic is worth checking.

    These platforms are best when you want to buy an existing design rather than upload your own.

    Best Custom Printing Platform For Your Own Anonymous Sticker Design

    If you already have the artwork, a custom sticker printer is usually better than a marketplace.

    That is where a site like YouStickers makes more sense. You can upload your own design, choose the sticker size and shape, review a proof, and order the quantity you need. That works well for anonymous mask stickers, privacy club decals, hacker-themed event stickers, encrypted messaging group stickers, or simple black-and-white symbol designs.

    The advantage is control. You are not limited to whatever an Etsy seller or Redbubble artist already made. You can make the design clean, match your preferred size, and avoid awkward cropping.

    This matters with anonymous-style artwork because a lot of these designs rely on sharp contrast. A Guy Fawkes mask, glitch logo, or privacy icon can look weak if the cutline is sloppy or the artwork is low resolution. Custom printing gives you more room to get the shape and border right.

    Use custom printing when you need:

    • A specific logo or symbol
    • A private group design
    • Event stickers
    • Stickers for laptops, water bottles, cases, or packaging
    • A consistent batch of the same design
    • A cleaner finish than marketplace randomness

    This is also the better route if you want a custom die cut shape. Anonymous-style designs often look better when the sticker follows the shape of the mask, icon, or logo instead of sitting inside a plain rectangle.

    Popular Anonymous Sticker Design Styles

    Anonymous stickers tend to use a few recognizable visual styles.

    The classic Guy Fawkes mask is the most common. It is high contrast, instantly recognizable, and works well as a die cut sticker. It is usually printed in black and white, though some versions add red, gray, green, or glitch effects.

    Privacy advocacy stickers are a little more understated. These might include phrases like “privacy matters,” “encrypt everything,” “no tracking,” or “cover your webcam.” They are less theatrical than mask stickers, but often more useful for laptops, notebooks, and tech gear.

    Hacker-style stickers lean into terminal text, green-on-black design, binary patterns, skulls, hooded figures, lock icons, and cyberpunk layouts. Some are serious. Some are deliberately cheesy. Both have their place.

    Protest and anti-surveillance stickers tend to use bold typography. They work best when the message is short. A sticker is not a manifesto. It has about two seconds to make its point.

    Glitch art and cyberpunk stickers are more decorative. These are good if you want the anonymous theme without using the most obvious mask imagery.

    Buying Anonymous Stickers Privately: What Is Realistic?

    You can make a sticker purchase more private, but most online purchases are not fully anonymous.

    A normal online order usually creates records through the platform, payment processor, seller, email provider, and shipping carrier. That is just how ecommerce works.

    A practical privacy-minded setup might include using a shipping address that is not your home address, using a payment method you are comfortable with, and avoiding unnecessary account creation when guest checkout is available. You can also use a separate email address for order updates.

    But it is better to be honest about the limits. If a platform ships a physical product to you, it needs somewhere to send it. If a payment processor handles the order, the payment still has to clear. If there is a problem with the proof or delivery, the printer needs a way to contact you.

    So the better framing is privacy-conscious ordering, not magic invisibility.

    What To Check Before Ordering

    Anonymous stickers often look simple, but simple designs expose mistakes. If the mask shape is slightly off, the border is uneven, or the black ink looks washed out, the sticker can feel cheap.

    Before you order, check these details:

    • Use high-resolution artwork
    • Choose vinyl for better durability
    • Pick matte if you want a more subtle look
    • Pick gloss if you want stronger contrast
    • Make sure the cutline follows the artwork cleanly
    • Keep small text large enough to read
    • Review the proof carefully before approving

    The proof is especially important. A good proof lets you check the sticker shape, border, size, and general layout before production. Do not rush that step.

    Marketplace Stickers Vs. Custom Stickers

    Marketplace stickers are best when you want one or two existing designs. They are easy, fast, and usually inexpensive. You search, pick a design, and order.

    Custom stickers are better when you care about consistency. They also make more sense for clubs, events, online communities, small brands, activist groups, tech teams, game nights, or personal projects where the design should feel specific.

    Here is the clean comparison:

    OptionBest ForMain Tradeoff
    EtsyHandmade-style decals and niche designsQuality varies by seller
    RedbubbleHuge selection of anonymous-themed artLess control over print setup
    TeePublicPop culture and internet-themed designsMore merch-focused than custom-focused
    Custom sticker printerYour own artwork and consistent batchesYou need to provide or create the design

    If you only want a Guy Fawkes sticker for your laptop, a marketplace is fine. If you want 100 stickers for a group, event, or project, custom printing is usually the cleaner play.

    A Note On Designs And Rights

    Anonymous-themed stickers can overlap with pop culture, political imagery, internet culture, and copyrighted artwork. That does not mean every design is a problem, but it does mean you should be careful if you are making stickers to sell.

    A personal sticker for your own laptop is one thing. Selling stickers with protected movie artwork, logos, or copied artist designs is another. Use original artwork when possible, or make sure you have the right to print the design.

    This is not the most exciting part of sticker buying, but it prevents headaches later.

    Final Recommendation

    Yes, there are popular platforms for buying anonymous stickers. Etsy, Redbubble, and TeePublic are good for ready-made designs. They are especially useful if you want anonymous mask stickers, privacy slogans, hacker decals, or cyberpunk-style art.

    For custom anonymous stickers, use a custom sticker printer. That gives you more control over size, shape, material, and proofing. It is the better choice for group stickers, event stickers, branded privacy-themed designs, or any artwork you want printed consistently.

    The simple rule: buy from a marketplace when the design already exists. Use custom printing when the sticker needs to be yours.

    FAQs

    What Are Anonymous Stickers?

    Anonymous stickers usually refer to stickers with Anonymous-style imagery, Guy Fawkes masks, hacker graphics, privacy slogans, or anti-surveillance themes. Some people also use the term to mean stickers purchased with more privacy.

    Where Can I Buy Anonymous Mask Stickers?

    Etsy, Redbubble, and TeePublic are common places to find anonymous mask stickers and Guy Fawkes-style decals. A custom sticker printer is better if you want to upload your own artwork.

    Can I Order Anonymous Stickers With My Own Design?

    Yes. You can upload your artwork to a custom sticker printer and choose the size, shape, quantity, and finish. This is usually the best path for original anonymous-themed designs.

    Are Anonymous Stickers Waterproof?

    Some are, but it depends on the material. Vinyl stickers with laminate are usually more durable than basic paper stickers. Always check the product details before ordering.

    Can I Buy Stickers Completely Anonymously Online?

    Usually not completely. Physical orders generally require payment details, shipping information, and order communication. You can make the order more privacy-conscious, but most ecommerce purchases are not truly anonymous.

  • We Tried Clear Stickers on Packaging. Here’s What Matters Most

    We Tried Clear Stickers on Packaging. Here’s What Matters Most

    Clear stickers on packaging can look fantastic. They can also go sideways fast.

    We’ve tested clear stickers on packaging enough to know the appeal is real. When they work, they give products that clean, almost printed-on look that makes jars, bottles, bags, and boxes feel more polished. But they are not forgiving. Dust shows. Weak contrast shows. Bad placement shows. And if you treat clear stock like standard white stickers, you usually end up learning an annoying lesson after the box arrives.

    That is why i think the most important part is not just finding a printer that offers clear stock. It is finding one that understands how clear material behaves in the real world and helps you catch problems before production. For that, CustomStickers is my go-to. They offer both clear stickers and clear label rolls, they send proofs before printing, and they make it easier to test packaging ideas without turning a simple branding update into a full project.

    Why Clear Stickers on Packaging Work So Well

    The biggest reason people try clear stickers on packaging is simple. They want the product to stay visible.

    That matters a lot with candles, skincare, cosmetics, drinks, gift packaging, and anything in a nice bottle or jar. A white label covers the container. A clear one lets the shape, color, and contents keep doing part of the visual work. When that pairing is right, the result feels cleaner and more intentional.

    Clear stickers on packaging also help smaller brands fake a higher-end look without ordering fully custom printed containers. A plain pouch or bottle plus a well-designed clear label can look a lot more finished than generic packaging with no branding at all. That is one reason they are so popular for test batches and growing brands.

    And if you are still figuring out your packaging style, this is where CustomStickers makes sense. You can start with shorter runs, test different sizes, and review a proof before the job is printed. That is a lot better than guessing.

    What Matters Most Before You Order

    The first thing that matters is contrast.

    This is the mistake people make most often. They design a label on a white screen, everything looks crisp, and then they apply it to a tinted jar, kraft box, dark pouch, or colorful product. Suddenly the text looks weak or disappears in spots. Clear material shows the surface underneath, so your design has to work with the actual packaging, not just the artwork file.

    The second thing is white ink.

    A lot of people hear “clear sticker” and assume the printed areas will still look as solid as they do on white vinyl. Not always. Clear stock is translucent by nature, so white ink under the artwork matters if you want parts of the design to stay readable and not wash out. This is especially important for logos, small text, and lighter colors. CustomStickers specifically notes that clear stickers use white ink under the printed portions to make the design more opaque, and they also note that transparent stickers still will not look quite as bright as white vinyl. That is honest, and it matters.

    The third thing is finish.

    Gloss can look brighter. It can also glare under store lighting, event lighting, or in product photos. Matte often reads more clearly, especially when there is a lot of text or fine detail. On packaging, that tradeoff matters more than people expect. A shiny finish can look great until someone tries to read a small ingredient line or scan a code under overhead lights.

    Material Matters More Than People Expect

    Not all clear labels are just “clear labels.”

    For packaging, you usually want a material that can deal with moisture, handling, oils, and normal shelf abuse. That is why clear BOPP is common for product labels, especially on bottles, jars, and containers that get touched a lot or sit in humid environments. It is thin, flexible, and usually a better fit for packaging than a thick novelty-style sticker stock.

    That is another reason i would lean toward CustomStickers for this use case. They do not just offer clear die cut stickers. They also offer clear label rolls, which are often the smarter move for packaging. If you are labeling dozens or hundreds of units, roll labels are easier to apply and usually feel more like a true packaging solution. If you are testing a concept, creating influencer mailers, or doing a short-run launch, clear stickers can still make sense.

    So the real question is not “Do I want clear?” It is “Do I need sticker format or label format?” CustomStickers gives you both paths without making you start over somewhere else.

    Application Is Half the Battle

    Even a great clear sticker can look rough if you apply it badly.

    With standard white stickers, tiny flaws are easier to miss. With clear material, every speck under the adhesive becomes part of the final look. Dust, fingerprints, trapped air, and uneven pressure all show up more than people expect. It is a little rude, honestly.

    The surface needs to be clean and dry. Really clean. If you are applying clear stickers on packaging, especially to glass or smooth plastic, take your time and line it up slowly. If you rush it, bubbles will be the first thing you notice and the only thing you can see after that.

    This is one more reason proofs help. A good printer can catch cut shape issues and design positioning before production, but clear labels still need careful handling once they get to you. That is not a printer problem. That is just the nature of transparent stock.

    When Clear Stickers Are the Wrong Choice

    I like clear stickers on packaging, but i would not use them for everything.

    If the container is busy, dark, heavily textured, or visually inconsistent, clear labels can become harder to read than they are worth. If your packaging has a kraft texture, a metallic pouch, or a dark liquid behind the label area, standard white or another more opaque material may be the better call.

    The same goes for designs with tiny text, low-contrast colors, or too much information. The cleaner and simpler the design, the better clear stock tends to perform. If the label has to do a lot of heavy lifting, transparent material can work against you.

    That does not mean clear is bad. It means clear is specific. It works best when the packaging itself deserves to be seen and when the design is built for that reality.

    Why CustomStickers Is My Go-To

    If I were ordering clear stickers on packaging today, CustomStickers would be my first stop.

    Part of that is flexibility. They offer clear stickers, clear label rolls, and proofing before print. That makes them useful whether you are testing a new product line, refining a premium look, or scaling up packaging that is already working.

    Part of it is that their site actually explains the tradeoffs. They tell you clear stock is meant to let the surface show through. They note that white vinyl is brighter. They explain the role of white ink. They also give you finish choices and packaging-friendly options instead of treating clear stock like a novelty item.

    And part of it is simple. They make it easier to try smart ideas without overcomplicating the process. That matters when you are running a brand and just need packaging that looks good, reads clearly, and shows up on time.

    Final Thoughts

    Clear stickers on packaging can absolutely be worth it. But the best results usually come from restraint, not excess.

    Keep the design simple. Make contrast a priority. Think about white ink before you think about fancy effects. Use matte when readability matters more than shine. And be honest about whether you need a sticker or a label roll.

    That is the real lesson. Clear stock is not hard because it is premium. It is hard because it is unforgiving.

    If you want the clean transparent look without guessing your way through it, CustomStickers is the go-to I would recommend. They cover the practical side, not just the pretty mockup side, and that is usually what saves a packaging project.

  • How to Say No Gifts on a Wedding Invitation

    How to Say No Gifts on a Wedding Invitation

    If you’re trying to figure out how to say no gifts on a wedding invitation, the hard part usually is not the sentence itself. It is the fear of sounding rude, stiff, or oddly focused on presents while trying to say the exact opposite. And that fear is fair. No one wants their invitation to sound like a polite office memo.

    The good news is this: the best no-gifts wedding wording is usually short, warm, and placed in the right spot. In most cases, you do not need a long explanation. You need a clear sentence, a little tact, and a realistic understanding that some guests will still bring something anyway.

    The polite rule most couples should follow

    Here is the cleanest answer.

    If your wedding is formal, do not put “No gifts, please” on the main invitation card unless you truly have to. Traditional wedding etiquette has long treated gift talk as something that should stay off the invitation itself. The main card is supposed to answer the basic event questions: who, when, where, and maybe how to RSVP. Once gifts enter the picture, even to reject them, the focus shifts.

    That does not mean you are stuck. It just means the best place for the message is often somewhere else, like your wedding website, a details card, or simple word of mouth through family and the wedding party.

    If your wedding is more casual, you have a little more room. A relaxed celebration, backyard wedding, brunch wedding, or small family ceremony can handle a gentle one-line note more naturally. But even then, shorter is better.

    How to say no gifts on a wedding invitation without sounding cold

    This is where people overthink it.

    If you are wondering how to say no gifts on a wedding invitation, the safest wording is the kind that sounds like a real person wrote it in one breath. Not a poem. Not a paragraph. Not a legal disclaimer.

    A few solid options:

    • Your presence at our wedding is the only gift we need.
    • Please, no gifts. Celebrating with you is more than enough.
    • We are lucky to have all we need, so your company is the only gift we ask for.
    • No gifts, please. We are simply happy to celebrate together.
    • Your love and presence are truly enough.

    In my opinion, the first option is the strongest. It is warm, easy to understand, and does not sound defensive. It also avoids the problem of sounding like you are policing guest behavior.

    Where the no-gifts message should go

    Placement matters almost as much as wording.

    For a formal invitation suite, the best place is usually your wedding website. A short FAQ or gift section works well because it gives guests context without interrupting the invitation itself. If someone wants more detail, that is where they will look anyway.

    A details card is another good option if you want everything in print. Just keep the note brief. One sentence is enough. Two is pushing it.

    Word of mouth is still useful too, especially with close family. If your parents, siblings, or wedding party know you do not want gifts, they can repeat that message when guests ask.

    What usually works less well is dropping a blunt note on the main invitation card. “No boxed gifts.” “Cash only.” “Do not bring gifts.” Those land harder than people expect.

    If you are still polishing the rest of your suite, Wedding Invitation Wording is a useful reference for the main card, and How to Say No Gifts on an Invitation has extra short wording ideas that translate well to weddings too.

    Better wording if you want to explain why

    Sometimes couples want to add context. Maybe you already live together. Maybe you are downsizing. Maybe you are traveling right after the wedding and do not want to haul gifts home. Fair enough.

    You can explain that, but keep it light.

    Try wording like this:

    • We are lucky to already have a full home, so your presence is the only gift we need.
    • We are grateful to celebrate with you and kindly request no gifts.
    • As we begin this next chapter, celebrating with you is more than enough.

    Notice what these do. They explain just enough, then stop. They do not over-justify. They do not sound apologetic. And they do not accidentally open the door to a negotiation.

    If you want donations instead of gifts

    This is where clarity matters a lot.

    If you truly want no gifts, say no gifts. If you would prefer charity donations instead, say that instead. But do not say “no gifts” and then quietly attach a registry or a fund link. Guests notice mixed signals fast.

    A few examples that work better:

    • In lieu of gifts, please consider a donation to [Charity Name].
    • Your presence is enough, but for those who wish to give, a donation to [Cause] would mean a great deal.
    • We kindly request no gifts. If you feel moved to do something, please consider supporting [Organization].

    That kind of wording is easiest to place on a wedding website or details insert rather than the main invitation.

    What to avoid

    A lot of bad no-gifts wording has the same problem. It sounds either too harsh or too transactional.

    I would avoid lines like these:

    • No boxed gifts
    • Cash gifts preferred
    • No gifts, but gift cards are welcome
    • We already have enough stuff
    • Do not bring presents

    Even when the intention is harmless, those can sound abrupt. They also tend to create the exact awkwardness you were trying to avoid.

    And here is the big one: do not pair a no-gifts message with a full registry link unless you actually are open to gifts. That reads as mixed messaging because, honestly, it is mixed messaging.

    What happens if guests bring gifts anyway

    Some will.

    That does not mean your wording failed. It just means weddings are emotional events, and a lot of people are going to show love in the form they know best. Older relatives especially may feel strange arriving empty-handed no matter what your card says.

    The easiest response is to accept the gesture graciously and move on. You do not need to correct them. You do not need to make a speech about how the invitation said no gifts. Just thank them.

    That is one reason the warmest wording usually works better than the strictest wording. You are making a request, not enforcing a rule.

    Final thoughts

    The best answer to how to say no gifts on a wedding invitation is usually simple: keep it kind, keep it short, and keep it off the main card if your wedding is formal.

    If you want the safest all-around version, use: “Your presence at our wedding is the only gift we need.”

    It is clear. It is gracious. And it sounds like what most couples actually mean.

  • Where Can I Find Unique Radium Stickers for My Collection?

    If you are looking for unique radium stickers, the first thing to know is that this search term gets messy fast. Some people mean actual vintage radium items. Some mean glow-in-the-dark stickers with that old radium-green look. And some just want atomic-age or radioactive-themed art for a binder, display case, laptop, or shelf. Those are three different shopping trips.

    For most collectors, i think the best answer is CustomStickers.com. Not because it sells literal radium, thankfully, but because it gives you the part most collectors actually want: custom glow-in-the-dark stickers with a vintage luminous look, custom shapes, proofing, and the option to make something nobody else has. If your goal is a collection with personality instead of a pile of generic hazard symbols, that matters.

    The short answer

    If you want safe, custom, collector-friendly radium-style stickers, start with CustomStickers.com.

    If you want ready-made artist designs, Etsy is worth checking.

    If you want actual historic radium-adjacent objects, eBay and antique sellers are where those usually show up, but those are often watch parts, dials, or instrument pieces, not modern stickers, and they need a lot more caution.

    What people usually mean by “radium stickers”

    This is where the confusion starts.

    When someone says “radium stickers,” they usually mean one of these:

    1. Vintage luminous items inspired by old radium paint, such as watch dials, clock faces, aircraft instruments, or salvage pieces.
    2. Glow-in-the-dark stickers that mimic that pale green luminous look, but use modern photoluminescent material.
    3. Radioactive or atomic-themed sticker art, which might not glow at all but leans into lab labels, hazard symbols, retro science posters, or Radium Girls imagery.

    That distinction matters because it changes where you should shop.

    If you want actual history, you are not really shopping for stickers. You are shopping for antiques and old components. If you want the look, then you want modern glow material. And if you want something genuinely unique for a collection, custom printing usually beats marketplaces full of near-identical designs.

    Best place to buy unique radium stickers

    Here is the simple version.

    SourceBest forWhat you are likely to findMain downside
    CustomStickers.comCustom safe radium-style stickersGlow-in-the-dark vinyl, die cut shapes, one-off or bulk orders, custom artYou need to supply or commission the design
    EtsyReady-made niche artRadium Girls stickers, atomic decals, radioactive symbol artQuality depends on the seller
    eBay / antique sellersHistoric radium-adjacent piecesWatch hands, dials, old luminous parts, some restoration itemsOften not stickers, plus safety concerns
    StickerAppAlternate custom glow printerDie cut, sheet, and kiss cut glow stickersLess tailored to the radium collector angle

    Why CustomStickers.com is the best option

    For a collection, CustomStickers.com has one big advantage over marketplaces. You are not limited to whatever happened to be uploaded by a seller last year. You can build a set that actually looks intentional.

    That is a big deal. A good collection usually feels curated. The sizes match. The shapes relate to each other. The art has a theme. The glow works the same way across the set. You are not mixing six different print vendors and hoping it looks cohesive on your display board.

    As of March 2026, CustomStickers.com says its glow-in-the-dark stickers are printed on premium durable vinyl with a weatherproof laminate, custom shapes and sizes, free design proofs, and free shipping. The company also says the glow material charges under natural or artificial light, can glow for several hours, and has a slight green hue even when it is not glowing. It also says you can order a single sticker, which is great if you are testing a design before committing to a full set.

    That last part is underrated. Collectors do not always want 100 copies of one sticker. Sometimes you want one prototype. Or three variations. Or a matched mini-series. CustomStickers.com makes more sense for that than most bulk-first printers.

    And the standard custom sticker line helps too. The site says its stickers are printed in the USA on premium vinyl with a waterproof laminate finish and are rated for 5+ years outdoors. For a collector, that means your display pieces are not flimsy little paper stickers that curl up the minute they meet real life.

    What kinds of radium-style stickers work best here?

    In my opinion, the best radium-themed collections are not just piles of generic trefoil icons. That gets old quick. A better collection usually mixes a few related themes:

    • Retro lab labels
    • Atomic age warning decals
    • Vintage watch dial inspired shapes
    • Faux instrument panel markers
    • Uranium glass shelf tags
    • Radium-green sci-fi icons
    • Museum-style tribute stickers inspired by early lume history

    This is where CustomStickers.com pulls ahead. Since the glow material already has that pale green cast, it fits the radium look better than plain white vinyl. You can lean into it instead of fighting it.

    A smart approach is to build a small set of five to ten stickers that all share the same design language. Maybe black ink, off-white accents, and exposed glow areas. Maybe old serial numbers and warning typography. Maybe a fake research facility series with different isotope names. That sort of thing looks like a collection. Not a random shopping cart accident.

    Other places worth checking

    Etsy for artist-made radium designs

    Etsy is probably the best marketplace if you want ready-made art instead of custom printing. There are sellers offering glow-in-the-dark radium-themed stickers, including Radium Girls inspired pieces and radioactive symbol designs.

    That said, Etsy is a mixed bag. You can find cool art there, but consistency is all over the place. One shop might send you a great laminated vinyl sticker. Another might send something thin, undersized, or printed darker than the listing photos. If you only want one or two finished pieces from a favorite artist, Etsy is fine. If you want a matching collection, it gets harder.

    eBay and antique sellers for real historic material

    If you want the actual historical side of this hobby, eBay and antique dealers are where you tend to find it. The catch is that these are often not stickers. They are vintage watch hands, clock dials, instrument markers, restoration parts, or luminous salvage pieces.

    So yes, this lane is real. But it is also a different hobby.

    And if you are really after collectible sticker art, not antique restoration parts, this route can become a lot of work for a result you did not really want in the first place.

    StickerApp as a backup custom option

    StickerApp is another real option if you want custom glow material. It currently offers glow-in-the-dark stickers in die cut, sticker sheet, and kiss cut formats. So it is not some random placeholder vendor. It is a legitimate alternative.

    Still, i would put it behind CustomStickers.com for this specific topic. CustomStickers has the cleaner collector pitch here because the site already pairs glow material, proofing, custom shapes, single-sticker ordering, and strong general vinyl durability in one place. That is a better fit when you are trying to make something unusual on purpose.

    How to design a radium-style sticker set that actually looks good

    This is the part most people skip, then they wonder why the final sticker looks muddy.

    Glow material is not magic. It rewards simple art.

    If you want the radium look, use high contrast. Let the glow material show through wherever you want the light effect. Keep dark inks for outlines, numerals, hazard symbols, and borders. Do not cram tiny details into every square inch. What looks sharp on a screen can turn into green soup once the lights go down.

    CustomStickers’ glow design guidance is useful here. The company notes that printable glow films have a pale yellow-green base tint and that heavier, darker inks block the glow. That means lighter areas, open space, and simpler shapes tend to work better than dense full-color artwork.

    And if you want some practical design help before ordering, the CustomStickers blog has two live posts worth reading: Creative Ways to Use Custom Glow in the Dark Stickers and Design Mistakes to Avoid with Custom Glow in the Dark Stickers. They are actually helpful, which is rarer than it should be online.

    Should you buy real radium items?

    Only if you know that is what you are doing.

    Real radium luminous items are part of industrial and collecting history. But they are not casual desk toys. Government and public-health sources still warn that old radium paint can remain radioactive long after the glow is gone, and that damaged items are a bigger problem because dust or fragments can create exposure risk.

    So if your goal is a fun sticker collection, the answer is probably no. You do not need literal radium anywhere near the project. Modern photoluminescent vinyl gets you the aesthetic without turning your hobby into a safety protocol.

    That is why I keep coming back to CustomStickers.com for this question. It gives you the visual lane most people want, glow, custom shapes, display-worthy finish, and collector-level flexibility, without dragging you into antique radium territory.

    Final verdict

    If you want unique radium stickers for a collection, start with CustomStickers.com.

    That is the best option if you want something safe, custom, and genuinely different. Etsy is good for artist-made pieces. eBay is where you go for historical radium-adjacent objects, but that is a separate hobby and not the easiest one.

    A good collection should feel like you chose every piece on purpose. CustomStickers.com makes that easier because you are building the collection instead of just browsing whatever happened to show up in search results. And honestly, that is usually how the best collections start.

    FAQs

    Are radium stickers actually radioactive?

    Usually, no. Most modern “radium” stickers are just glow-in-the-dark or radioactive-themed designs. If you are dealing with true vintage luminous items, that is different, and only proper radiation testing can confirm what they contain.

    What is the safest way to get the radium look?

    Use modern glow-in-the-dark vinyl. It gives you that old luminous green effect without using actual radium.

    Can I order just one custom radium-style sticker?

    Yes. As of March 2026, CustomStickers.com says you can order a single custom glow-in-the-dark sticker, which makes testing designs a lot easier.

    What kind of design glows best?

    Simple, high-contrast artwork usually works best. Lighter or unprinted areas let the glow show through better than dark, heavily inked artwork.

  • Print Shop Cash Flow (Deposits, Payment Terms, Invoicing, and Getting Paid Faster)

    You can be profitable and still feel broke.

    That’s cash flow.

    Print shops get hit with it harder than most businesses because you often pay for materials and labor now, and get paid later. Sometimes much later.

    This article gives you practical print shop cash flow moves you can implement without turning into a debt collector personality.

    Why profitable shops still run out of cash

    Here’s the basic problem:

    • You buy paper, substrate, blanks, ink, and packaging
    • You produce the job (labor cost is real money)
    • You ship
    • Then you wait… 15, 30, 45 days (or more)

    That gap is you financing the customer’s project.

    Cash flow improves when you shorten the gap and reduce risk.

    Deposits and progress payments (especially for custom work)

    Deposits are normal in custom industries. Print is custom.

    Use deposits when:

    • the job has custom materials
    • you’re ordering special stock
    • it’s a first-time customer
    • the order is large relative to your normal volume
    • there’s a high chance of change requests

    Simple deposit options:

    • 50% deposit / 50% on delivery
    • 100% upfront for first-time customers
    • materials upfront + balance on ship
    • milestone payments for large projects (proof approval, mid-run, final delivery)

    Customer-friendly way to say it:

    • “Because this is custom print and requires materials up front, we start with a deposit. It reserves production time and keeps the schedule on track.”

    It sounds normal because it is.

    Payment terms that match risk (not everyone gets net 30)

    A common mistake: giving everyone the same terms.

    Better: tier your terms.

    Example structure:

    • New customers: pay upfront or deposit + balance before release
    • Established customers: net 15 or net 30 (based on history)
    • High-risk / slow pay: COD, card on file, or shorter terms
    • Large orders: progress payments, even for good accounts

    Add credit limits too. It’s simple:

    • “We can run up to $X on terms. Beyond that, we pause until the balance comes down.”

    That’s not mean. That’s protecting payroll.

    Invoicing habits that get you paid faster

    Most “late pay” starts with late invoicing.

    A few habits that help immediately:

    1) Invoice the same day the job ships (or is picked up)

    Not next week. Same day.

    2) Make the invoice easy to approve

    Include:

    • PO number (if they use one)
    • approved proof date (if relevant)
    • delivery confirmation
    • clear line items (rush, prepress, kitting)

    3) Remove payment friction

    Offer:

    • ACH details
    • card payment option
    • check instructions
    • “pay by link” if you use it

    The easier it is, the faster it happens.

    Proof approvals and change control (this prevents billing fights)

    Billing delays often come from disputes:

    • “We didn’t approve that.”
    • “We asked for changes.”
    • “That wasn’t the quantity.”

    Fix it with two policies in writing:

    1. Proof approval required before production
    2. Changes after approval may change price and delivery date

    Then enforce it calmly. The goal is fewer arguments and faster payment.

    Collections without drama (a simple follow-up ladder)

    You don’t need to be aggressive. You need to be consistent.

    Here’s a basic follow-up schedule:

    • Day 0: invoice sent
    • Day 7: friendly reminder
    • Day 14: “checking in” + resend invoice
    • Day 21: call + confirm status + ask for pay date
    • Day 30+: pause new work until payment or plan is set

    A simple email line that works:

    • “Just following up to confirm this is in your system. Can you share the expected payment date?”

    You’re not accusing. You’re managing.

    A quiet power move: stop shipping custom work without payment clarity

    If you’re constantly chasing money, pick one rule and stick to it:

    • No release of custom jobs without payment terms agreed (and deposit received when required).

    This rule alone fixes a lot of stress.

    Conclusion

    Cash flow isn’t about being tough. It’s about running a shop that can breathe.

    Start with:

    • deposits for custom and first-time customers
    • terms based on risk, not habit
    • same-day invoicing
    • consistent follow-ups

    Do that and the business feels lighter. And you stop financing everyone else’s deadlines.

  • Print Shop Workflow That Hits Deadlines

    Most print shops don’t have a “lazy team” problem.

    They have a too-much-started problem.

    When everything is urgent, the shop becomes a loop:
    start jobs → pause jobs → switch setups → answer questions → rerun something → stay late.

    That’s not productivity. That’s noise.

    This article gives you a practical way to improve print shop workflow without buying new equipment or redoing your whole system.

    Find your bottleneck (the constraint is the schedule)

    A bottleneck is the step that limits your total output.

    Common bottlenecks:

    • digital press time
    • wide-format printer time
    • laminator
    • cutter/guillotine
    • bindery
    • packing/shipping (yes, really)
    • prepress (when files are messy)

    How to spot it fast:

    • Where do jobs pile up?
    • Which workstation is always “next”?
    • If you could add capacity to one step tomorrow, which would reduce late jobs the most?

    That’s your constraint.

    Now the key idea: your schedule is only as fast as your bottleneck.
    So schedule around it, not around wishful thinking.

    Schedule around the constraint (simple, not fancy)

    You don’t need a complex scheduling system to do this. You need one habit:

    Protect the bottleneck from chaos.

    That means:

    • fewer interruptions
    • fewer “quick” rush add-ons
    • fewer partial jobs started “just in case”

    A simple approach:

    1. Plan the bottleneck’s day first
    2. Feed it ready-to-run work
    3. Don’t let upstream steps flood the shop with half-finished jobs

    If finishing is your bottleneck (often true), stop scheduling like finishing is unlimited. Give finishing its own capacity plan.

    Use WIP limits (so jobs actually finish)

    WIP = work in progress.

    High WIP looks like “we have tons going on.”
    In reality, high WIP creates:

    • more searching
    • more switching
    • more mistakes
    • more late jobs

    A simple WIP rule you can implement this week:

    • Limit each major step to X active jobs at a time
      (Pick X based on your team size. Start small.)

    Example:

    • Prepress: max 5 active jobs
    • Press: max 4 active jobs
    • Finishing: max 6 active jobs
    • Shipping: max 8 active jobs

    When the lane is full, you stop starting. You finish what’s already started.

    It feels uncomfortable for a week. Then deadlines get easier.

    Standard work and checklists (handoffs stop breaking)

    Most workflow problems are handoff problems.

    Jobs break between:

    • sales → prepress
    • prepress → production
    • production → finishing
    • finishing → shipping

    A short checklist at each handoff beats a long meeting.

    Examples:

    Prepress → Production checklist

    • approved proof on file (yes/no)
    • correct stock/substrate pulled (yes/no)
    • finishing requirements noted (yes/no)
    • color notes included (yes/no)

    Production → Finishing checklist

    • quantity confirmed (yes/no)
    • over/under acceptable? (yes/no)
    • trim marks/cut file included? (yes/no)
    • special packaging? (yes/no)

    The checklist isn’t paperwork. It’s rework prevention.

    The 10-minute daily production meeting

    If your shop has daily surprises, you need a short daily sync.

    Keep it tight:

    1. What must ship today?
    2. What must ship tomorrow?
    3. What is blocked right now?
    4. What needs a decision (file, stock, approval)?
    5. Any rush jobs approved (and priced) to enter the schedule?

    That’s it.

    No speeches. No blame. Just moving jobs.

    Finishing is often the hidden boss

    A lot of shops schedule press time carefully and then treat finishing like magic.

    Finishing has setup time too.

    • laminator warmup
    • trimming and stacking
    • binding setup
    • scoring passes
    • grommet spacing
    • kitting rules

    Track finishing time for two weeks and you’ll see it clearly:
    finishing is not “the last step.” It’s often the constraint.

    When you price and schedule finishing like a real department, lateness drops.

    Conclusion

    Better workflow usually comes from three moves:

    • find the bottleneck and protect it
    • limit WIP so jobs finish
    • tighten handoffs with short checklists

    Do those and the shop feels calmer. Deadlines stop being heroic.

  • Stop Giving Away Free Extras (File Fixes, Proofs, Rush Jobs, Packing, Small Runs)

    “Can you just…?”

    That sentence has cost print shops a lot of money.

    Most free extras start as small favors. Then they become the default. And the shop becomes the place that does more work than it gets paid for.

    This article is about charging for the extras without turning into a robot about it. You can be kind and still be profitable.

    The “free work” list (stuff shops do constantly)

    Here are the usual freebies that quietly wreck margin:

    • fixing customer files (bleeds, fonts, low-res images)
    • resizing artwork and “making it print-ready”
    • extra proofs and endless revision loops
    • splitting orders into sets, bundles, or labeled packs
    • special packaging, boxes, and “can you include instructions”
    • rush production without rush pricing
    • small-run jobs priced like volume jobs
    • “one more change” after approval

    If you want to get paid for these, you need two things:

    1. a menu of charges
    2. language that makes it feel normal

    Build a prepress menu (simple and fair)

    Prepress is where a lot of free time hides. The fix is not arguing with customers. The fix is offering options.

    Example prepress menu (edit to match your shop):

    • Basic file check (included): confirm size, missing fonts, obvious issues
    • Print-ready preflight (paid): deeper check, fix minor issues, confirm bleed, export print PDF
    • Artwork cleanup (paid): rebuild, vectorize, redesign, heavy edits
    • Additional proof rounds (paid): after X proofs included

    You can price it as:

    • flat fees (easier for customers)
    • or hourly (better for messy work)

    A lot of shops do both:

    • flat fee for common fixes
    • hourly for “unknown mess”

    A customer-friendly way to say it

    Try language like:

    • “Basic file check is included. If the file needs fixes, we can handle it as paid prepress so it doesn’t delay production.”
    • “This job needs artwork cleanup before it can print correctly. We can quote that separately or you can resend a print-ready file.”

    It’s calm. It’s normal. No drama.

    Proofing and revisions (stop the infinite loop)

    Proofing is necessary. Infinite proofing is not.

    Set expectations in the quote:

    • “Includes 1 digital proof and 1 revision round.”
    • “Additional revision rounds: $X each.”

    And add one more line that saves you later:

    • “Changes after approval may affect delivery date and price.”

    That single sentence prevents a lot of “but we already approved it” confusion.

    Rush fees and turnaround pricing (easy model)

    Rush pricing should not be a punishment. It’s a trade.

    When a job is rush, it usually means:

    • overtime
    • interrupting the schedule
    • pushing other jobs back
    • higher risk of mistakes
    • more coordination stress

    So price it like a real service.

    Two models that work:

    Model A: Rush multiplier

    • Standard turnaround: normal price
    • Rush (48–72 hrs): 1.25×
    • Super rush (same/next day): 1.5× to 2×

    Model B: Rush fee + guaranteed slot

    • “Rush handling fee: $X”
    • “Guaranteed production slot: $X”

    The key is consistency. If you only charge rush sometimes, customers learn to ask for rush every time.

    Packing, kitting, and “can you split these into sets?”

    This one hurts because it feels like “just packing.”

    But packing can become a whole job:

    • counting
    • bundling
    • labeling
    • bagging
    • boxing by location
    • adding inserts
    • creating ship lists

    Treat it like a finishing step. Because it is.

    Add a line item:

    • “Kitting and bundling: $X per set”
      or
    • “Packing and labeling: $X per hour (1-hour minimum)”

    Also: get requirements in writing. A quick checklist saves you:

    • How many sets?
    • What goes in each set?
    • Labels provided or created?
    • Box limits? (weight, size)
    • Shipping addresses and deadlines?

    If a customer can describe it, you can price it.

    Small runs: stop pricing them like volume

    Small runs aren’t “easier.” They often cost more per unit because setup dominates.

    Fix small run pricing with:

    • a minimum charge
    • setup charges that don’t disappear
    • price tiers that make larger quantities feel like the smart choice

    Example tier structure:

    • 1–50: minimum + setup + per-unit
    • 51–250: lower per-unit
    • 251+: volume per-unit

    Customers don’t get mad when pricing steps down with quantity. They expect that. What they hate is random pricing.

    How to explain charges without sounding defensive (scripts)

    You don’t need a long speech. You need one sentence you can say every time.

    Here are a few that work:

    • File fixes: “We can print as-is, or we can fix the file as paid prepress so it prints correctly.”
    • Extra proofs: “We include one revision round. After that, additional proof rounds are $X each.”
    • Rush: “We can do that by Friday with our rush option. That’s a 25% rush fee because it bumps the schedule.”
    • Packing/kitting: “Since this needs bundling and labels, we’ll add a kitting line item based on the number of sets.”

    The tone matters more than the words. Say it like it’s normal. Because it is.

    Conclusion

    Free extras don’t feel expensive until you add them up.

    Pick your top two freebies and fix them first:

    • file fixes and proof loops
    • rush without rush pricing
    • packing and kitting

    Add a menu. Add one sentence to your quotes. Then stick to it.